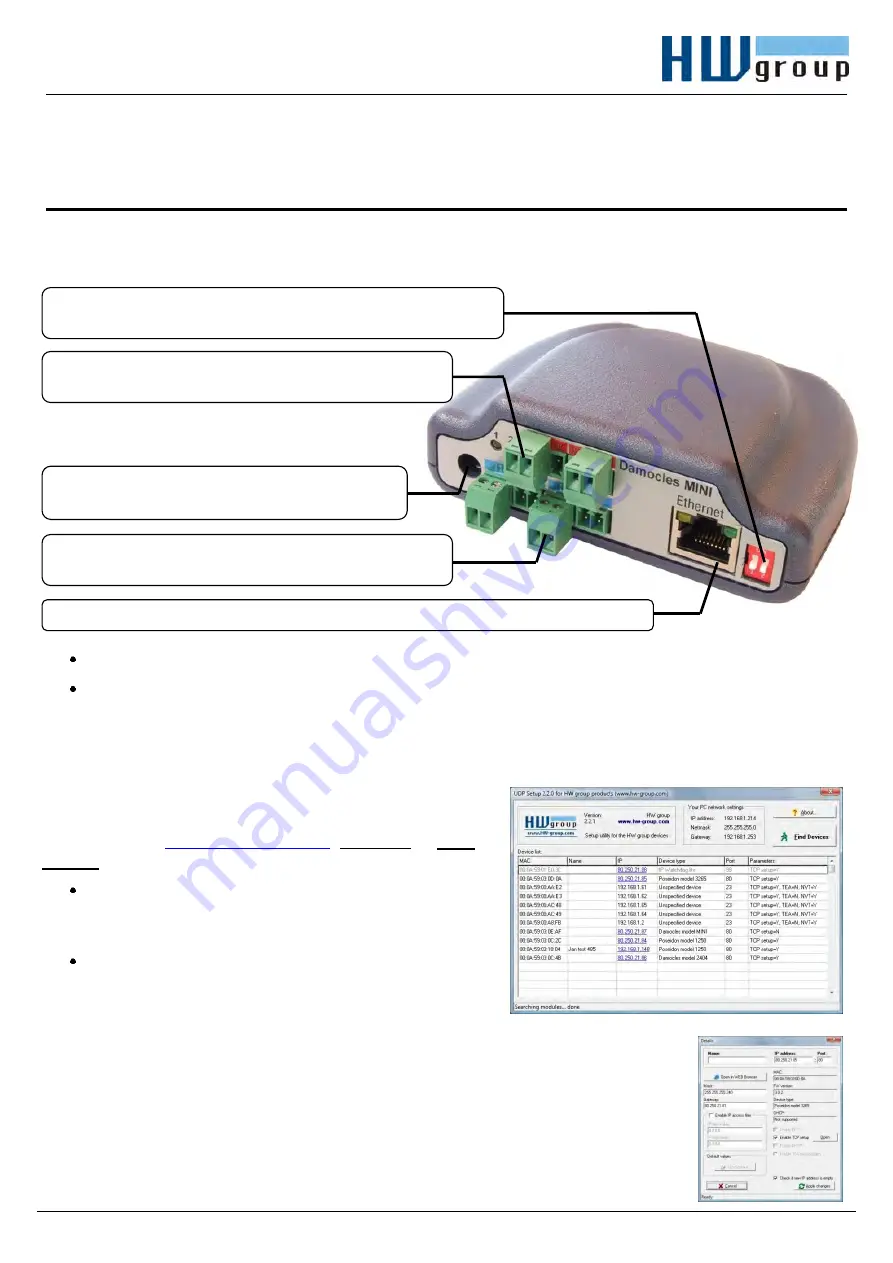
Damocles MINI
–
starting guide
HW group
www.HW-group.com
Starting Guide
–
Damocles MINI
First steps for I/O control with Damocles
1) Connecting the Damocles MINI
Green POWER LED on the RJ45 socket lights up
–
power supply is OK
Yellow LED on the RJ45 socket flashes
–
connection to 10 Mbit network is OK
2) Configuring the IP address
–
UDP Config
The
UDP Config
executable is located in the root of the
supplied CD (Windows and Linux version), or it can be
downloaded at
, Software ->
UDP
Config
.
Click the icon to run
UDP Config
. The program
automatically starts searching for connected
devices.
Click the
Find Devices
button to start searching
for devices.
The program looks for devices on your local network. To
identify a particular Poseidon unit, look at its MAC address (printed on the label
at the bottom of the unit). Double click a MAC address to open a dialog window
with basic device settings.
Click the
Apply Changes
button to save the settings.
Note:
Contact your network administrator if you are unsure about these
settings.
Damocles MINI
1.5)
Connect
Damocles to the Ethernet (patch cable to switch, or cross-over cable to
PC)
1.2) Output
(double-throw relay contact) to turn on/off
external devices (fans, A/C, heating, horn, etc.)
1.1)
Check the DIP switches. For installation, set them as shown
in the picture (DIP1=
Off
, DIP2=
Off
).
1.3)
Connect the power adapter to an outlet (230 /
110V) and to the 12V power supply connector.
1.4)
Dry contact
inputs
to connect sensors with Dry
Contact outputs (buttons, relay contacts, door contacts).


