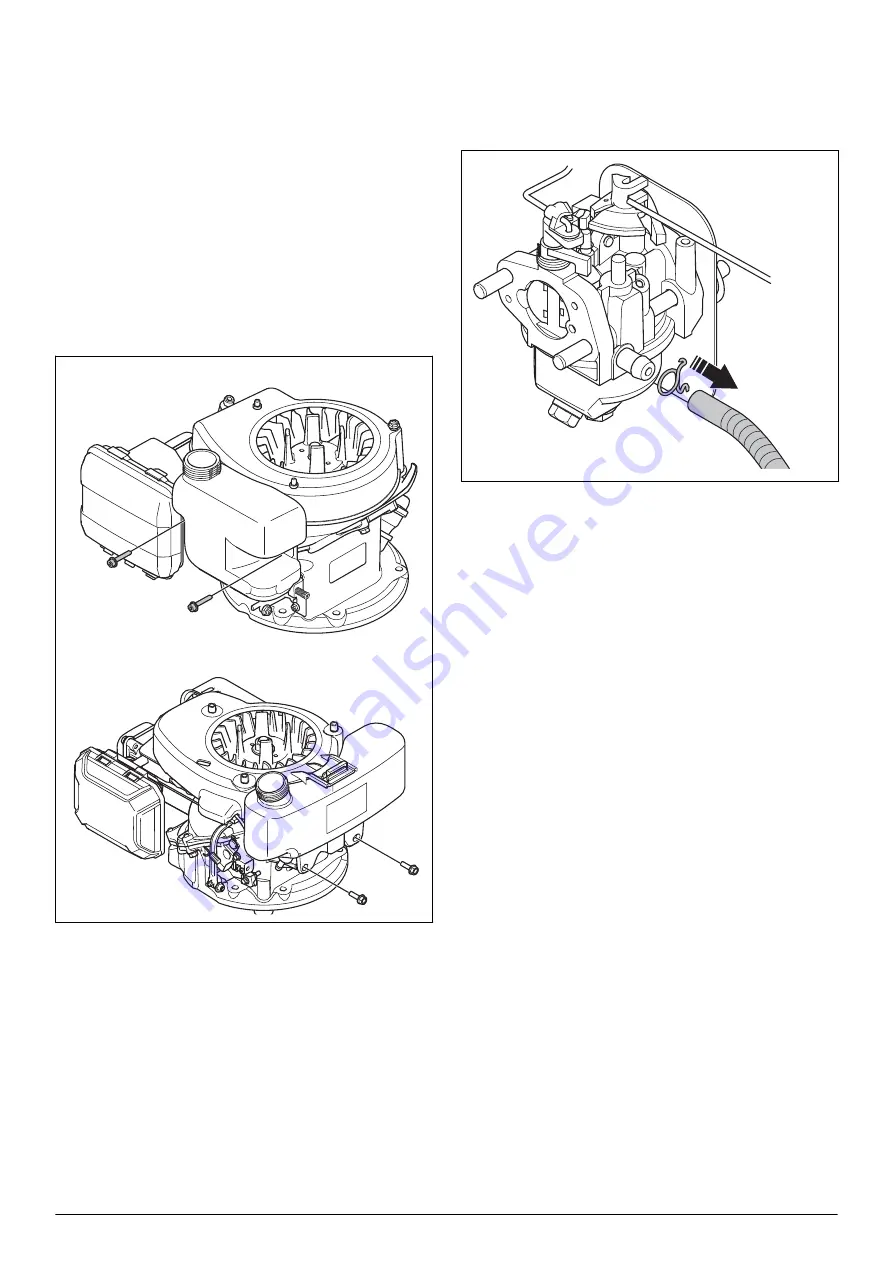
5. Put the fuel tank hose in the container and remove
the hose clips.
6. Tilt the product and drain the fuel into the container.
6.8.2 Fuel tank cap
The fuel tank cap cannot be repaired. If the engine stops
after a short period of time or if the O-ring on the fuel
tank cap is damaged, the fuel tank cap must be
replaced.
6.8.3 To remove the fuel tank
1. Drain the fuel tank. Refer to
page 31.
2. Remove the engine cover.
3. Remove the 2 screws and remove the fuel tank.
HS 139A
HS 166A
6.8.4 To do a tank venting test
1. Drain the fuel tank. Refer to
page 31.
2. Remove the fuel hose from the carburetor and
connect it to the pressure tester.
3. Tighten the fuel tank cap fully.
4. Increase the negative pressure in the tank. If the
negative pressure holds, replace the fuel tank cap.
6.8.5 To replace the fuel filter
All models do not have a fuel filter.
1. Compress the fuel tank hose to prevent leakage.
2. Pull out the filter through the opening in the fuel tank
3. Move the hose clips away from the fuel filter with a
pair of flat pliers.
4. Pull off the fuel filter from the hose ends. A small
quantity of fuel can leak.
5. Push the new fuel filter into the ends of the hoses.
Apply liquid detergent to the ends of the fuel filter to
make the connection easier.
6. Push the hose clips against the fuel filter.
7. Install the fuel filter in the fuel tank.
32 - Repair instructions
1425 - 001 - 03.06.2020


