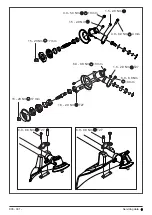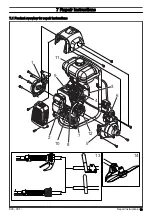
1. Starter
2. Muffler
3. Air filter and air filter holder
4. Carburetor
5. Clutch drum cover and clutch drum
6. Ignition module
7. Centrifugal clutch
8. Flywheel
9. Cylinder and piston
10. Crankcase and crankshaft
11. Fuel tank
12. Frame and harness
13. Handle
14. Gearbox
15. Gearbox
7.2 To clean and examine the product parts
•
Clean and examine all parts fully. You find more
instructions in the chapter for each part if special
tools or procedures are necessary.
•
Replace damaged or defective parts.
•
Always use original spare parts.
7.3 Starter
Note: There are 2 different starters for this product, the
standard starter and the Smart start starter. The Smart
start starter has a spring and a starter pulley driver to
decrease the resistance of the starter spring.
7.3.1 To disassemble the standard starter
WARNING: Use protective glasses to prevent
injury to the eyes if the recoil spring ejects.
1. Remove the 4 screws. Remove the starter.
2. Pull out the starter rope approximately 30 cm.
3. Put your thumb on the starter pulley.
4. Put the starter rope in the groove in the starter
pulley.
5. Let the starter pulley rotate rearward until the spring
tension loosens.
WARNING: Be careful, the recoil spring can
cause injury to your thumb when the starter
pulley rotates rearward.
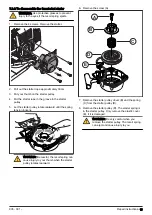
6. Remove the screw (A) and the washer (B).
A
B
C
D
E
7. Remove the starter pulley (C).
8. Carefully remove the starter spring (E) from the
starter housing. Only remove the plastic cover (D), if
it is damaged.
WARNING: Be very careful when you
remove the starter pulley. The recoil spring
can eject and cause injury to you.
14 - Repair instructions
935 - 001 -
Summary of Contents for 531RB
Page 1: ...Workshop manual 541RB 531RB English 935 001 ...
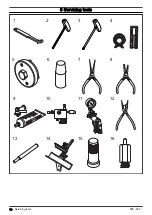
Page 10: ...5 Servicing tools 10 8 3 11 12 9 1 2 4 5 6 7 13 14 15 16 10 Servicing tools 935 001 ...
Page 61: ...935 001 Technical data 61 ...
Page 62: ...62 Technical data 935 001 ...
Page 63: ...935 001 Technical data 63 ...
Page 64: ...114 10 74 26 2019 04 18 ...


