24
25
104 72 57-26
104 72 57-26
�
��� �
�
�
�
21. Upper thread tension - only Rose, Iris
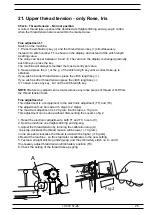
Check - Thread tension - Normal position
A correct thread take-up should be obtained at straight stitching and zig-zag in cotton
when the thread tension dial is set within the marked area.
Fine adjustment -1
Switch on the machine.
1. Press the embroidery key (
⇓
) and the thread tension key (+) simultaneously.
Instead of a stitch number TT is shown on the display, and instead of the stitch length
a setting value.
The value can be set b6 and -6. The value on the display is changed gradually
each time you press the key.
The machine will always remember the most recently set value.
2. Sew and press the (+) or the (-) of the
stitch length key
until a correct take-up is
obtained.
If you wish a harder thread tension press the
stitch length key
(+).
If you wish a softer thread tension press the
stitch length key
(-).
3. To save, press any key, but not the stitch length key.
NOTE !
Before any adjustment is made remove any loose pieces of thread or fluff from
the thread tension discs
Fine adjustment -2
This adjustment is a complement to the electronic adjustment (TT) and (TC).
The adjustment can be made in 5 steps (± 2 steps).
The maximum adjustment is ± 20 gram. Each step is ± 10 gram.
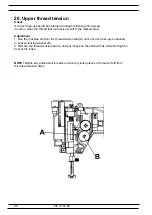
This adjustment can be done without dismounting the covers se fig 2
1. Reset the electronic adjustments, both TT and TC to zero (0).
2. Sew the machine on straight stitching and Zig-zag
3. Adjust the thread tension by turnning the calibration stop (A)
one-step clockwise the thread tension will be lower (- 10 gram).
or one step anti-clockwise the thread tension will be higher (+10 gram) .
4.Restart the machine , so the stepmotor recalibrates to the new setting.
5. Test sew straight stitching and Zig-zag and the embroidery stitch no 9 - card 1.
If necessary adjust thread tension-Embroidery position (TC).
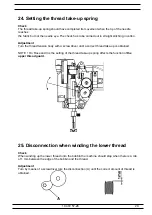
6. Check the setting of the thread take-up spring

