background image

www.HunterFan.com

1.888.830.1326

PA
G

E

8

PA
G

E

14

PA
G

E

11

PA
G

E

5

PA
G

E

7

30 inches

7 feet

PA
G

E

2

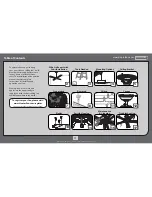
What to Expect with 

Your Installation

Ceiling Bracket

Ladder

PA
G

E

3

Tools Needed

Wiring

Canopy

Maintenance 

& Cleaning 

Blades

Troubleshooting

Downrod

Switch Housing

Preparation

Table of Contents

PA
G

E

12

PA
G

E

4

Mounting Options

PA
G

E

16

?

?

?

PA
G

E

17

Congratulations on purchasing 
your new Hunter® ceiling fan!  It will 
provide comfort and performance 

in your home or office for many 

years. This installation and operation 
manual contains complete 
instructions for installing and 
operating your fan.

We are proud of our work and 
appreciate the opportunity to 
supply you with the best ceiling fan 
available anywhere in the world.

To register your fan, please visit:

www.HunterFan.com/register

Save your receipt for proof of purchase.

PA
G

E

13

1

M3554-01 • 08/24/15 • © 2013–2015 

Hunter Fan Company

Summary of Contents for Sea Air 53061

Page 1: ...6 PA G E 17 Congratulations on purchasing your new Hunter ceiling fan It will provide comfort and performance in your home or office for many years This installation and operation manual contains comp...

Page 2: ...marked acceptable for fan support of 70 lbs 31 8 kg and use the mounting screws provided with the outlet box w 2 To avoid possible electrical shock before installing or servicing your fan disconnect...

Page 3: ...26 Tools Needed Screwdrivers Ladder Pliers Wire Strippers Power Drill optional 9 64 Drill Bit optional If mounting to a support structure you will also need these tools 11 32 Wrench 3 M3554 01 08 24 1...

Page 4: ...ger Downrod most common If you have a flat ceiling Hang your fan by a standard downrod included Mounting Options Use Standard Mounting or Low Profile Mounting to hang the fan from a flat ceiling Use A...

Page 5: ...ate with the holes in the ceiling bracket Install the four ceiling plate screws found in the hardware bag and secure with the flange nuts using an 11 32 wrench Hold the ceiling bracket assembly up to...

Page 6: ...pport at 1 888 830 1326 Use wood screws included and washers when securing to support structure with approved electrical outlet box Drill 9 64 pilot holes in support structure to aid in securing ceili...

Page 7: ...terFan com DISC A R D KEEP Remove the shipping blocks from the motor Save the screws They will be needed for blade iron installation Note Some fans will have a shipping ring instead of shipping blocks...

Page 8: ...ngs 10 or higher Shorter Downrod for fans installed close to ceiling Standard Downrod for ceilings 8 10 high Option 1 Option 2 Option 3 skip to next page If you need a different downrod length follow...

Page 9: ...setscrew so that the downrod can be inserted Hand tighten the downrod at least 4 5 full turns until it stops The wires can be cut but leave at least 8 extending from the top of the downrod Downrod co...

Page 10: ...ed DO NOT PICK THE FAN UP BY THE CANOPY OR WIRES Place the downrod ball into the slot in the ceiling bracket Put the wires and downrod through the canopy Let the canopy sit loosely on top of the fan 1...

Page 11: ...e To connect the wires hold the bare metal leads together and place a wire connector over them then twist clockwise until tight FROM FAN Using the orange wire connectors from the hardware bag connect...

Page 12: ...n Company Canopy Lift the canopy into place so that the screw holes are aligned Position the canopy so that when lifted into place the canopy fits into the hanging bracket as shown Screw Holes Note Fa...

Page 13: ...attach the blade irons to the motor with screws found in the hardware bag then securely tighten after both screws are attached Remember the screws that you kept after removing the shipping blocks pag...

Page 14: ...ousing assembly screws from the hardware bag halfway into the motor housing It does not matter which two screw holes you choose Insert the third screw found in the hardware bag into place and then tig...

Page 15: ...sings Make sure to line up the colored markings on the plug connectors Screw Holes Connect the fan pull chain pendant to the short chain coming from the switch housing ON Turn Power Lift the lower swi...

Page 16: ...d Maintenance Cleaning Changing the direction of air flow move the reverse switch to the opposite position Cleaning the fan use soft brushes or cloths to prevent scratching Cleaning products may damag...

Page 17: ...a Hunter ceiling fan lets you set your thermostat higher and still stay comfortable Every degree you raise the thermostat saves up to 7 on energy costs So you can cut back on expensive air conditioni...

Reviews: