HTC IOLI110 User Manual Download Page 255

Managing Your Device  55
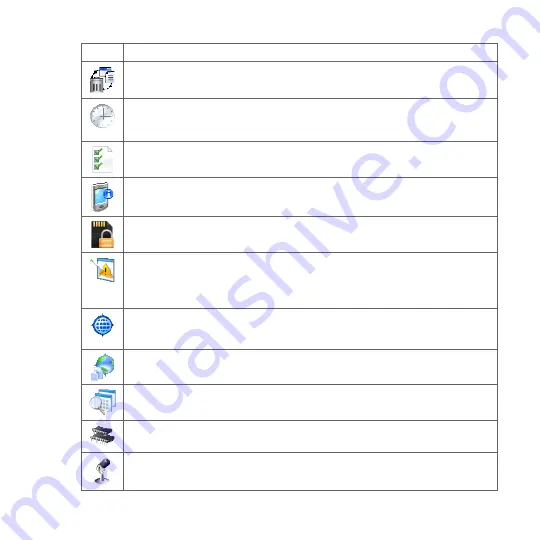
Icon

Description

Clear Storage  Reset your device to factory default settings. 

Clock & Alarms  Set the device clock to the date and time of your locale or to a 

visiting time zone when you’re traveling. Alarms can also be set at specified days 

and times of a week.
Customer Feedback  Set your device to automatically send information about 

how you use Windows Mobile. By default, this option is disabled.  

Device Information  See information about the firmware version, hardware, 

identity, and the duration of calls made on your device.

Encryption  Encrypt files on your storage card. Encrypted files will only be 

readable on your device.

Error Reporting  Enable or disable the device's error reporting function. When 

this function is enabled and a program error occurs, technical data about the state 

of the program and your computer will be logged in a text file and delivered to 

Microsoft's technical support if you choose to send it.
External GPS  Set the appropriate GPS communication ports, if required. You may 

need to do this when there are programs on your device that access GPS data or 

you have connected a GPS receiver to your device. See Help for details. 
Location Settings  Change what location data is sent and received on your 

device. For more information, see “Location Settings” in Chapter 10.

Managed Programs Displays the programs that were installed on your device 

using System Center Mobile Device Manager.  

Memory  Check the device memory allocation status and storage card 

information.

Microphone AGC  Adjust the volume of your voice automatically when you are 

recording.

Summary of Contents for IOLI110

Page 1: ...www htc com User Manual ...

Page 2: ...xtUSB TouchFLO Touch Cruise HTC Footprints and HTC Care are trademarks and or service marks of HTC Corporation Microsoft MS DOS Windows Windows NT Windows Server Windows Mobile Windows XP Windows Vista ActiveSync Windows Mobile Device Center Internet Explorer MSN Hotmail Windows Live Outlook Excel PowerPoint Word OneNote and Windows Media are either registered trademarks or trademarks of Microsoft...

Page 3: ...37 338 5 659 569 5 600 754 5 414 796 5 657 420 5 416 797 All other company product and service names mentioned herein are trademarks registered trademarks or service marks of their respective owners HTC shall not be liable for technical or editorial errors or omissions contained herein nor for incidental or consequential damages resulting from furnishing this material The information is provided a...

Page 4: ... or course of performance Without limiting the foregoing it is further understood that HTC and its Providers are not responsible for Your use or misuse of the Weather Information Data and or Documentation or the results from such use HTC and its Providers make no express or implied warranties guarantees or affirmations that weather information will occur or has occurred as the reports forecasts da...

Page 5: ...ty precautions below must be taken to avoid possible legal liabilities and damages Retain and follow all product safety and operating instructions Observe all warnings in the operating instructions on the product To reduce the risk of bodily injury electric shock fire and damage to the equipment observe the following precautions ELECTRICAL SAFETY This product is intended for use when supplied with...

Page 6: ...er sources refer to the operating instructions that are included with the product Handle battery packs carefully This product contains a Li ion battery There is a risk of fire and burns if the battery pack is handled improperly Do not attempt to open or service the battery pack Do not disassemble crush puncture short external contacts or circuits dispose of in fire or water or expose a battery pac...

Page 7: ...ry leaks Do not allow the leaking fluid to come in contact with skin or clothing If already in contact flush the affected area immediately with clean water and seek medical advice Do not allow the leaking fluid to come in contact with eyes If already in contact DO NOT rub rinse with clean water immediately and seek medical advice Take extra precautions to keep a leaking battery away from fire as t...

Page 8: ...STRICTIONS Do not use this product in gas stations fuel depots chemical plants or where blasting operations are in progress or in potentially explosive atmospheres such as fuelling areas fuel storehouses below deck on boats chemical plants fuel or chemical transfer or storage facilities and areas where the air contains chemicals or particles such as grain dust or metal powders Please be aware that...

Page 9: ...ources such as microwave ovens sound speakers TV and radio Use only original manufacturer approved accessories or accessories that do not contain any metal Use of non original manufacturer approved accessories may violate your local RF exposure guidelines and should be avoided INTERFERENCE WITH MEDICAL EQUIPMENT FUNCTIONS This product may cause medical equipment to malfunction The use of this devi...

Page 10: ...owed to come too close to the antenna during operation of the equipment Use only the supplied integral antenna Use of unauthorized or modified antennas may impair call quality and damage the phone causing loss of performance and SAR levels exceeding the recommended limits as well as result in non compliance with local regulatory requirements in your country To assure optimal phone performance and ...

Page 11: ...efore should not be interpreted as a problem with the device Heed service markings Except as explained elsewhere in the Operating or Service documentation do not service any product yourself Service needed on components inside the device should be done by an authorized service technician or provider Damage requiring service Unplug the product from the electrical outlet and refer servicing to an au...

Page 12: ...abinet slots or other openings in the product Slots and openings are provided for ventilation These openings must not be blocked or covered Mounting accessories Do not use the product on an unstable table cart stand tripod or bracket Any mounting of the product should follow the manufacturer s instructions and should use a mounting accessory recommended by the manufacturer Avoid unstable mounting ...

Page 13: ...Battery 30 Storage card 32 1 3 Charging the battery 33 1 4 Using the Strap Holder 34 1 5 Starting Up 35 Turn your device on and off 35 Auto configure the data connection settings 35 Switch to Sleep mode when not in use 36 1 6 Using the In Car Holder 37 Assemble the in car holder 37 Mount the holder in the car 38 Put the device in the holder 39 Remove the device from the holder 39 1 7 Navigating On...

Page 14: ...5 Make a call from the TouchFLO Home screen 55 Set the device to vibrate when the call is established 55 Make an emergency call 55 Make an international call 56 Call voice mail 56 2 3 Answering and Ending Calls 56 Accept or reject an incoming call 56 Call functions 57 Check missed calls 59 2 4 Call History 60 2 5 Speed Dial 60 2 6 Turning the Phone Function On and Off 61 2 7 Setting Up Bluetooth S...

Page 15: ...4 Entering Text 85 4 1 Selecting an Input Method 86 4 2 Using the Full QWERTY 87 4 3 Using the Compact QWERTY 88 4 4 Using the Phone Keypad 89 4 5 Using Multitap and T9 Modes 90 Multitap mode 90 T9 mode 90 4 6 Using Numeric and Symbol Mode 92 4 7 Using Block Recognizer 93 4 8 Using Letter Recognizer 94 4 9 Using Transcriber 94 Chapter 5 Synchronizing Information With Your Computer 97 5 1 About Syn...

Page 16: ...105 5 5 Synchronizing via Bluetooth 105 5 6 Synchronizing Music and Video 106 Chapter 6 Exchanging Messages 107 6 1 Messaging 108 6 2 Text Messages 109 Create a new text message 109 Compose and send a text message 110 Manage text messages 111 6 3 MMS 113 Change MMS settings 113 Create and send MMS messages 115 View and reply to MMS messages 117 6 4 Types of E mail Accounts 118 Set up your device t...

Page 17: ...matic synchronization through Direct Push 134 Scheduled synchronization 135 Instant download through Fetch Mail 135 Search for e mails on the Exchange Server 136 Flag your messages 137 Out of office auto reply 138 7 3 Managing Meeting Requests 138 7 4 Finding Contacts in the Company Directory 140 Chapter 8 Internet 141 8 1 Ways of Connecting to the Internet 142 Wi Fi 142 GPRS 3G 146 Dial up 147 8 ...

Page 18: ...ize headlines 170 View the news summary 171 Chapter 9 Bluetooth 173 9 1 Bluetooth Modes 174 9 2 Bluetooth Partnerships 175 9 3 Connecting a Bluetooth Hands free or Stereo Headset 176 9 4 Set Up the Default Bluetooth Device to Connect to 177 9 5 Beaming Information Using Bluetooth 178 9 6 Bluetooth Explorer and Bluetooth File Sharing 179 9 7 Printing Files via Bluetooth 181 Chapter 10 Finding and R...

Page 19: ...r 11 Experiencing Multimedia 199 11 1 Taking Photos and Videos 200 Capture modes 200 Capture photos and videos 202 On screen controls and indicators 203 Menu Panel 205 Zooming 206 The Review screen 208 Advanced Options 209 11 2 Viewing Photos and Videos Using Album 212 Launch Album 213 Select a photo or video to view 213 View an image 214 Play back video 217 Close Album 217 11 3 Using Windows Medi...

Page 20: ...ments 230 View appointments 231 Send appointments 232 12 5 Contacts 233 Add new contacts 234 Organize and search contacts 235 Share contact information 237 12 6 Comm Manager 238 12 7 Microsoft Office Mobile 239 12 8 Notes 240 12 9 Java 242 Install and launch MIDlets MIDlet suites 242 Manage MIDlets MIDlet suites 243 12 10 SIM Manager 244 12 11 Tasks 246 12 12 Voice Recorder 247 12 13 ZIP 249 Chapt...

Page 21: ...Connection Setup 263 13 5 Using Task Manager 264 13 6 Protecting Your Device 266 Protect your SIM card with a PIN 266 Protect your device with a password 266 Encrypt files on your storage card 267 13 7 Managing Memory 268 13 8 Resetting Your Device 269 Soft reset 269 Hard reset 269 Clear Storage 270 13 9 Windows Update 271 13 10 Battery Saving Tips 272 Appendix 275 A 1 Specifications 276 A 2 Regul...

Page 22: ...22 Safety precautions for RF exposure 279 Exposure to Radio Frequency RF Signals 279 SAR Information 281 Index 283 ...

Page 23: ...e SIM Card Battery and Storage Card 1 3 Charging the battery 1 4 Using the Strap Holder 1 5 Starting Up 1 6 Using the In Car Holder 1 7 Navigating On Your Device 1 8 Home Screen 1 9 Status Icons 1 10 Start Menu 1 11 Quick Menu 1 12 Adjusting the Volume 1 13 When Connecting Your Device to a Computer ...

Page 24: ... turn off the power press and hold for about 5 seconds For more information see Starting Up in this chapter Left panel Right panel VOLUME UP During a call or when playing music press here to increase the volume VOLUME DOWN During a call or when playing music press here to lower the volume Stylus See Stylus in this chapter for details ...

Page 25: ...ove through menus and program instructions carry out the selection by pressing the center button In some programs such as Camera and Opera Mobile rotate the wheel to zoom in or out Earpiece Listen to a phone call from here GPS Press to launch the GPS navigation software See Chapter 10 for details FOOTPRINTS Press to launch Footprints See Chapter 10 for details Touch Screen END HOME Press to end a ...

Page 26: ...ra See Taking Photos and Videos in Chapter 11 for details Speaker Bottom panel Sync Connector Earphone Jack Connect the supplied USB cable to synchronize information or plug in the power adapter to recharge the battery Connect the supplied USB stereo headset for hands free conversation or for listening to audio media Microphone ...

Page 27: ...the following items and accessories Battery Power adapter Screen protector Stereo headset USB sync cable Pouch In car holder Car charger Quick Start Guide Getting Started disc 2 GB microSD card with pre loaded map content for included CoPilot navigation software ...

Page 28: ... To remove the back cover Make sure your device is turned off Hold the device securely with the front facing down With your thumb or finger lift up the bottom of the back cover 1 2 3 To replace the back cover Secure the top part of the back cover first by aligning into the two openings located on the topmost part of the back of the device Press the bottom part of the back cover down to lock the co...

Page 29: ...rvice To install the SIM card Make sure your device is turned off Locate the SIM card slot then insert the SIM card with its gold contacts facing down and its cut off corner facing in the card slot Slide the SIM card completely into the slot 1 2 3 RESET Cut off corner To remove the SIM card Remove the battery if it is installed From the opening near the top of the device push the SIM card partiall...

Page 30: ... Battery life estimates approximations Standby time Up to 330 hours for GSM Up to 400 hours for WCDMA Talk time Up to 400 minutes for GSM Up to 375 minutes WCDMA Note Battery life is subject to network and phone usage Warning To reduce risk of fire or burns Do not attempt to open disassemble or service the battery pack Do not crush puncture short external contacts or dispose of in fire or water Do...

Page 31: ...Ensure that the free end of the ribbon strip is visible above the battery Insert the contacts side of the battery first and then gently push the battery into place Replace the back cover 1 2 3 2 1 Ribbon strip To remove the battery Make sure your device is turned off Remove the back cover Pull the ribbon strip upward to release the battery 1 2 3 ...

Page 32: ...ion software included with your device requires that you install the CoPilot Live memory card included in the box See CoPilot Live Quick Start Guide for more information To install a microSD card Remove the back cover Insert the microSD card into the slot with its gold contacts facing down until it clicks into place RESET Note To remove the microSD card press it to eject it from the slot 1 2 ...

Page 33: ...e AC adapter and USB sync cable provided with your device must be used to charge the device As the battery is being charged while the power is on a charging icon appears in the title bar of the Home screen After the battery has been fully charged a full battery icon appears in the title bar of the Home screen Depending on the battery charging status a green or amber light also illuminates on the L...

Page 34: ... the back cover 2 Insert the loop of the strap lanyard or string accessory through the small hole at the bottom of the back cover 3 From the inner side of the back cover pull the loop and then attach it over the strap holder s t shaped hook as shown on the illustration at the right Tip To attach the loop over the t shaped hook easier push the loop into the strap holder hole using a pointed object ...

Page 35: ... Press and hold the POWER button for a few seconds Tap Yes when a message prompts you to choose whether or not to turn off the device completely Auto configure the data connection settings The first time you power on your device you will see a notification message from Connection Setup Connection Setup automatically configures your device s data connections such as 3G GPRS WAP and MMS so that you ...

Page 36: ...out Connection Setup see Chapter 13 Switch to Sleep mode when not in use Press and immediately release the POWER button to turn off the display temporarily and switch your device to Sleep mode Sleep mode suspends your device to a low power state while the display is off in order to save battery power Your device automatically goes into Sleep mode when you leave the device idle after a certain peri...

Page 37: ...d in car holder so you can use your device while inside a vehicle Assemble the in car holder 1 Put the cradle on the base so that the two tabs on the base insert into the corresponding slots on the cradle 2 Slide the cradle firmly down on the base so that the tabs click into place ...

Page 38: ...uded alcohol prep pad 2 Place the suction pad on the holder s base on the surface you just cleaned 3 Push the lever on the base so that the suction pad attaches firmly to the surface Warning Always ensure that the base of the in car holder is attached firmly to a smooth stable surface otherwise it may become detached and fall causing damage to your device ...

Page 39: ...n and you put it in the holder NaviPanel automatically opens and offers you a convenient one touch interface to Footprints the phone and the GPS navigation software For more information about NaviPanel see Chapter 10 Remove the device from the holder 1 Pull the upper edge of the cradle slightly upwards and with your fingers in the hole behind the cradle push so that the device clicks out 2 Lift th...

Page 40: ...tly and quickly with your finger pad or fingertip On screens that display smaller size items you can more accurately select an item by tapping it with your fingertip Swipe To swipe means to drag your finger vertically or horizontally across the screen The following are some instances when you would use swiping Flipping on the Home screen Swipe your finger vertically to flip through favorite contac...

Page 41: ...er Mobile see Using Windows Media Player Mobile in Chapter 11 Flick Flicking the screen is similar to swiping except that you need to swipe your finger in light quicker strokes This finger gesture is always in a vertical direction such as when flicking the contacts list See Finger scrolling in Chapter 3 for details Finger zooming and panning In programs such as Album and Opera Mobile you can use f...

Page 42: ...selection In some programs such as Camera and Opera Mobile you can also rotate the wheel to zoom in or out 1 8 Home Screen The main screen of the device is the TouchFLO Home screen which allows finger touch access to the most important functions such as contacts text messages e mail Internet and more Start menu Notification Signal strength Adjust volume Battery status TouchFLO Home screen Connecti...

Page 43: ...s screen opens and displays larger status icons so you can touch them with your finger more easily and accurately Tip The System Status screen can be disabled in TouchFLO settings See Settings on your Device in Chapter 13 for details The following are some of the status icons that you may see on the device ...

Page 44: ...notification of voice mail Sending MMS Receiving MMS MMS sent Cannot send MMS New incoming MMS New Windows Live message Missed call Speakerphone on Roaming Alarm Other wireless network s detected Wired headset connected Icon Description GPRS available EDGE available HSDPA available WCDMA UMTS available Connected to a wireless network Connection is active Connection is not active Synchronization in...

Page 45: ...g WCDMA UMTS in use Maximum signal strength No signal Phone is turned off No phone service Searching for phone service Voice call in progress Call on hold Calls are forwarded Dialing while no SIM card is inserted No SIM card inserted Icon Description Vibrate mode Sound on Sound off 4 Icon Description Battery charging Battery full Battery low 5 ...

Page 46: ...ss more programs Open a recently used program Open a program When you are on another screen touch or tap this item to return to the TouchFLO Home screen Open the Start menu By default the Start menu is displayed in a large size to make it easier for you to touch menu items with your finger when selecting them from the Start menu The Start menu can also be displayed in a smaller size if preferred T...

Page 47: ...ograms stop programs and see how much program memory is being used Touch this icon to open the Quick Menu To switch to a running program touch the program name To stop a running program touch Customize Task Manager settings See Using Task Manager in Chapter 13 Stop all currently running programs Shows the total percentage of program memory in use Touch to open the Memory settings screen ...

Page 48: ... either screen you can do the following To increase or decrease the volume level drag your finger up or down the volume bars You can also press the VOLUME button on the left panel of your device Volume bars Touch Vibrate to switch both System and Ring to Vibrate mode Touch Silent to mute both the system and ring volume 4 The System Volume or Ring Volume screen automatically closes You can also man...

Page 49: ...ynchronize Outlook e mail messages contacts calendar appointments files and other data between your device and your computer Have read and write access to the whole device For more information about using ActiveSync see Chapter 5 Disk Drive This mode is available for selection only when there is a microSD storage card inserted on your device Select this mode when you want to use your storage card ...

Page 50: ...is connected to your computer Your computer will only connect to the device s storage card When you access your device from the computer you will only see the contents of the device s storage card Internet Sharing When you do not have Internet access on your computer you can select this mode to use your device as a modem for your computer For more information about using Internet Sharing see Using...

Page 51: ...ng Phone Features 2 1 The Phone Screen 2 2 Making Calls 2 3 Answering and Ending Calls 2 4 Call History 2 5 Speed Dial 2 6 Turning the Phone Function On and Off 2 7 Setting Up Bluetooth SIM Access for Car Kit Phones ...

Page 52: ...Press the TALK SEND button TALK SEND button Enter your PIN Most SIM cards are preset with a PIN personal identification number that is provided by your wireless service provider 1 Enter the preset PIN assigned by your wireless service provider 2 Tap Enter Note If you enter the wrong PIN three times the SIM card will be blocked If this happens you can unblock it with the PUK PIN Unblocking Key obta...

Page 53: ...score in a contact name For example if you tap number 2 on the phone keypad which is associated with a b and c on the Phone keypad contact names such as the following will be considered matches Ben Miller George Adams John Carter Carter Ellen Dixon Allan Thomas_Clark JaneCampbell If the matching list is long and you want to narrow down the search further enter another letter Using the same example...

Page 54: ... select the contact and then press NAVIGATION left right to select the number to call 5 Press the TALK SEND button to place the call Tips After entering the beginning digits and the number you are dialing is not found in your contacts a Save to Contacts button will appear above the keypad Tap this button and then choose whether to create a new contact to save the number or to add the number to an ...

Page 55: ...t Call Work Call Home or Call Mobile Make a call from the TouchFLO Home screen Refer to Chapter 3 to learn how to make a call from the TouchFLO Home screen Set the device to vibrate when the call is established You can set the device to vibrate once to alert you that the call has been established with the other party 1 On the Phone screen tap Menu Options Advanced tab 2 Select the Vibrate device w...

Page 56: ...eading zero if any and phone number Call voice mail Number 1 is generally reserved for your voice mail Tap and hold this button on the Phone screen keypad to call voice mail and retrieve your voice mail messages 2 3 Answering and Ending Calls When you receive a phone call the Incoming Voice Call screen appears allowing you to either answer or ignore the call Accept or reject an incoming call To an...

Page 57: ...ject the call and send the text message to the caller Call functions When a call is in progress tap the available buttons on the Phone screen to put a call on hold dial another contact for a phone conference enter notes about the conversation and more These are the call functions Notes When the Phone is dialing only the Speaker Mute Note Contacts and End Call buttons can be used Other buttons are ...

Page 58: ...witch between two calls During a call tap To set up a conference call 1 Either put a call on hold and dial a second number or accept a second incoming call when you already have one in progress Tip To dial a second number tap on the screen 2 Tap Note Not all mobile phone networks support conference calling Contact your wireless service provider for details To open Notes during a call Tap To turn o...

Page 59: ... can choose to save the number after you hang up 1 On the Phone screen tap Menu Options Advanced tab 2 Select the Add new phone number to Contacts at end of call check box then tap OK When you enable this option a pop up message appears after you end the phone call and lets you add the phone number to Contacts Check missed calls When you have missed calls you will see the icon in the title bar and...

Page 60: ...r the list according to the type of call All Calls Missed Dialed Received 2 5 Speed Dial Use Speed Dial to call frequently used numbers with a single tap For example if you assign a contact to the location 2 in Speed Dial you can tap and hold the number 2 key on the Phone screen keypad to dial the contact s number To create a Speed Dial entry 1 On the Phone screen tap Menu Speed Dial 2 Tap Menu Ne...

Page 61: ...able the phone function 1 Tap Start Programs Comm Manager 2 On the Comm Manager screen tap Phone to enable or disable the phone function When enabled the ON indicator is activated To enable or disable Airplane Mode Another way to turn off the phone function is to switch your device to Airplane Mode When you enable Airplane Mode all wireless radios on your device are turned off including the phone ...

Page 62: ...ning on Bluetooth see Bluetooth Modes in Chapter 9 2 On the Home screen slide to the Settings tab and then tap Menu Bluetooth Devices SIM Access tab 3 Select the Remote SIM Access check box then tap OK 4 Connect the car kit phone to your device via Bluetooth To learn how to connect consult your car kit phone s manual 5 If this is the first time you are pairing the car kit phone with your device en...

Page 63: ...Chapter 3 TouchFLO 3 1 About TouchFLO 3 2 Using the TouchFLO Home Screen 3 3 Finger Gestures ...

Page 64: ...lows finger touch access to the most widely used functions such as People Messages Mail Music Internet and more Finger gestures that allow you to navigate screens 3 2 Using the TouchFLO Home Screen The TouchFLO Home screen has the following tabs Home People Messages Mail Footprints Settings Programs Map Search available by country Internet Photos and Videos Weather ...

Page 65: ...screen Press Navigation Wheel Right or Left to move to the next or previous tab Press and hold your finger on the active tab then slide your finger right or left over the tabs Release when you have selected the desired tab Note Apply some pressure when pressing and holding on the active tab to be able to slide over the tabs ...

Page 66: ...item on the Home tab Touch the item or Press Navigation Up or Down first to navigate to the item you want to select and then press ENTER Touch this area to open the Clock Alarms screen where you can set the date time and alarm See Chapter 13 for details Touch this area to view details about missed calls in the Call History See Chapter 2 for details Home tab Touch this area to create edit or view a...

Page 67: ...n the Home screen slide your finger to the People tab 2 Touch an empty slot on the screen 3 On the Select a Contact screen touch the name of the desired contact Tips To create a new contact touch Menu New Contact See Contacts in Chapter 12 for details SIM contacts cannot be added as favorite contacts 4 Select a phone number or e mail address to associate to the favorite contact Note If there is no...

Page 68: ...p Touch the area below the contact picture to place a call send a text message or send an e mail to the favorite contact Touch the picture of a contact to access his or her contact card On the contact card you will see the last outgoing or incoming call as well as contact details such as phone numbers e mail address and more Tip On the People tab touch All People to access SIM contacts and all con...

Page 69: ...le indicates that there is a new message received To view the entire message thread from the sender and reply touch the message on the screen Touch All Messages to access all text messages in your inbox and other folders Touch this icon to create a new SMS text message To flip through received SMS MMS messages swipe your finger upward downward or press Navigation Up Down Touch Menu to access more ...

Page 70: ...rd to set up your account For detailed instructions on setting up e mail accounts using the E mail Setup wizard see Chapter 6 To check e mail When there are new e mails the icon on the Mail tab and the respective icons of the e mail accounts will show the number of newly received messages To browse through received e mail messages swipe up or down on the envelope image or press Navigation Up Down ...

Page 71: ...l messages see Chapter 6 and 7 Footprints On the Footprints tab you can take photos of places you visit and store them together with information about those places You can navigate to the places using the GPS navigation software To take a photo and add location information 1 On the Home screen slide your finger to the Footprints tab 2 Select the icon for the category that best describes your curre...

Page 72: ...ss the ENTER button to capture the photo Your photo is then displayed and you can add more location information Note If your GPS position has not been found yet you are asked whether to find the position on Google Maps continue the GPS search or stop the GPS search Add a voice recording Edit location information Exit Footprints GPS status indicator Icons appear here as follows Searching for positi...

Page 73: ... new footprint Navigate to the location with the GPS navigation software delete the footprint and more To flip through footprints swipe your finger upward downward rotate the NAVIGATION WHEEL or press Navigation Up Down To view the detailed location information touch the photo Touch a category icon to browse the entries in that category The total number of footprints in the current category and th...

Page 74: ...tes For more information about using Opera Mobile see Chapter 8 Photos and Videos The Photos and Videos tab lets you visually flip through your photos and video clips and view them in full screen From this tab you can also activate the Camera so you can take pictures and record video clips The Photos and Videos tab displays pictures and video files from the current favorite album By default the Ca...

Page 75: ...ls Touch here to take a photo Touch Slideshow to view the photos as a slideshow If a video is selected touch Play To flip through photos and videos swipe upward downward touch the Up Down arrow or press Navigation Up Down Touch here to shoot video Tips For more information about viewing in full screen see View an image and Play back video in Chapter 11 The file formats that can be viewed on the Ph...

Page 76: ...w letters of a country or city name and then tap the Search icon 3 Tap the desired city name and then tap Select To view weather information Your device automatically connects to the Internet via the data connection or Wi Fi to download and display weather information The current temperature highest and lowest temperature type of weather sunny cloudy showers or others and the time of day daytime o...

Page 77: ... three hours Weather data is also downloaded every time an ActiveSync connection is established through over the air or USB connections Clear this option if you prefer to manually download weather information Download when roaming Select this option only if you want to allow automatic download of weather data when roaming This may incur additional costs Temperature Scale Choose whether to display ...

Page 78: ... search bar Tap this icon to perform the search Tip Every time you search for places they will be added to the history list and displayed on the Map Search tab Next time you want to locate the same address or place of interest you can just choose it from the history list This list can store up to eight most recent entries To display a map that shows your current location On the Map Search tab touc...

Page 79: ...e profile A profile is a preset that determines how your device will alert you when there are incoming phone calls To select a profile touch Sounds on the Settings tab and then choose one of the following Normal Vibrate Silent or Automatic Notes Automatic sets your device to vibrate only when you receive phone calls during scheduled appointments in your Calendar If your device has been set with th...

Page 80: ...y following these steps On the Settings tab tap Wallpaper On the Select a Picture screen navigate to the folder where the image you want to use is located When you have found the desired background image tap the image to select it Slide your finger to the Home tab You will now see that the background image has changed Tips To reset the Home tab back to the default background tap Wallpaper on the S...

Page 81: ...ave filled up the screen with programs scroll down the Programs tab to access more empty slots and add more programs To scroll down press and hold on the screen and then drag your finger upward You can add up to 18 favorite programs To scroll back up press and hold on the screen and then drag your finger downward Note To replace a slot with another program you must delete the occupying program sho...

Page 82: ...e or flick your finger on the touch screen To scroll up and down To scroll down swipe your finger upward on the touch screen To scroll up swipe your finger downward on the touch screen To auto scroll flick your finger upward or downward on the touch screen Touch the screen to stop scrolling To scroll left and right To scroll towards the right swipe your finger to the left To scroll towards the lef...

Page 83: ...pe on the touch screen See Viewing Photos and Videos Using Album in Chapter 11 for details Finger panning You can use finger panning to move to and view other parts of a zoomed photo web page document or an e mail To pan touch and hold on the touch screen and then drag your finger in any direction Tip To enable or mute finger scrolling and panning sound touch Start Settings System tab TouchFLO and...

Page 84: ...84 TouchFLO ...

Page 85: ...an Input Method 4 2 Using the Full QWERTY 4 3 Using the Compact QWERTY 4 4 Using the Phone Keypad 4 5 Using Multitap and T9 Modes 4 6 Using Numeric and Symbol Mode 4 7 Using Block Recognizer 4 8 Using Letter Recognizer 4 9 Using Transcriber ...

Page 86: ...xt input method the corresponding Input Panel is displayed which you can use to enter text Tip Select Other Input Methods to display more input methods To show or hide the Input Panel tap the Input Panel icon Input Panel Full QWERTY Input Selector arrow Input Panel icon Text input methods Key when pressed Icon Input method Icon Input method Icon Input method Full QWERTY Letter Recognizer or Block ...

Page 87: ...on Caps Lock Tap to toggle between using Normal or T9 mode Tap to open a keyboard layout that lets you easily enter numbers and symbols See Using Numeric and Symbol Mode for details Tap to create a new line Tap to delete the previous character Displays the word candidate list in T9 mode Tap a word to insert it into your text Tap to add a word to the T9 dictionary To enter text using the Full QWERT...

Page 88: ...ap to create a new line Tap to delete the previous character Displays the word candidate list in T9 mode Tap a word to insert it into your text Tap to add a word to the T9 dictionary Tap to open a keyboard layout that lets you easily enter numbers and symbols See Using Numeric and Symbol Mode for details Tip You can tap and hold to immediately open the numeric keyboard To enter text using the Comp...

Page 89: ...number that appears on top of a key Tap to enter an uppercase letter Tap twice to turn on Caps Lock Tap to toggle between using Multitap or T9 mode Tap to create a new line Tap to delete the previous character Displays the word candidate list in T9 mode Tap a word to insert it into your text Tap to add a word to the T9 dictionary Tap to open the input settings Tip You can tap and hold to immediate...

Page 90: ... a predictive text input mode which displays a word candidate list as you enter the first few characters so you just select the word that you want To enter text using T9 mode 1 Start entering the first few letters of a word As you enter each letter predicted words will appear above the keyboard 2 Tap the desired word to immediately insert it to your text Note Navigate through the word candidate li...

Page 91: ...hat reflect the characters of the keys you have tapped as well as characters of nearby keys Word Completion in T9 mode Lets you select from a list of possible words based on the keys that you have tapped and on the words available in the dictionary Word Completion in ABC mode Lets you select from a list of possible combinations based on the characters that appear on the keys that you tapped Auto S...

Page 92: ...TY Compact QWERTY and Phone Keypad Tap a number or symbol to insert it into your text Tap to go to the previous or next page of symbols Tap to switch back to the letter keyboard layout Tap to switch to the numeric keyboard See To lock the keyboard in Numeric and Symbol mode Compact QWERTY and Phone Keypad Full QWERTY To switch to Numeric and Symbol mode 1 While using Full QWERTY Compact QWERTY or ...

Page 93: ...n Numeric and Symbol mode and switching back to the letter keyboard layout after tapping a symbol 4 7 Using Block Recognizer With Block Recognizer you use a single stroke to write letters numbers symbols and punctuation which are then converted into typed text To use Block Recognizer 1 From a program tap the Input Selector arrow and then tap Other Input Methods Block Recognizer 2 Write characters ...

Page 94: ... box Enter punctuation and symbols by writing the desired character in the 123 right area of the box Tip For help with writing characters tap the question mark near the writing area 4 9 Using Transcriber Transcriber is a handwriting recognition program that enables you to write in cursive print or a combination of both To write using Transcriber 1 Open a program that accepts user input such as Wor...

Page 95: ... location When no text is selected you can open the keyboard by using the gesture draw a line straight down and then straight up For more information about using Transcriber gestures see Help on your device To edit text 1 In a program draw a line from left to right across the text you want to edit 2 After you lift the stylus from the screen the line disappears and the selected text will be highlig...

Page 96: ...96 Entering Text ...

Page 97: ...Your Computer 5 1 About Synchronization 5 2 Setting Up Windows Mobile Device Center on Windows Vista 5 3 Setting Up ActiveSync on Windows XP 5 4 Synchronizing With Your Computer 5 5 Synchronizing via Bluetooth 5 6 Synchronizing Music and Video ...

Page 98: ... computer For more information see Setting Up Windows Mobile Device Center on Windows Vista and Setting Up ActiveSync on Windows XP in this chapter Note ActiveSync or Windows Mobile Device Center only synchronizes data on your computer and device If you have installed a storage card and you want to back up files from the storage card use Windows Explorer on your computer to copy files from the sto...

Page 99: ...o back up your files To back up files from the storage card to your computer use Windows Explorer to copy files from the storage card to the computer 5 2 Setting Up Windows Mobile Device Center on Windows Vista Microsoft Windows Mobile Device Center is the replacement for Microsoft ActiveSync on Windows Vista Note Some versions of Windows Vista come with Windows Mobile Device Center already instal...

Page 100: ... transfer media files check for updates and explore your device but not synchronize Outlook information 4 Select the items you want to synchronize then click Next 5 Enter a device name then click Set Up When you finish the setup wizard Windows Mobile Device Center synchronizes your device automatically Notice that Outlook e mails and other information appear on your device after synchronization ...

Page 101: ...usic and Video XX new pictures video clips are available for import a wizard guides you to tag and transfer photos from your device to the Photo Gallery on your computer Click Pictures Music and Video Add media to your device from Windows Media Player to synchronize music and video files using Windows Media Player For more information see Using Windows Media Player Mobile in Chapter 11 Click File ...

Page 102: ... Select the ActiveSync check box then click Install 4 Read the license terms then click Accept 5 When installation is completed click Done 6 On the Getting Started with Windows Mobile screen click Close Set up synchronization in ActiveSync 1 Connect your device to your computer The Synchronization Setup Wizard automatically starts and guides you to create a synchronization partnership Click Next t...

Page 103: ...uch Sync Data or Tap Start Programs ActiveSync then tap Sync To end synchronization before it completes tap Stop Tip To delete a partnership with one computer completely disconnect your device from that computer first In ActiveSync on your device tap Menu Options tap the computer name then tap Delete From Windows Mobile Device Center 1 Click Start All Programs Windows Mobile Device Center 2 Click ...

Page 104: ...ist 3 To change synchronization settings for an information type for instance E mail select it and tap Settings You can then set the download size limit specify the time period of information to download and more Notes Some information types such as Favorites Files and Media cannot be selected in ActiveSync Options on your device You can only select or clear these items from your computer s Window...

Page 105: ...ave a built in Bluetooth or installed with a Bluetooth adapter or dongle To synchronize with a computer via Bluetooth 1 Set up Windows Mobile Device Center or ActiveSync on your computer to synchronize through Bluetooth See the program s Help for instructions 2 Make sure that Bluetooth on both your device and the computer are turned on and set to visible mode See Bluetooth Modes in Chapter 9 for d...

Page 106: ...ettings must be set in Windows Media Player Before media can be synchronized you must do the following Install Windows Media Player Version 11 on your computer Windows Media Player 11 works only in Windows XP or later versions Connect your device to the computer with a USB cable If your device is currently connected using Bluetooth you must end that connection before media can be synchronized Set ...

Page 107: ...Chapter 6 Exchanging Messages 6 1 Messaging 6 2 Text Messages 6 3 MMS 6 4 Types of E mail Accounts 6 5 E mail Setup Wizard 6 6 Using E mail ...

Page 108: ...screen While you are in a message list of a certain account for example SMS MMS tap Menu Go To to switch to other types of messaging accounts Account Picker screen To configure message account settings Tap Menu Options on the Account Picker screen or Tap Menu Tools Options while you re in a message list To automatically add a signature in outgoing messages You can automatically add your name and o...

Page 109: ...sage will be delivered to your recipients in two or more separate messages These are called concatenated SMS messages If your recipient s mobile phone supports concatenated messages they will receive your complete SMS message at one time Create a new text message Depending on your preference there are a number of alternative ways you can create a new text message From the TouchFLO Home screen 1 On...

Page 110: ... You can also tap To or tap Menu Add Recipient to add mobile phone numbers from Contacts 2 Enter your message Tip To choose from preset messages tap Menu My Text and tap a desired message To check the spelling tap Menu Spell Check 3 Tap Send Tips For more information about entering text and symbols see Chapter 4 If you want to know when a text message is received before sending the message that yo...

Page 111: ...ouped as a single thread in your inbox Threaded SMS lets you see exchanged messages similar to a chat program with a contact on the screen To reply to a text message 1 In the SMS MMS inbox tap a message thread to open it 2 At the bottom of the screen type your reply message and then tap Send Enter your reply message here ...

Page 112: ...esults in duplicate messages in the Inbox folder when your SIM card is in use To delete a message in the thread 1 In the SMS MMS inbox tap a message thread to open it 2 Use the Navigation Up or Down control to select a message in the thread that you want to delete 3 Tap Menu Delete To delete all messages in a thread 1 In the SMS MMS inbox select a message thread using the Navigation Up or Down con...

Page 113: ...rovisioned on your mobile phone account Contact your wireless service provider to have MMS provisioned as part of your calling plan Make sure the size of MMS messages that you send is within the limits allowed by your wireless service provider Change MMS settings Check your device to see if it is preconfigured with your wireless service provider s MMS settings Add the MMS settings of your wireless...

Page 114: ...red Connect via Select the connection that your device uses for MMS messages Send limit Select the maximum MMS message size allowed by your wireless service provider WAP version Select either WAP 1 2 or WAP 2 0 depending on which one is being used by your wireless service provider 5 Tap Done Notes If your device already has preset MMS settings it is recommended that you do not change these setting...

Page 115: ... scroll up to see Cc and Bcc 4 Enter a subject for your message 5 Tap the Insert icon to select and insert a photo or video clip When selecting a photo or video clip you can Tap Select to insert the selected photo or video clip into the MMS message you are composing Tap to take a photo and insert it into the MMS message Tap to record MMS video and insert it into the MMS message Tap Exit to quit se...

Page 116: ...e My Text list tap and hold a string then tap Edit or Delete from the shortcut menu To add a new phrase tap New To add an audio clip to an MMS message You can add one audio clip per slide in your MMS message 1 Tap Insert audio on your MMS message By default My Documents will be shown Tap My Music or another folder that contains audio files When navigating folders tap the down arrow to return to th...

Page 117: ...e Message Contents screen you can do the following To save a file select it and tap Menu Save To save the contents of a text file to the My Text list tap Menu Save into My Text To associate a photo to one of your contacts tap Menu Assign to Contact To reply to an MMS message 1 In the SMS MMS inbox press Navigation Up or Down to select the mobile phone number or name of the contact who sent you the...

Page 118: ...acklist 5 Tap Done Tip To unblock a phone number and allow the sender to send you MMS messages remove the number from the Blacklist Go to the SMS MMS inbox tap Menu MMS Options Blacklist tab tap and hold the phone number in the Blacklist and then tap Delete 6 4 Types of E mail Accounts You can set up the following types of e mail accounts on your device Outlook e mail that you sync with your compu...

Page 119: ...ccess Outlook e mail messages wirelessly you must set up your device to synchronize via an over the air connection with your company s Exchange Server For more information about synchronizing with your company e mail server see Chapter 7 Add an e mail account To add a new e mail account you can do one of the following On the TouchFLO Home screen slide to the Mail tab and then touch New Account if ...

Page 120: ...l account see Chapter 7 Set up an Internet e mail account Set up a POP3 or IMAP4 e mail account on your device if you have an e mail account from an Internet service provider ISP or other e mail service provider or a web based account such as Gmail Yahoo Mail Plus or AOL You can also add a work account that you access using a VPN server connection as a POP3 IMAP4 account 1 Add a new e mail account...

Page 121: ...ustomize download and format settings 6 Tap Finish To specify e mail server settings If Auto Setup is unsuccessful contact your ISP or e mail provider for the Incoming mail server and Outgoing mail server settings so you can enter them on your device Other options that you can select include the following Select the Outgoing server requires authentication check box if required by your provider If ...

Page 122: ...ges are immediately delivered when you tap Send If you prefer to save outgoing messages to the Outbox folder first clear the check box In this case you will need to manually send messages by tapping Menu Send Receive Use automatic send receive schedule when roaming This allows your device to data roam when there is a set time interval for connecting to the Internet automatically Since this may res...

Page 123: ...lect Custom domain and then tap Next 5 Enter the domain of your e mail provider and then tap Next 6 The E mail Setup wizard then tries to find the e mail provider settings on your device or from the Internet If the settings are found it shows a successful message Tap Next 7 Enter Your name and the Account display name and then tap Next Note If the E mail Setup wizard was unsuccessful in finding th...

Page 124: ...elect the e mail account you want to use on the right side of the screen 3 Touch the New Mail icon to create a new e mail To send an e mail to a favorite contact 1 On the TouchFLO Home screen slide to the People tab 2 Swipe your finger on the screen to scroll through the photos of your favorite contacts 3 Touch the photo of the desired contact and then touch Send e mail For more information about ...

Page 125: ...essages tap Menu My Text and tap a desired message To check the spelling tap Menu Spell Check 3 Tap Send Tips For more information about entering text and symbols see Chapter 4 To set the message priority tap Menu Message Options If you are working offline e mail messages are moved to the Outbox folder and will be sent the next time you connect To add an attachment to a message 1 In the message th...

Page 126: ...ain a particular sender or subject you are searching for To filter your Inbox Enter the sender name or e mail subject you want to look for As you type characters the message list narrows down to the sequence of characters you have entered For example entering B then E narrows the list to only the e mails that contain sender names and e mail subjects that start with BE ...

Page 127: ... IMAP4 Internet e mail accounts downloads an entire e mail without the need for you to perform a full synchronization This limits the download to just the e mail message that you want and helps save data cost Fetch Mail is also available for Outlook E mail See Instant download through Fetch Mail in Chapter 7 for details Download may take some time depending on the speed of your Internet connection...

Page 128: ...being added to the recipient list Tap Menu Options in ActiveSync select the E mail item tap Settings then tap Advanced In the My e mail addresses text box enter e mail addresses you want to exclude Synchronize e mails Synchronizing e mails ensures that new e mails are downloaded to the device Inbox folder e mails in the Outbox folder are sent and e mails deleted from the server are removed from yo...

Page 129: ... Sync Options screen Under Message format select HTML or Plain Text HTML is only available when connected to Microsoft Exchange Server 2007 or later Under Download size limit select the desired e mail size 5 Close ActiveSync and reconnect your device to the computer To change the download size and format for Internet e mail 1 Tap Menu Options on the Account Picker screen or tap Menu Tools Options ...

Page 130: ...t Picker screen or tap Menu Tools Options while you re in a message list 2 Tap the name of your IMAP4 e mail account 3 Tap Download Size Settings 4 In Download attachments Select All attachments to always download file attachments or Select a file size limit for auto downloading attachments 5 Tap Done To store attachments on the storage card 1 Tap Start Messaging 2 Tap Menu Options Storage tab 3 S...

Page 131: ... 7 Working With Company E mails and Meeting Appointments 7 1 Synchronizing with the Exchange Server 7 2 Working With Company E mails 7 3 Managing Meeting Requests 7 4 Finding Contacts in the Company Directory ...

Page 132: ...ur device Exchange Server name must be Outlook Web Access server name Domain name User name and password that you use at work If you have not synchronized your device with your computer follow these steps to set up an Exchange Server connection 1 Add a new e mail account See Add an e mail account in Chapter 6 for instructions 2 Enter the E mail address and Password for the e mail account and selec...

Page 133: ...ange Exchange Server settings open ActiveSync on your device then tap Menu Configure Server Start synchronization Before you start synchronizing with the Exchange Server make sure your device has been set up with a Wi Fi or data connection to the Internet so that you can synchronize over the air For more information about connections see Chapter 8 After you finish setting up an Exchange Server con...

Page 134: ...er Items such as contacts calendar and tasks are also immediately updated onto your device when these items have been changed or new entries have been added on the Exchange Server To make Direct Push work you need to have a Wi Fi or data connection on your device You need to perform a full synchronization between your device and the Exchange Server first before Direct Push can be enabled Requireme...

Page 135: ...y Peak times usually refer to your working hours when e mail volume is high 3 Select a longer interval in the Off peak times box Tip To set the days and hours that make up your peak and off peak times tap the peak times link at the bottom of the screen Instant download through Fetch Mail The Fetch Mail feature downloads an entire e mail immediately without the need for you to perform a full Send R...

Page 136: ...you have a Microsoft Outlook account that synchronizes with Microsoft Exchange Server 2007 or later Exchange Server must also be set up to allow access to SharePoint document libraries or internal file servers Search for e mails on the Exchange Server You can access e mails that are not available on your device by searching your Microsoft Exchange Server mailbox The search results are downloaded a...

Page 137: ...lags are disabled or hidden if e mails are synchronized with earlier versions of Microsoft Exchange Server To flag or unflag a message 1 Open Outlook on your device and access the Inbox 2 Select a message or open a message 3 Tap Menu Follow Up and select one of the following options Set Flag Mark the message with a red flag to indicate that it needs follow up Complete Flag Mark the message with a ...

Page 138: ...and check their status to know about their availability When you receive a meeting request you can reply by accepting or declining the request The meeting request also clearly indicates whether or not there are conflicting or adjacent meetings Requirement Your company must be using Microsoft Exchange Server 2007 or higher To reply to a meeting request 1 When you receive a meeting request e mail a ...

Page 139: ...endees will be listed Icons indicating whether each attendee has accepted or declined the meeting request will also be displayed Note To see the icon indicators in the attendees list make sure Calendar is synchronized with the Exchange Server Tips For information about creating a meeting request see To send a meeting request in Chapter 12 To view an attendee s contact information tap the attendee ...

Page 140: ...ange Server 1 Synchronize with the Exchange Server 2 Do any of the following In Contacts tap Menu Company Directory In a new e mail message tap the To box or tap Menu Add Recipient then tap Company Directory on the top of the list When creating a meeting request and selecting required and optional attendees in Calendar tap Company Directory 3 Enter a partial or full contact name and tap Search In ...

Page 141: ... Ways of Connecting to the Internet 8 2 Starting a Data Connection 8 3 Using Opera Mobile 8 4 Using YouTube 8 5 Using Streaming Media 8 6 Using Windows Live 8 7 Using Your Device as a Modem Internet Sharing 8 8 Using RSS Hub ...

Page 142: ...etwork Wi Fi Wi Fi provides wireless Internet access over distances of up to 100 meters 300 feet To use Wi Fi on your device you need access to a wireless access point or hotspot Note The availability and range of your device s Wi Fi signal depends on the number infrastructure and other objects through which the signal passes To turn Wi Fi on and off 1 On the Home screen slide to the Settings tab ...

Page 143: ...e Internet Tap Work if the wireless network connects your device to a private network 3 Enter the key and then tap Connect Next time you use your device to detect wireless networks you will not see the pop up message windows again and you will not be prompted to enter the network key of the previously accessed wireless network unless you perform a hard reset which will erase custom settings on you...

Page 144: ...s and the wireless signal icon appears on the title bar The arrows in this icon move back and forth while your device is scanning for a wireless network signal Once your device successfully connects to a wireless network the arrows stop moving Wireless LAN screen On the Home screen slide to the Settings tab and then tap Menu Wireless Network On the Main tab you will see the wireless network that y...

Page 145: ...ess networks if available by tapping Add New To save battery power while connected to a wireless network Using Wi Fi quickly consumes battery power Turn off Wi Fi when not in use You can also enable power saving settings 1 On the Home screen slide to the Settings tab 2 On the Settings screen tap Menu Wireless Network Power Mode tab 3 On the Power Mode tab move the Power Save Mode slider to a posit...

Page 146: ... 3G services Do not change the connection settings as this may cause services to stop working Note If you did not complete the auto configuration process before follow the instructions in To manually select the network operator to use for data connections in Chapter 13 to configure the data connection for your device To add a new GPRS 3G connection When you need to add another GPRS 3G connection o...

Page 147: ...ial up To set up a dial up connection to your Internet Service Provider ISP on your device you need the same settings that you normally use when you dial up from your computer This includes the ISP server phone number your user name and password 1 On the Home screen slide to the Settings tab and then tap All Settings 2 On the Connections tab tap Connections 3 In My ISP tap Add a new modem connecti...

Page 148: ...then tap Communications to open the Comm Manager 2 Tap Data Connection to connect or disconnect the data connection When your device successfully establishes the data connection the ON indicator is activated To choose from multiple types of data connections If you have set up multiple types of data connections on your device you can choose and manually start a desired connection 1 On the Home scre...

Page 149: ...2 3 4 5 6 7 8 9 1 Refresh Tap to reload the web page being viewed 2 Address bar Enter the URL of the web site here 3 Back Tap to go back to the previous web page viewed 4 Bookmarks Tap to go to the Bookmarks screen where you can add a bookmark edit bookmarked web pages and send the favorite URL link via one of the Messaging accounts 5 Tabs Tap to add a new browsing tab or switch to another existin...

Page 150: ...et tab and then tap the globe image on the screen or tap Browser at the bottom right side of the screen To go to a web site 1 On the Opera Mobile screen tap the address bar 2 Enter the URL address and tap Search field Address bar Tip When you tap the address bar a search field also appears Quickly search the web by entering the search item and tapping Zoom in and out on web pages While viewing a w...

Page 151: ...ar tap to open the menu Tap to open the Settings screen where you can set the default home page change display settings set privacy settings and more Tap to view items being downloaded You can also resume or stop current downloads Tap to view information about the Web page you are browsing Tap to see web pages that you have viewed Tap to manage and view web pages that you have saved Tap to open th...

Page 152: ... if you are subscribed to a channel Displays the current program channel being viewed Tap to close the YouTube Tap the arrows to filter the list by Most Viewed Top Rated and Featured Displays the available videos for the selected program channel Tap a video to watch it Tap to view details about the video Tap to switch between the different YouTube screens Tap to set video playback quality Browse f...

Page 153: ... can also add a YouTube user as a program channel To add tap in any of the YouTube screens and then tap To change the program channel 1 On the Videos screen tap Program Guide at the top of the screen 2 On the Program Guide list select a channel 3 The video list refreshes to display the available videos for the newly selected channel To delete a program channel from the Program Guide list You can o...

Page 154: ...playback Tap to resize the video to fit the screen Tap again to go back to actual size Drag to go forward or backward in the video Buffered video Download progress While watching YouTube videos you can also use the following controls on your device This control Does this ENTER Toggle between playing and pausing video playback NAVIGATION right Landscape orientation Press and hold to go forward in t...

Page 155: ...about the video you just watched Tap to go to the next page of related videos If no action is taken it automatically goes to the next page after 10 seconds Tap to go back to the previous page of related videos Bookmarks You can store frequently viewed videos into Bookmarks for quick access To view Bookmarks On the YouTube screen tap Tap a video to watch it To add a video into Bookmarks Do one of t...

Page 156: ...ap Edit 2 Tap on the video you want to remove from Bookmarks 3 On the confirmation screen tap Yes 4 Tap Done History View recently watched videos on the History screen To view History On the YouTube screen tap Tap a video to watch it Note To clear the History list tap Clear ...

Page 157: ...otocol links to streaming media content then play the content in the Streaming Media program 1 On the Home screen slide to the Internet tab and tap Browser 2 In the address bar enter the URL address of the web page that contains the RTSP link to the desired 3gp mp4 or sdp file 3 On the web page tap the RTSP link 4 Streaming Media then automatically opens and starts playing the file During playback...

Page 158: ...tch to full screen rewind and fast forward To view streaming video information Tap Menu Properties to view the properties and general information of a streaming video clip such as video codec audio codec dimension frames and duration of the video To configure streaming video connection settings Tap Menu Options to configure streaming settings Playback tab Specify the memory space in terms of durat...

Page 159: ...s your address book for storing Live Mail Live Messenger and Hotmail contacts Set up Windows Live The first time you use Windows Live sign in using your Windows Live ID which is your Windows Live Mail or Hotmail address and password To set up Windows Live for the first time 1 Tap Start Programs Windows Live and then tap Sign in to Windows Live 2 Tap the links to read the Windows Live Terms of Use ...

Page 160: ...loaded to your device 6 Tap Next 7 After synchronization is complete tap Done The Windows Live interface On the Windows Live main screen you will see a search bar navigation buttons and an area where you can show and customize your profile 1 Search bar 2 Navigation buttons Tap the left or right arrow to switch between Windows Live Messenger Windows Live Mail and Sync status 3 Tap to change the dis...

Page 161: ...tos Change status display name View contacts by online status groups and more Send messages even when a contact is offline Note Before you can use Windows Live Messenger your device must be connected to the Internet For information about setting up an Internet connection see Ways of Connecting to the Internet in this chapter Launch Messenger and sign in To open Windows Live Messenger Do one of the...

Page 162: ... list select a contact then tap Send IM to open a message screen 2 Enter your text message in the text entry area of the message screen 3 To add an emoticon tap Menu Add emoticon then tap an icon from the list 4 Tap Send 5 To end a conversation with the current contact tap Menu End conversation Tips To send a file tap Menu Send You can choose to send a picture voice clip or any file To invite one ...

Page 163: ...n the Home screen slide to the People tab and then tap All People 2 Tap New then tap Windows Live 3 In the IM box enter the e mail address of the contact which can be a Windows Live ID or any other e mail address Tip You can fill in other information about the contact if desired This is not necessary if you will communicate with the contact only through Windows Live Messenger or Live Mail 4 Tap OK...

Page 164: ...chapter If you want to use a USB cable connection you must first install Windows Mobile Device Center or Microsoft ActiveSync version 4 5 or later on the computer If you want to use a Bluetooth connection make sure your computer has built in Bluetooth capability If your computer does not have Bluetooth you can connect and use a Bluetooth adapter or dongle Before using Internet Sharing disconnect f...

Page 165: ...rt Programs Internet Sharing 4 Select Bluetooth PAN as the PC Connection 5 From the Network Connection list select the name of the connection that your device uses to connect to the Internet 6 Tap Connect 7 On your computer set up a Bluetooth Personal Area Network PAN with your device For Windows Vista a Click Start Control Panel Network and Internet Network and Sharing Center b Click Manage netwo...

Page 166: ...he Bluetooth software that came with the Bluetooth adapter dongle to connect your computer and device via Bluetooth Refer to the Bluetooth adapter dongle documentation for more information 8 On the Internet Sharing screen on your device check if a connected status message is displayed which indicates that your computer has been successfully connected to the Internet using your device as a Bluetoot...

Page 167: ... RSS Hub see Help on your device Note Make sure you have an active Internet connection such as EDGE or GPRS before using RSS Hub Subscribe to and organize news channels You must subscribe to news channels before you can receive RSS feeds To subscribe to news channels 1 Tap Start Programs RSS Hub then tap Continue 2 In the New Channel Wizard screen select the Choose from a list of known Channels op...

Page 168: ...Select the check boxes of the RSS channels you want to subscribe to then tap Finish Tip Channels are grouped by categories If you want to select all channels in a category select the category check box 4 The channel list appears Tap Refresh to update the channels Tap to cancel channel updating Channel is updated Tap it to view the headlines Tap to select the channel category to display Headline co...

Page 169: ...display all subscribed channels Manage channel categories To view all the channels in a particular category tap All Categories in the upper left area of the channel list then tap the category you want to display To add a new category tap Menu Categories in the channel list to display all categories then tap Menu New To rename or delete a category tap Menu Categories in the channel list to display ...

Page 170: ...Headline or news summary contains a keyword Tap to download audio video file attachment Audio Video Image file attachment is downloading New or unread headline Headline has been read Tap to return to the channel list New or unread headlines display in bold and are marked with a blue newspaper icon Headlines that have been read are marked with a gray newspaper icon ...

Page 171: ...attachment Tap to download the file News summary Tap to open the news item in Opera Mobile See Using Opera Mobile in this chapter for details Channel name Tap to return to the headline list To change view options In the news summary screen tap Menu to change the text size fit the text to the screen text wrap or enable ClearType for better viewing ...

Page 172: ...dcast Save to save a copy of the file to the device main memory or storage card To send the headline link via e mail 1 In the news summary screen tap Menu Send Link via Email 2 Messaging opens and displays the Account Picker screen Tap the e mail account you want to use to send the headline link A new e mail message is then created with the headline link 3 Specify the e mail recipients then send i...

Page 173: ...ooth Partnerships 9 3 Connecting a Bluetooth Hands free or Stereo Headset 9 4 Set Up the Default Bluetooth Device to Connect to 9 5 Beaming Information Using Bluetooth 9 6 Bluetooth Explorer and Bluetooth File Sharing 9 7 Printing Files via Bluetooth ...

Page 174: ... turns off When you turn on your device again Bluetooth automatically turns on Turn off Bluetooth when not in use to conserve battery power or in places where using a wireless device is prohibited such as on board an aircraft and in hospitals To turn Bluetooth on and make your device visible 1 On the Home screen slide to the Settings tab and then tap Menu Bluetooth Devices Mode tab 2 Select the Tu...

Page 175: ... establish a secure connection The passcode can be 1 up to 16 characters 5 Tap Next 6 Wait for the paired device to accept the partnership The receiving party needs to enter the same passcode that you specified 7 After the receiving party enters the passcode a message box appears on your device confirming the partnership Tip Tap Advanced to change the paired device name and to set the services you...

Page 176: ... then tap Delete 9 3 Connecting a Bluetooth Hands free or Stereo Headset For hands free phone conversations you can use a Bluetooth hands free headset with your device Your device also supports A2DP Advanced Audio Distribution Profile which allows you to use a Bluetooth stereo headset for hands free phone conversations and for listening to stereo music To connect a Bluetooth hands free or stereo h...

Page 177: ...t your device in the supplied in car holder For more information see NaviPanel settings in Chapter 10 1 On your device make sure that Bluetooth is turned on 2 Connect the car kit or headset to your device via Bluetooth If this is the first time you have used the car kit or headset with your device you will need to create a partnership For information on how to do this see To create a Bluetooth par...

Page 178: ...s installed using a third party provided driver open the Bluetooth software that came with the Bluetooth adapter dongle and enable the adapter dongle to be discovered by other devices Refer to the Bluetooth adapter s documentation for more information If your computer has Windows Vista or Windows XP SP2 and your computer s Bluetooth adapter is supported by your Windows version do the following ste...

Page 179: ...nformation to a Bluetooth enabled device such as another Windows Mobile powered device follow steps 1 to 5 in the above procedure Tips The default folder on your computer where beamed items are stored may be C Documents and Settings your_username My Documents in Windows XP or C Users your_username My Documents in Windows Vista For your device to receive Bluetooth beams tap Start Settings Connectio...

Page 180: ...m You can open it by tapping Start Programs Bluetooth Explorer or by tapping the down arrow on the upper left of File Explorer screen then tapping Bluetooth 2 Bluetooth Explorer then scans for other Bluetooth devices that have file sharing enabled From the list tap to select a Bluetooth device you want to connect to You may need to enter a passcode in order for you to connect to the selected devic...

Page 181: ...ooth Menu Search Devices Your device starts to search for Bluetooth devices 4 Select the Bluetooth printer and tap Menu Send File 5 Set the printing options you want then tap Print To print a calendar appointment 1 Tap Start Calendar then select highlight the appointment whose details you want to print 2 Follow steps 3 to 5 in the To print contact information procedure To print a JPEG file 1 In Pi...

Page 182: ...182 Bluetooth ...

Page 183: ...inding and Recording Places 10 1 Guidelines and Preparation for Using GPS 10 2 Downloading Satellite Data via QuickGPS 10 3 HTC Footprints 10 4 Google Maps Available by Country 10 5 Location Settings 10 6 NaviPanel ...

Page 184: ...ould not interfere with actual driving behavior Do not leave your device in a vehicle or expose the device to direct sunlight to avoid overheating the battery which could pose damage to the device or risk to the vehicle When using the device inside a vehicle use the car holder to mount the device securely in place Avoid placing the device in the areas shown in the following diagram 1 Do not place ...

Page 185: ... Positioning System GPS is built and operated by the US Defense Department The Department is responsible for the accuracy and maintenance of the system Any changes that the Department makes may affect the accuracy and function of the GPS system 10 2 Downloading Satellite Data via QuickGPS Before you start using your device for GPS navigation open the QuickGPS program first to download ephemeris da...

Page 186: ...isplay a reminder message when the validity of the ephemeris data has expired When you see the reminder message tap Menu to dismiss the reminder or to set the snooze time so that you will be reminded again Tap OK to open the QuickGPS program and download the latest data Auto download when data expires Allows ephemeris data to be automatically updated onto your device when the data has expired Auto...

Page 187: ...um If the photo from Album is geotagged with a precise GPS position this is shown as the GPS position on your new footprint To take a photo and add location information 1 Do one of the following Press the FOOTPRINTS button On the Home screen slide to the Footprints tab tap the category that best describes your current location and touch the New icon on the upper right side of the screen Tap Start ...

Page 188: ...d choose a setting 3 Press the ENTER button to capture the photo Your photo is then displayed and you can add more location information Note If your GPS position has not been found yet you are asked whether to find the position on Google Maps continue the GPS search or stop the GPS search Add a voice recording Edit location information Exit Footprints GPS status indicator Icons appear here as foll...

Page 189: ...print in this chapter Note Footprints uses a database of cell towers and Wi Fi hotspots to estimate your position for the automatically assigned district or area name for your footprint and for the initial map location if you choose to find a position on Google Maps The database is continually being improved If your nearest cell tower or Wi Fi hotspot is new to the database your estimated position...

Page 190: ...is displayed Note By default footprints are displayed with the most recent entries at the top To display them in alphabetical order tap Menu Sort by Name 3 Touch the footprint for the place you want to visit again 4 To call a phone number if specified touch 5 To launch the GPS navigation software if there is a displayed GPS position touch Note To navigate to the location in the GPS navigation soft...

Page 191: ...me tap the name and enter text 5 To delete an existing voice recording tap To make a voice recording if there was no recording before or to replace an existing recording tap To listen to the recording tap 6 Tap the fields to the right of the and icons to enter the phone number and street address respectively 7 To add a description of the location tap the field and enter the text 8 To change the ca...

Page 192: ...ort If any footprints on the device are the same as footprints on the card you are asked whether you want to overwrite them 10 4 Google Maps Available by Country Google Maps lets you track your current location view real time traffic situations and receive detailed directions to your destination It also allows you to search and locate places of interest or even a contact address Note You need an a...

Page 193: ...terms preferences and image cache Tap Menu Help Tips to learn more about the program and its many features Search for a place of interest You can easily search and locate a place of interest such as hotels restaurants and other places using Google Maps Google Maps can also show details on how to contact and reach the place of interest from your current location Note You can also enter keywords str...

Page 194: ... interest that you have selected Tap Directions to here or Directions from here to get directions on how to get to the place of interest from your current location or vice versa Tap Send as text message to send the contact information of the place of interest via SMS Tap Search nearby to search for other places of interest near your current location For more information about Google Maps you can v...

Page 195: ...able options Important If your service provider s networks contain Internet firewalls or DNS servers which block this service contact the service provider for assistance on how to connect to a different network If your device s data connection settings change in the future remember to return to this screen and choose again the connection to use for AGPS Location service Your device provides access...

Page 196: ...o Footprints Navigate to your stored home address in the GPS software Navigate to a recent destination stored in the GPS software Enter an address in the GPS navigation software and be directed there Open the GPS navigation software Open the Phone application Notes You can use other programs on your device while it is in the holder While on another program screen press the FOOTPRINTS button to ret...

Page 197: ... NaviPanel is not automatically launched when you put the device in the in car holder To launch NaviPanel manually when the device is in the holder press the FOOTPRINTS button Auto connect to your chosen default Bluetooth device in Car Kit Mode When this is cleared your device does not automatically connect to the default Bluetooth car kit or headset when you put it in the in car holder To connect...

Page 198: ...198 Finding and Recording Places ...

Page 199: ...Chapter 11 Experiencing Multimedia 11 1 Taking Photos and Videos 11 2 Viewing Photos and Videos Using Album 11 3 Using Windows Media Player Mobile 11 4 MP3 Trimmer 11 5 Using Audio Booster ...

Page 200: ...era screen icons and then tap the Exit icon Capture modes The camera on your device allows you to capture pictures and video clips by using various built in modes that provide you flexibility in taking your shots To change the capture mode If icons are not showing on the screen tap the screen first to display the Camera screen icons and then do one of the following to select a capture mode Press N...

Page 201: ... MMS Video Captures video clips suitable for sending with MMS messages Contacts Picture Captures a still image and gives you the option to immediately assign it as a Photo ID for a contact Picture Theme Captures still images and places them within frames GPS Photo Captures still images and uses GPS to tag them with your geographical location When you tap this the device searches for your GPS posit...

Page 202: ...cture Picture Theme Panorama GPS Photo JPEG Video MMS Video H 263 3gp MPEG 4 mp4 Capture photos and videos Use the ENTER button as the shutter release when capturing photos and videos Press the ENTER button to take a photo or to start capturing video In Video or MMS Video mode press ENTER again to stop recording In Picture Theme or Panorama mode press ENTER for each shot you need to take ...

Page 203: ...en Album See Viewing Photos and Videos Using Album for details 3 Capture mode Displays the current capture mode Tap to open the Capture Mode menu where you can choose from available capture modes 4 Menu Tap to display the Menu Panel See Menu Panel for details 5 Exit Tap to exit the Camera program 6 Remaining information indicator In Photo Contacts Picture Picture Theme and Panorama modes this show...

Page 204: ...your location has not been found is displayed 8 Recording indicator Flashes when recording a video Picture Theme mode 9 10 9 Template Selector icon In Picture Theme mode tap to toggle among different templates 10 Progress indicator In Picture Theme and Panorama modes this shows the number of consecutive shots ...

Page 205: ...end on the selected capture mode 2 1 5 4 3 6 1 Resolution Tap to select the resolution to use when taking photos or capturing videos 2 Storage Select where you want to save your files You can either save the files to the main memory or to a storage card if one is installed 3 Self timer Tap to set the self timer to 2 seconds 10 seconds or Off when in the Photo Contacts Picture or GPS Photo modes Wh...

Page 206: ...ettings include Auto Daylight Night Incandescent and Fluorescent Zooming Before capturing a photo or a video clip you can zoom in to make the object in focus appear closer or zoom out to make the object appear farther away To zoom in Rotate the NAVIGATION WHEEL clockwise press NAVIGATION up Landscape orientation or tap To zoom out Rotate the NAVIGATION WHEEL counterclockwise press NAVIGATION down ...

Page 207: ... 320 x 240 1 0x to 4 0x Video CIF 352 x 288 1x and 2x Large 320 x 240 1x and 2x Medium 176 x 144 1x and 2x Small 128 x 96 1x and 2x Panorama Large 640 x 480 1x and 2x Medium 320 x 240 1x 2x and 4x MMS Video Medium 176 x 144 1x and 2x Small 128 x 96 1x and 2x Contacts Picture Medium 240 x 320 1 0x to 4 0x Picture Theme Determined by the current template Depends on the size of the selected template ...

Page 208: ...on Back Return to the live Camera screen Delete Delete the captured image or video View View the captured image in the Album program Play Play back the captured video or MMS video in the Album program Send Send the captured image or video via e mail or MMS or save the captured image to Footprints Assign to Contact After capturing in Contacts Picture mode tap this icon to assign the photo to a sele...

Page 209: ...video on the Review screen Select No Limit if you do not want to impose a time limit Select No Review to immediately return to the live Camera screen after capturing and saving Grace Period GPS Photo mode Select the amount of time None 5 minutes 10 minutes or 30 minutes during which you can capture photos without having an active GPS signal on your device If GPS reception is cut off for this amoun...

Page 210: ...Image Properties This option lets you adjust the image Contrast Saturation and Sharpness 1 Tap a property to adjust 2 Tap to reset all properties to their default values 3 Tap to save the settings 4 Tap or press NAVIGATION right left Landscape orientation to increase decrease the value 5 Tap to close the Image Properties screen without applying and saving the changes 2 3 4 1 5 Effect Choose a spec...

Page 211: ...gital Camera Images naming standard and will be saved to the DCIM 100MEDIA folder on the storage card Counter To reset the file naming counter back to 1 tap Reset Flicker Adjustment When taking indoor shots flicker on the camera screen may be caused by inconsistencies between the vertical scan rate of the camera display and the flicker frequency of fluorescent lighting To reduce flicker you can ch...

Page 212: ... the storage card Show Reminder Contacts Picture mode Select On if you want the Camera to always display a message that confirms whether or not to assign the captured picture to a contact Direction Panorama mode Choose in what direction images will be stitched in a panorama Stitch Count Panorama mode Select the desired number of images to be captured and stitched into a panorama Help Tap to open t...

Page 213: ... by sliding your finger upward or downward 3 Do one of the following Tap an image to view it in full screen mode See View an image for details Tap a video file files with the icon to play back the video file See Play back video in this chapter for details Select a still image and then tap Menu Slideshow to view the images in the album as a slideshow Animated GIF and video files will not be played ...

Page 214: ...oto for a contact save the current image as a new file delete the image and view file properties Tip You can delete multiple files at once by selecting Menu Delete Items on the main Album screen and then selecting the files to delete To rotate the image While viewing an image in full screen make a half circle gesture on the screen with your finger to rotate the image To rotate the image 90 degrees...

Page 215: ...finger across the screen from right to left Go back to the previous image by swiping your finger from left to right To zoom in or out of an image While viewing an image make a full circle gesture on the screen with your finger Slide your finger clockwise on an area to zoom in on that area Slide your finger counterclockwise to zoom out ...

Page 216: ...save the image on screen as a new file To view still images as a slideshow While viewing the slideshow tap the screen to show playback controls Tap to go back to the previous image Tap to open the Slideshow Options screen where you can set the transition effect to use time per slide and orientation of the images Tap to return to the main Album screen or the Photos and Videos tab Tap to play or pau...

Page 217: ...forward or backward in the video Elapsed time Total duration Tip If the video is in your favorite album you can start the video playback from the Photos and Videos tab on the Home screen On the Photos and Video tab tap Play Close Album Close Album by tapping on the main Album screen When viewing files in full screen mode tap the screen to show the on screen menu or playback controls and then tap t...

Page 218: ...ted File Extensions Windows Media Video MPEG4 Simple Profile H 263 H 264 Motion JPEG wmv asf mp4 3gp 3g2 mp4 3gp 3g2 m4v avi Audio File Formats Supported File Extensions Windows Media Audio WAVE MP3 MIDI and SP MIDI AMR Narrow Band AMR Wide Band AAC AAC and eAAC MPEG4 audio QCELP EVRC wma wav mp3 mid midi rmi amr 3gp awb 3gp aac mp4 m4a 3gp m4a qcp 3g2 qcp To open Windows Media Player Mobile Tap S...

Page 219: ...screens Playback screen The screen that displays the playback controls such as Play Pause Next Previous and Volume and the video window You can change the appearance of this screen by choosing a different skin Now Playing screen The screen that displays the Now Playing playlist This special playlist indicates the current file being played and any files that are queued up to play next Library scree...

Page 220: ...er and searched for media on your computer you will not be prompted to search your computer in Step 2 3 On the Device Setup dialog box enter a name for your device and click Finish Note If you installed a storage card that has a capacity of more than 4GB and your entire library can fit into the storage card Windows Media Player will automatically synchronize your music files The device also needs ...

Page 221: ...nization between your device and computer follow steps 1 to 3 in To synchronize content to your device automatically 2 Click the Sync tab on the Windows Media Player of your computer Select a Playlist or a Library on the left panel of the Windows Media Player 3 From the Content List drag the media files that you want to sync to your device and drop them to the Sync List Playlists and Library List ...

Page 222: ...storage that you want use for example Storage Card 3 In most cases Windows Media Player Mobile automatically updates the library However you can manually update the library to ensure that it contains new files that you recently copied to your device or storage card Tap Menu Update Library to manually update the library list To play video and audio files on your device 1 Select a category for examp...

Page 223: ...tep until you have added all desired media files to the Now Playing list Note You cannot select multiple files simultaneously 4 After adding the media files tap Menu Now Playing 5 On the Now Playing screen tap Menu Save Playlist 6 Enter the playlist name then tap Done 7 To play back the playlist you created tap My Playlists in the Library select your playlist then tap Play Troubleshooting If you e...

Page 224: ...rimmer 2 Tap Open to find the MP3 file in the device 3 On the MP3 Trimmer screen use the stylus to adjust the Start point and End point After you set the Start point the song will play back starting from the Start point After you set the End point the song will play back starting from 5 seconds before the End point 4 Tap Play to play back the trimmed song 5 Tap Menu and select to whether set the f...

Page 225: ... Tap Start Programs Audio Booster 5 4 3 This control Does this 1 On Select the check box to enable or disable the equalizer 2 Equalizer presets Tap to choose the Equalizer preset to use 3 Done Tap to apply the modified settings 4 Menu Tap Menu Cancel to exit Audio Booster without applying the modified settings Tap Menu Save as Preset or Delete Preset to save or delete preset equalizer settings 5 F...

Page 226: ...ers 2 Save your equalizer settings as a preset by tapping Menu Save as Preset 3 Enter a preset name and then tap Done The preset you created is added to the list box To delete a custom equalizer preset 1 Tap the list box and select the Equalizer preset you want to delete 2 Tap Menu Delete Preset Note You can only delete custom equalizer presets Equalizer presets that are pre installed cannot be de...

Page 227: ... Programs on Your Device 12 2 Adding and Removing Programs 12 3 Adobe Reader LE 12 4 Calendar 12 5 Contacts 12 6 Comm Manager 12 7 Microsoft Office Mobile 12 8 Notes 12 9 Java 12 10 SIM Manager 12 11 Tasks 12 12 Voice Recorder 12 13 ZIP ...

Page 228: ...r device does not allow you to uninstall most of the preinstalled programs Note Before you purchase additional programs for your device make sure that they are compatible with your device To install a program 1 Download the program to your computer or insert the CD or disk that contains the program into your computer You may see a single exe file a zip file a Setup exe file or several versions of ...

Page 229: ...e Open a PDF file in Adobe Reader LE or Open File Explorer find the PDF file then tap the file to open it To navigate through a PDF document You can use the controls in the program and finger gestures to navigate a PDF document To zoom in rotate the NAVIGATION WHEEL clockwise or tap To zoom out rotate the NAVIGATION WHEEL counterclockwise or tap While zoomed in you can pan the current page by slid...

Page 230: ...le day event set the All Day option to Yes If there is a time frame for the appointment set the start and end dates and times 4 Specify the type of category for your appointment so that it can be grouped with other related appointments Tap Categories then select a preset category Business Holiday Personal or Seasonal or tap New to create your own category 5 When finished tap OK to return to the ca...

Page 231: ...minder to alert you 5 Tap OK to return to the Calendar screen View appointments By default Calendar displays appointments in Agenda view You can also look at your appointments in Day Week Month and Year views The highlighted hours here indicate the time of your appointments Tap to view appointment details Agenda view Tap to switch views The red box and arrows indicate that there are conflicting ap...

Page 232: ...e a new appointment or open an existing one and tap Menu Edit 3 Tap Attendees then tap Add Required Attendee or Add Optional Attendee and add the contacts whom you want to invite Note You can specify if an attendee is required or optional only if your device is connected to a Microsoft Exchange 2007 server Otherwise all attendees are designated as required For more information see Managing Meeting...

Page 233: ...tap Menu Send as vCalendar to send a vCalendar containing appointment details as a file attachment in an MMS message For more information see MMS in Chapter 6 12 5 Contacts Contacts is your address book and information storage for people and businesses you communicate with You can add the following types of contacts to your device Outlook contacts Contacts that are stored on your device which can ...

Page 234: ... and then select the picture file or tap Camera to take a photo of the contact 5 To assign a ring tone to the contact tap the Ring tone field scroll through the list of tones then select a desired tone 6 When finished tap OK Tips If a person who is not in your list of contacts called you and you want to save that person s phone number tap and hold the phone number in the Call History and then tap ...

Page 235: ...acts on your SIM card For more information see SIM Manager in this chapter Organize and search contacts To group similar contacts For easier management you can group similar contacts by assigning them to categories 1 Create a new Outlook contact or edit an existing Outlook contact 2 Tap Categories 3 Select a preset category such as Business or Personal or tap New to create your own category 4 When...

Page 236: ...or tap a letter to go directly to the part of the contacts list where contact names start with that letter Quick Scroll bar Note You can disable the Quick Scroll bar by tapping Menu Options and selecting the Show alphabetical index check box This will show the alphabetical index at the top of the Contacts list Filter the list by categories In the contact list tap Menu Filter then tap a category yo...

Page 237: ...cts screen select a contact 2 Tap Menu Send Contact SMS MMS 3 Select the contact information you want to send then tap Done 4 In the new text message enter the mobile phone number of the recipient then tap Send To send contact information as a vCard A vCard virtual business card is a standard file format used for exchanging contact information vCard files can be exported to Outlook on the computer...

Page 238: ...ctions For more information see To enable or disable Airplane Mode in Chapter 2 1 3 2 4 5 6 2 Switch the phone on or off Tap Settings Phone to set the ring tone and other phone settings See Changing Basic Settings in Chapter 13 for details 3 Switch Bluetooth on or off Tap Settings Bluetooth to configure Bluetooth on your device See Chapter 9 for details 4 Switch Wi Fi on or off Tap Settings Wirele...

Page 239: ...soft Office Word and Microsoft Office Excel To see a complete list of features that are not supported in Word Mobile and Excel Mobile see Help on your device Tips By default Word Mobile saves documents in docx format while Excel Mobile saves workbooks in xlsx format If you want to open these types of files on a computer that uses Microsoft Office 2000 Office XP or Office 2003 you need to download ...

Page 240: ...tap OK to save and return to the note list Notes To select handwritten text tap and hold next to the writing As soon as dots appear and before they form a complete circle quickly drag across the writing If a letter crosses three ruled lines it is treated as a drawing rather than text To draw in a note 1 Create or open a note file 2 Use the stylus to draw on the screen A selection box then appears ...

Page 241: ...ecording to a note create or open a note To create a stand alone recording record from the note list 4 Tap the Record icon to begin recording your voice Tap the Stop icon when you are finished recording Tip To select the voice recording format return to the note list and then tap Menu Options Global Input Options link at the bottom of the Options screen On the Input screen tap the Options tab and ...

Page 242: ...let MIDlet suite while connected to the Internet 3 Select the MIDlet MIDlet suite to download 4 Information about the MIDlet MIDlet suite is then displayed Tap Continue 5 Confirm to start downloading 6 Select root or a folder where to install the MIDlet suite to then tap OK To install from your device You can copy MIDlets MIDlet suites from the computer to your device using the USB sync cable or B...

Page 243: ...tall some MIDlets MIDlet suites to free up memory space To create folders 1 On the Java screen tap Menu New Folder 2 Enter a folder name then tap Create To update a MIDlet MIDlet suite Tap and hold a MIDlet MIDlet suite then tap Update Alternatively you can tap Menu Actions Update Java will search for updates for the selected MIDlet MIDlet suite where it was installed from before To uninstall MIDl...

Page 244: ...to Contacts on your device 1 On the SIM Manager screen select the desired contact or select all SIM contacts by tapping Menu Select All 2 Tap Menu Save to Contacts To copy contacts to the SIM card Only one phone number per contact name can be stored on a SIM card When you copy a contact that has several phone numbers to your SIM card SIM Manager saves each number under a separate name To save each...

Page 245: ...hone type tap Edit enter your desired indicator then tap Save 4 After modifying tap OK 5 Tap Menu Contacts to SIM 6 Select the check boxes of the contact s phone numbers that you want to copy to your SIM card then tap Save To store your SIM card s phone number 1 On the SIM Manager screen tap Menu Tools List of Own Numbers 2 Tap Voice Line 1 3 Change the name if desired then enter your mobile phone...

Page 246: ...an be grouped with other related tasks Tap Categories then select a preset category Business Holiday Personal or Seasonal or tap New to create your own category 4 When finished tap OK To change the priority of a task Before you can sort tasks by priority you need to specify a priority level for each task 1 Tap Start Programs Tasks 2 Tap the task you want to change the priority for 3 Tap Edit and t...

Page 247: ... Tap Start Programs Voice Recorder 2 Hold the device s microphone close to your mouth 3 Touch Record or to start recording Tap Stop or to end the recording To select or create a folder where to save voice recordings By default all recordings are saved in the My Voices folder of the device You can choose another folder or create a new folder to save your voice recordings Note If a storage card is i...

Page 248: ... in Chapter 6 to learn how to send e mails To beam a voice recording via Bluetooth 1 Select the voice recording you want to beam then tap Menu Beam File Tip To select multiple recordings tap and drag over the desired recordings or tap Menu Select All 2 Tap the device you want to send the voice recording to 3 On the other device accept the file transfer to receive the file To set a voice recording ...

Page 249: ...e and extract files 1 Touch a zip file to open it or navigate to a zip file and then touch File Open Archive Note You cannot select multiple ZIP files 2 From the zip file select files by doing one of the following Touch a file to select it To select several files touch Menu Action and make sure Multi Select Mode is selected Select files by touching each file Touch a selected file to deselect it To...

Page 250: ...contains the files you want to archive 6 Select files to add by doing one of the following Touch a file to select it To select several consecutive files drag over the files To select several non contiguous files use the stylus to tap and hold on the screen and then select Multi Select Mode Select files by tapping each file Tap a selected file to deselect it To select all files use the stylus to ta...

Page 251: ...d Managing Files 13 2 Settings On Your Device 13 3 Changing Basic Settings 13 4 Using Connection Setup 13 5 Using Task Manager 13 6 Protecting Your Device 13 7 Managing Memory 13 8 Resetting Your Device 13 9 Windows Update 13 10 Battery Saving Tips ...

Page 252: ...Copy b Right click a folder on your computer then click Paste 4 To copy a file from your computer to your device a Browse the folders on your computer right click the file you want to copy then click Copy b Right click a folder on your device then click Paste To manage files on your device using File Explorer File Explorer lets you browse and manage the contents of your device The root folder on t...

Page 253: ...le and Excel Mobile to directly save edited files onto a storage card In the program s file list tap Menu Options then select the Storage Card in the Save to box 13 2 Settings On Your Device You can adjust the device settings to suit the way you work To see all available settings slide to the Settings tab on the Home screen and tap All Settings Personal tab Icon Description Buttons Assign a progra...

Page 254: ...en you can disable TouchFLO by tapping Start Settings Personal tab Today Items tab and then clearing the TouchFLO check box However you will not be able to use the TouchFLO Home screen if you disable it Voice Command Choose which functions you want to access by speaking out voice commands System tab Icon Description About This is where you can see basic information such as the Windows Mobile versi...

Page 255: ...s error reporting function When this function is enabled and a program error occurs technical data about the state of the program and your computer will be logged in a text file and delivered to Microsoft s technical support if you choose to send it External GPS Set the appropriate GPS communication ports if required You may need to do this when there are programs on your device that access GPS da...

Page 256: ...d on your device Screen Recalibrate the screen apply ClearType and change the screen text size Task Manager Stop running programs and set the button to end programs immediately when you tap the button For more information see Using Task Manager in this chapter TouchFLO You can enable or mute the finger scrolling and panning sound You can also enable or disable the large Start menu and choose to sh...

Page 257: ... Bluetooth Turn Bluetooth on set your device to visible mode and scan for other Bluetooth devices Comm Manager Manage your device s connections including GPRS Wi Fi and Bluetooth turn the phone on or off and enable or disable the Direct Push function Connection Setup Configure your device s data connections such as 3G GPRS WAP and MMS based on the detected or selected network operator See Using Co...

Page 258: ... set the date and time 1 On the Home screen Home tab tap the time display and then tap the Time tab Tip Tap the More tab and select the Display the clock on the title bar in all programs option to show the clock on all screens 2 Select the correct time zone and change the date or time Note During synchronization the time on your device is updated with the time on your computer To set the date and ...

Page 259: ...er tap the appropriate tabs and set the desired options Display settings To adjust the screen brightness 1 On the Home screen slide to the Settings tab and then tap All Settings 2 On the System tab tap Power Backlight tab 3 Clear the Auto adjust backlight check box to display the sliders for adjusting brightness 4 Adjust the brightness by dragging the slider under On battery power and On external ...

Page 260: ...ring information from a backup Note If you synchronize multiple devices with the same computer each device must have a unique name To change the device name 1 On the Home screen slide to the Settings tab and then tap All Settings 2 On the System tab tap About Device ID tab 3 Enter the device name Notes The device name must begin with a letter consist of letters from A to Z numbers from 0 to 9 and ...

Page 261: ...to the My Documents My Ringtones folder on your device then select the sound from the Ring tone list of your device For more information about copying files see Copying and Managing Files in this chapter Alarms and notifications To set an alarm 1 On the Home screen Home tab tap the time display and then tap the Alarms tab 2 Tap Description and enter a name for the alarm 3 Tap the day of the week f...

Page 262: ...end on the event For instance only Play sound and Vibrate notifications can be enabled if it is an ActiveSync event Phone services Your device can directly link to the mobile phone network and enable you to access and change the settings of various phone services for your device Phone services may include Call Forwarding Call Waiting Voicemail and more Contact your wireless service provider to fin...

Page 263: ...tically configure your device s connection settings 1 Tap Yes on the notification message Note If your SIM card supports multiple network operator profiles the next message that appears will display network profile choices Select the profile you want to use and tap OK 2 When prompted to automatically configure your device to the proper network settings tap Yes Connection Setup configures your devi...

Page 264: ...completes the configuration tap Restart 13 5 Using Task Manager Task Manager lets you view and stop running programs configure the button and enable the Quick Menu on the Home screen To open Task Manager Tap the Quick Menu button on the top right corner of the Home screen to open the Quick Menu then tap or On the Home screen slide to the Settings tab and then tap All Settings On the System tab tap...

Page 265: ...the check box of the programs that you want to close then tap Stop Selected Tap Stop All to close all programs in the list Tap Menu Stop All but Selected to close all programs except those which check boxes are selected Tip You can also close running programs from the Quick Menu on the Home screen See Quick Menu in Chapter 1 for details To add a running program to the exclusive list If you add a r...

Page 266: ...l identification number The default SIM card PIN is provided by your wireless service provider To enable the SIM card PIN 1 On the Home screen slide to the Settings tab and then tap All Settings 2 On the Personal tab tap Phone PIN PIN2 tab 3 Select the Require PIN when phone is used check box 4 Enter the PIN number and then tap OK To change the PIN at any time tap Change PIN Tip Emergency calls ca...

Page 267: ...ng password is entered the device response time gets longer until the device appears to be not responding If you forget your password you can hard reset or clear the device memory Before you do this make sure you back up your data and files so that you can restore them back to your device For more information about hard resetting the device and clearing the memory see Resetting Your Device in this...

Page 268: ... storage versus program storage is displayed as well as the amount of memory in use versus the available memory To see the available space of the storage card 1 On the Home screen slide to the Settings tab and then tap All Settings 2 On the System tab tap Memory Storage Card tab If your device is running low on memory try the following to free memory on your device Close programs which are not in ...

Page 269: ... stylus and use the stylus tip to press the RESET button located near the battery compartment Your device then restarts and displays the Home screen RESET Hard reset You can also perform a hard reset also known as a full reset A hard reset should only be performed if a normal reset does not solve a system problem After a hard reset the device is restored to its default settings the way it was when...

Page 270: ...reset 1 Power off your device 2 Press and hold the VOLUME DOWN and ENTER buttons and then press the POWER button The following message then appears on the screen This operation will delete all your personal data and reset all settings to manufacturer default Press Volume Up to restore manufacturer default or press other keys to cancel 3 Press the VOLUME UP button to perform the hard reset or press...

Page 271: ...p Windows Update 3 On the Update Setup screen tap Next 4 Choose how you want to check for updates Manual or Automatic then tap Next Note If you select Automatic you will be asked if you want to use your current data plan to check for updates Select or clear the Use my data plan to check for and download updates check box and tap Next 5 Tap Finish To check for updates 1 On the Home screen slide to ...

Page 272: ...ry type and how you use your device Try the following to help conserve battery life When the device is not in use press POWER to switch off the display On the Home screen slide to the Settings tab and then tap All Settings On the System tab tap Power Advanced tab of the Power settings screen Here you can specify the time before your device automatically turns off the display and backlight to conse...

Page 273: ... tap Communications On the Comm Manager screen turn off Wi Fi or your active data connection when not in use Tap Start Settings Connections tab Wi Fi and then tap Wireless Networks Menu Advanced From the Turn off Wi Fi if not connected in list select a timeout period so that Wi Fi can be automatically turned off when your device is not connected to any wireless network for some time Lower the volu...

Page 274: ...274 Managing Your Device ...

Page 275: ...Appendix A 1 Specifications A 2 Regulatory Notices ...

Page 276: ...nk speeds Quad band GSM GPRS EDGE 850 900 1800 1900 MHz Band frequency and data speed are operator dependent Device Control HTC TouchFLO 4 Way navigation wheel with Enter button HTC Footprints button GPS Internal GPS antenna A GPS capable service provided by Google Connectivity Bluetooth 2 0 with Enhanced Data Rate and A2DP for stereo wireless headsets Wi Fi IEEE 802 11 b g HTC ExtUSB 11 pin mini ...

Page 277: ...microSD memory card SD 2 0 compatible AC Adapter Voltage range frequency 100 240V AC 50 60 Hz DC output 5V and 1A Special Features Includes proprietary in car holder Photo geotagging Notes The memory size figures are the total ROM and RAM memory available for use and storage Since the memory is shared by the operating system applications and data the actual available memory is less than what is sp...

Page 278: ... found to comply with the limits for a Class B digital device pursuant to Part 15 of the FCC Rules These limits are designed to provide reasonable protection against harmful interference in a residential installation This equipment generates uses and can radiate radio frequency energy and if not installed and used in accordance with the instructions may cause harmful interference to radio communic...

Page 279: ...itted levels of RF energy for the general population The guidelines are based on the safety standards previously set by international standards bodies American National Standards Institute ANSI IEEE C95 1 1992 National Council on Radiation Protection and Measurement NCRP Report 86 1986 International Commission on Non Ionizing Radiation Protection ICNIRP 1996 Ministry of Health Canada Safety Code 6...

Page 280: ...ing positions specified by the FCC with the phone transmitting at its highest certified power level in all tested frequency bands Although the SAR is determined at the highest certified power level the actual SAR level of the phone while operation can be well below the maximum value This is because the phone is designed to operate at multiple power levels so as to use only the power required to re...

Page 281: ... use the ear opposite the pacemaker to minimize the potential for interference If you have any reason to suspect that interference is taking place turn the phone OFF immediately Hearing Aids Some digital wireless phones may interfere with some hearing aids In the event of such interference you may want to consult your service provider or call the customer service line to discuss alternatives Other...

Page 282: ...to the specified collection point for recycling of such hazardous waste Isolated collection and proper recovery of your electronic and electrical waste equipment at the time of disposal will allow us to help conserving natural resources Moreover proper recycling of the electronic and electrical waste equipment will ensure safety of human health and environment For more information about electronic...

Page 283: ...dd to e mail 125 download 127 set IMAP4 to automatically receive attachments 130 set Outlook to automatically receive attachments 130 Audio Booster 225 B Backlight adjust brightness 259 set backlight timeout 259 Basic settings 258 Battery battery information 30 charge battery 33 install 31 remove 31 save battery power 145 272 Beam via Bluetooth 178 Block Recognizer 93 Bluetooth about 174 Bluetooth...

Page 284: ...arms 255 258 261 Comm Manager 238 257 Compact QWERTY 88 Company Directory 140 Conference call 58 Configure data connection settings 35 146 263 Connect device to Internet Dial up 147 GPRS 3G 146 start a connection 148 ways of connecting 142 Wi Fi 142 Connection Setup 35 44 263 Contacts 233 Contacts Picture capture mode 201 Copy contacts to SIM card 244 copy and manage files 252 media files from PC ...

Page 285: ...n device 236 Finger gestures 82 Finger panning 83 Finger scrolling 82 Footprints 187 Footprints tab Home screen 71 Forward e mail 128 Full QWERTY 87 G Google Maps 78 192 GPRS 146 GPS 184 185 GPS Photo capture mode 201 H Hard reset 269 270 Home screen 42 64 Home tab Home screen 66 I IMAP4 120 Input methods Block Recognizer 93 Compact QWERTY 88 Full QWERTY 87 Letter Recognizer 94 Phone Keypad 89 Tra...

Page 286: ...0 124 multimedia MMS 113 text SMS 109 Messenger 161 microSD card install 32 Microsoft Office Mobile 239 MIDlet MIDlet suite 242 MMS about 113 add audio clip 116 add photo video 115 add text 116 blacklist 118 create MMS message 115 MMS settings 113 reply message 117 view message 117 MMS Video capture mode 201 Modem Bluetooth 165 USB 164 MP3 Trimmer 224 Multimedia 113 199 Multitap 90 N NaviPanel 196...

Page 287: ...al Settings 256 259 Regulatory notices 278 Reply e mail 128 MMS 117 text SMS 69 111 Reset clear storage 270 hard reset 269 soft reset 269 Resolution 205 Review screen Camera 208 Ring tone 261 Ring type 261 RSS Hub about 167 headline list 170 news channels 167 podcasts 172 summary view 171 S Safety information 5 Screen text size 260 Send e mail 125 MMS message 115 text message SMS 109 Settings Conn...

Page 288: ...64 TouchFLO 46 83 256 Windows Update 256 271 Settings tab Home screen 79 SIM Access Profile SAP 62 SIM card install 28 PIN 266 remove 29 SIM Manager about 244 copy contacts to SIM card 244 copy SIM contacts to device 244 create SIM contact 244 Sleep mode 36 Smart Dial 53 SMS 69 109 125 Soft reset 269 Sounds Notifications 254 262 Sound settings 79 Speakerphone 58 Specifications 276 Speed Dial 60 St...

Page 289: ...38 U USB modem 164 USB to PC 105 258 V Vibrate 45 48 55 261 Video capture mode 201 Voice call 53 Voice Command about 254 Voicemail 56 Voice Recorder 247 W Weather tab Home screen 76 Wi Fi 142 238 Windows Live 159 Windows Live Messenger 161 Windows Media Player Mobile file formats 218 menus 219 playlists 223 troubleshoot 223 Windows Mobile Device Center 99 Windows Update 256 271 Word Mobile 239 Y Y...

Reviews: