TITLE
:
EF2 Series Guideline
REVISION DATE
13-Oct.-20
Rev No. 3
HIROSE ELECTRIC CO., LTD
.
OBJECT PRODUCT
EF2 SERIES
Figure No.
ETAD-C0387-00
PAGE:
1
OF
36
EF2 Series Guideline for Design and Handling
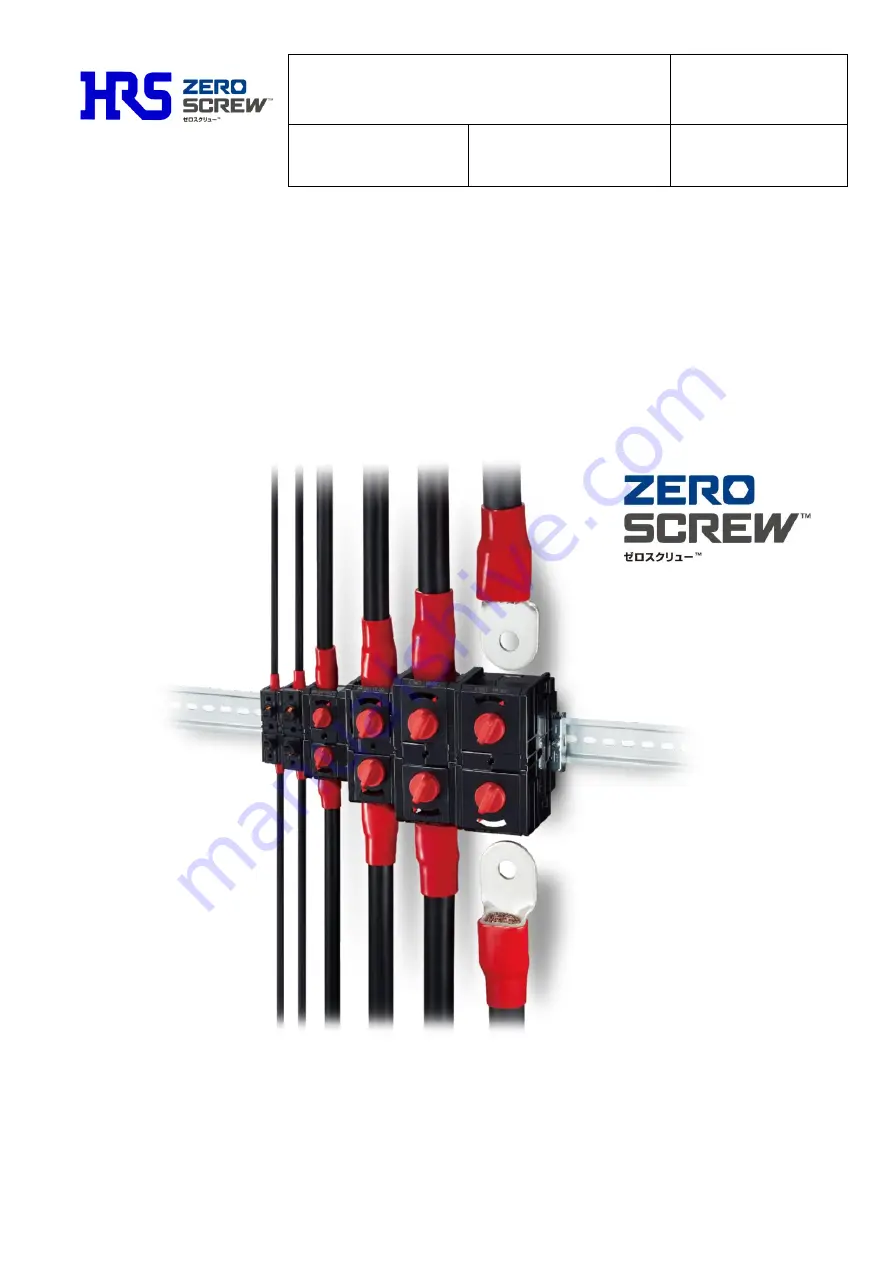
Page 1: ...TITLE EF2 Series Guideline REVISION DATE 13 Oct 20 Rev No 3 HIROSE ELECTRIC CO LTD OBJECT PRODUCT EF2 SERIES Figure No ETAD C0387 00 PAGE 1 OF 36 EF2 Series Guideline for Design and Handling ...
Page 2: ... 9 4 1 Series specification matrix 9 4 2 Specifications of applicable cables 10 5 Usage and Precautions 11 5 1 Applicable crimp contact Contact with different thickness is not allowed 11 5 2 Crimp work procedure 13 5 3 Product operation 14 5 4 Support for linkage Description of method for each product 23 5 5 Mounting and removing to and from DIN rail 25 5 6 Bending radius for each cable bending ra...
Page 3: ...es incorrect handling that may result in property damage Be sure to observe the following Prohibitions Cautions Always turn off the power before using the product Failure to do so may result in an electric shock or damage Do not touch the metallic parts Touching the metallic parts this may result in an electric shock Do not use the product at power supply voltage and currents exceeding the rating ...
Page 4: ...not cause physical deterioration of the plastic before use Salt damage countermeasures are not implemented for our products Use the specified crimp contacts and check them for deformations and contamination including oil and contact resistance failure before use Use the tinned crimp contacts Check them for abnormalities in inserting removing force and contact resistance before use Do not store or ...
Page 5: ...alog when placing orders EF2 D H 150 B 1 01 Series name EF2 Push Type EF2A Twist Type Mount type D DIN rail mount Connection Type Blank One Action on Both Sides H One Sided Screw Type Current capacity sign 30 60 150 200 250 400 Protection Design Blank No Protection Design B With Protection Design Linked quantity D150 type only Other specifications Additional product specifications will be identifi...
Page 6: ...igure No ETAD C0387 00 PAGE 6 OF 36 3 2 Outer dimensions Caution All height dimensions shall be measured from the DIN rail Width dimensions in linkage are based on Section 5 5 1 Width dimension in connecting housing EF2 D30 1 17 5 57 6 41 7 46 35 21 63 6 EF2 D60 1 40 5 71 53 45 53 95 5 EF2 D150 1 Twisting type ...
Page 7: ... Series Guideline REVISION DATE 13 Oct 20 Rev No 3 HIROSE ELECTRIC CO LTD OBJECT PRODUCT EF2 SERIES Figure No ETAD C0387 00 PAGE 7 OF 36 EF2A D200 1 49 6 111 80 45 80 25 EF2 D250 1 92 3 40 4 70 25 Twisting type ...
Page 8: ...TITLE EF2 Series Guideline REVISION DATE 13 Oct 20 Rev No 3 HIROSE ELECTRIC CO LTD OBJECT PRODUCT EF2 SERIES Figure No ETAD C0387 00 PAGE 8 OF 36 55 111 87 5 85 EF2 D400 1 Twisting type ...
Page 9: ...lent chromate Characteristics Rated current Product D30 D60 D150 D200 D250 D400 Applicable cable 1 25mm 2 16A 2mm 2 21A 3 5mm 2 30A 5 5mm 2 40A 5 5mm 2 40A 8mm 2 50A 14mm 2 70A 22mm 2 94A 38mm 2 132A 60mm 2 175A 60mm 2 175A 100mm 2 240A 150mm 2 310A 200mm 2 400A Rated voltage 600 V AC DC 1000 V AC 1500 V DC Withstanding voltage 2500 AC per 1 minute 5000 V AC per 1 minute Contact resistance 1 mΩ ma...
Page 10: ...Rev No 3 HIROSE ELECTRIC CO LTD OBJECT PRODUCT EF2 SERIES Figure No ETAD C0387 00 PAGE 10 OF 36 4 2 Specifications of applicable cables Current capacity sign Applicable cable size mm2 30 1 25 2 3 5 5 5 60 5 5 8 14 150 22 38 60 200 60 100 250 150 400 200 ...
Page 11: ...of enabled disabled of crimp contacts Table 1 Part numbers of recommended crimp contacts Current capacity sign Crimp contact manufacturer Part numbers of crimp contacts 30 JST R1 25 5 R2 5 3 5 R4 R5 5 4 Nichifu R1 25 5 R2 5 R3 5 4 R5 5 4 60 JST R5 5 5 R8 5 R14 5 Nichifu R5 5 5 R8 5 R14 5 150 JST R22 8 R22 10 R38 8 R38 10 R60 8 R60 10 Nichifu R22 8 R22 10 R38 8 R38 10 R60 8 R60 10 200 JST R60 10 R1...
Page 12: ...or less 10 5 or less 10 5 or more 250 3 3 0 1 36 5 or less 18 0 2 13 or more 400 4 0 1 44 5 or less 22 0 2 13 or more Caution Select the crimp contact that meets all dimensions shown above If one of the dimensions is not met lock or sufficient contact cannot be achieved Table 3 List of enabled disabled of crimp contacts Current capacity sign R1 25 R2 R3 5 R5 5 R8 R14 R22 R38 R60 R100 R150 R200 30 ...
Page 13: ...e out of the tolerance range may result in poor fit after crimping the terminal B is the dimension of the conductor protruding from the crimp contact before crimping Caution Set the ranges specified in the table Setting a dimension out of tolerance range may result in a poor fit or continuity failure mm Current capacity sign Crimp contact size A B 30 R1 25 11 1 1 0 0 5 R2 11 1 1 0 0 5 R3 5 10 1 1 ...
Page 14: ...lation tube may interfere with the lock engaging properly If it does not lock refer to the figure below to check the position of the insulation tube 5 3 Product operation 5 3 1 Inserting crimp contact Insert the applicable crimp contact into the crimp contact insertion position between the spring and the bus bar shown in the figure below For the crimp contact insertion position refer to the insert...
Page 15: ...in the locked state as described in Section 5 3 3 Depending on size the cable may be difficult to insert In such cases insert while moving the cable left and right Prohibition Do not insert the crimp contact into a position other than the insertion position Inserting the crimp contact incorrectly will not provide a fitting lock even if the contact is inserted Furthermore the product may be damaged...
Page 16: ...f the crimp contact is disconnected the insertion is not sufficient Using the product in this state may result in contact failure or ignition Insert the crimp contact again and be sure to lock it Prohibition Avoid leaving the product in the unlocked position Failure to follow this will detach the crimp contact to cause contact failure If the product is in the unlocked state fit the crimp contact i...
Page 17: ...ng the product into the locked state ensure that the crimp contact is not disconnected even if the cable is pulled If the crimp contact is disconnected the insertion is not sufficient Using the product in this state may result in contact failure or ignition Insert the crimp contact again and make sure to lock it OK Locked Not OK Unlocked The red salient must point to the lock symbol OK The red sal...
Page 18: ...ufficient Using the product in this state may result in contact failure or ignition Insert the crimp contact again and make sure to lock it If the red raised portion is not on the lock side when the crimp contact has been fully inserted twist the red raised portion to the lock side by hand The product may be difficult to lock depending on the contact size and hole diameter If it is difficult to lo...
Page 19: ...No ETAD C0387 00 PAGE 19 OF 36 5 3 3 Locked state 5 3 3 1 Unlock EF2 D30 D60 Unlock is performed by pulling out the crimp contact or cable while pressing the unlock button 5 3 3 2 Unlock EF2 D150 D250 D400 Unlock is performed by pulling out the crimp contact or cable while pressing the unlock button Pull out Pull out ...
Page 20: ...E ELECTRIC CO LTD OBJECT PRODUCT EF2 SERIES Figure No ETAD C0387 00 PAGE 20 OF 36 5 3 3 3 Unlock EF2A D150 D200 D250 D400 Pull out the crimp terminal or cable while twisting the Unlock Button to the release side to release the lock Release side Pull out Release side ...
Page 21: ...4 2 Tightening Torque Use the tightening torque in the table below for the one sided screw type N m Current capacity sign Tightening Torque 150 6 200 10 250 400 14 Caution Observe the tightening torque Failure to do so may cause the screws to loosen or break Please tighten regularly 5 3 4 3 Insulating Distance When using a bare crimp terminal ensure sufficient insulating distance with the insulati...
Page 22: ...bus bar can only be used on the spring side When using a bus bar ensure that the dimensions and allowable current meet the specifications in the below diagram and check in advance that there is no abnormality in contact resistance before use Current Capacity Symbol A B C D E 150 11 3or less 22 3 or less 8 4 0 4 0 6 22 9 0 5 200 14 3 or less 28 9 or less 10 5 0 4 0 6 29 8 0 5 250 20 or less 36 5 or...
Page 23: ...duct is described Combination of the product with a cover and the product without a cover creates a multi pole product To be handled by the customer 1 pole product product with cover For products with high pin counts use a combination of plateless and plate only parts D30 D60 Plate A with HRS indication Main body without Plate END PLATE Plate A with HRS indication Plate B without HRS indication Ma...
Page 24: ...Figure No ETAD C0387 00 PAGE 24 OF 36 We provide an assembly with a maximum of 5 poles Therefore this product cannot be disassembled Use 1 pole products as arranged Respective products are not linked to each other D150 1 pole product Multipole product 1 pole product 3 pole product D200 D250 D400 5 pole product ...
Page 25: ...40 40 80 80 121 2 40 4 n 250 49 60 99 20 148 80 49 6 n 400 55 00 110 00 165 00 55 n 5 5 Mounting and removing to and from DIN rail 5 5 1 Basic mounting method As shown in the figure below with the fixed hook hooked to the DIN rail press the product until the movable hook is hooked to the DIN rail Do not use a deformed DIN rail as doing so may damage the product Applicable DIN rail JIS C 2812 top h...
Page 26: ...TITLE EF2 Series Guideline REVISION DATE 13 Oct 20 Rev No 3 HIROSE ELECTRIC CO LTD OBJECT PRODUCT EF2 SERIES Figure No ETAD C0387 00 PAGE 26 OF 36 ...
Page 27: ...DIN rail 5 5 3 Fixing of product The mounted product must be fixed with a commercially available stopper to prevent it from moving along the DIN rail The end plate easily disengages for products D30 and D60 Hold it with a stopper to prevent disengagement If the cable comes into contact with the end plate and the end plate comes off of the connector body reattach the end plate to the connector body...
Page 28: ...f a flat blade screwdriver on the edge of the movable hook side and opening up the movable hook with the product end face set to fulcrum point For the D250 and D400 that have two movable hooks remove the product by opening up the hook using two flat blade screwdrivers simultaneously The position on which the flat blade screwdriver is placed is the center section of the fixed hook in both cases D30...
Page 29: ...en routing the cable sideways refer to the bending R in the table below In consideration of influence from any vibration on the contact part attach the cable 150 mm from the connector It is necessary to allow for a distance to the fixed part depending on the type of cable Therefore check that point when using cables mm Product name Dimension A Cable size EF2 D150 1 60 mm 200 EF2 D250 1 150 mm 360 ...
Page 30: ...against prying of cable The following table shows strength against prying of the cable Caution Unexpected load may cause damage to the connector depending on how the wire is handled Follow the instructions in Sections 5 7 1 to 5 7 3 Applicable cable Stranded cable mm2 1 25 2 3 5 5 5 8 14 22 38 60 150 200 Tensile force N 50 100 150 200 250 350 350 Tensile force ...
Page 31: ... from being applied to the connector form the cables into a bent position in advance before inserting crimp terminals Caution Do not pull on the cable after inserting the crimp contact as it may produce an unexpected load that can damage the connector OK Forming the cable into a bent shape after insertion 1 Form the cables into a bent shape 2 Insert crimp terminals after completing 1 Not OK ...
Page 32: ...he connector form the cables into a bent shape in advance before inserting crimp terminals Caution If an unexpected load is applied when the cable is not secured the connector will be loaded The lock may break and in the worst case scenario the cable may come out OK When an unexpected load is applied the secured section receives it Secured Section When an unexpected load is applied the connector r...
Page 33: ... 36 5 7 3 Removal of Cables When Moving Equipment Remove the cables when moving equipment Caution When moving device with cables connected the cable may receive an unexpected load the lock may break and in the worst case the cable may come out Moving equipment while the cables are connected OK After removing the cable move the equipment Not OK ...
Page 34: ...00 PAGE 34 OF 36 5 7 4 Strip Length of Capture Cable When using a capture cable ensure that the strip length is long enough to avoid loading the connector when the cable is swung Caution If the strip length is short the connector will be unexpectedly loaded when the cable is swung In the worst case the cable may come out OK Not OK ...
Page 35: ...th of 10 mm Reference product AM 10 Width 10 mm from TOYOGIKEN 5 9 Applicable probe and usage In voltage measurement insert a probe through the hole of the cover case and contact it with the crimp contact or the spring It is recommended to use the attachment type contact pin diameter 1 mm length 48 mm for the tip of probe Example of use Test lead L9207 10 made by Hioki Contact pin L4933 made by Hi...
Page 36: ...ools Recommended crimping tool Applicable cable size mm2 Remarks 5N18 made by Maxell Izumi Product Company 1 25 2 5 5 8 Manual REC Li14S made by Maxell Izumi Product Company 2 5 5 8 14 Electric 214A made by Maxell Izumi Product Company 2 5 5 8 14 Manual REC Li60S made by Maxell Izumi Product Company 5 5 8 14 22 38 60 Electric 9H 60 made by Maxell Izumi Product Company 14 22 38 60 Manual REC Li150 ...
Page 37: ...version 1 2019 12 05 E Kido 3 1 corrections 5 3 1 corrections 5 3 4 additions 5 7 corrections 5 3 1 to 5 7 4 additions 2 2020 7 10 H SATO 5 3 2 3 additions 5 3 3 3 corrections 3 2020 10 16 S MATSUZAKI Cover corrections table of contents corrections 2 3 1 3 2 4 1 corrections 5 1 Table 2 corrections 5 3 1 corrections 5 3 2 3 corrections 5 3 4 1 5 3 4 2 corrections 5 3 4 3 5 3 4 5 additions 5 4 1 cor...