


Installing Core Switch 2/64 FRUs
131
Core Switch 2/64 V4.1 Installation Guide
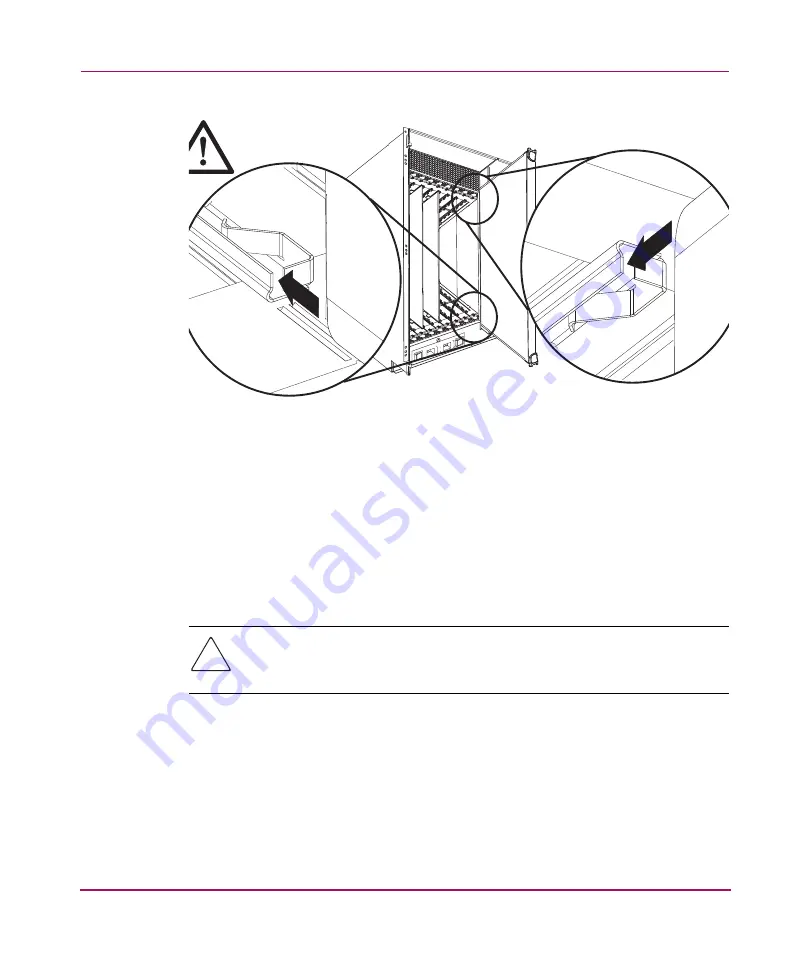
Figure 29: Alignment guides in card slots
d. Close the ejectors by rotating the black handles toward the center of the
16-port card or filler panel until the ejectors lock. The levering action of
the handles seats the 16-port card or filler panel in the slot.
■
For a filler panel that does not have ejector handles, align the flat side of
the filler panel inside the upper and lower rail guides in the slot, and slide
the filler panel into the slot, with slight pressure to the left, until it is
firmly seated.
Caution:
Do not force the card or filler panel in the slot. If the 16-port card or
filler panel does not slide in easily, adjust the alignment with the rail guides
accordingly.
4. Verify that the 16-port card was installed properly as follows:
a.
Check that the 16-port card power status LED shows a steady green light
(it may require a few seconds to turn on).
b. Check that the 16-port card is firmly seated. The front of the 16-port card
should be flush with adjacent 16-port cards or filler panels.
SHR-252
Summary of Contents for AA-RS2WC-TE
Page 12: ...Contents 12 Core Switch 2 64 V4 1 Installation Guide ...
Page 34: ...Overview 34 Core Switch 2 64 V4 1 Installation Guide ...
Page 88: ...Installing and Configuring the Core Switch 2 64 88 Core Switch 2 64 V4 1 Installation Guide ...
Page 168: ...Running Routine Operations 168 Core Switch 2 64 V4 1 Installation Guide ...
Page 198: ...Technical Specifications 198 Core Switch 2 64 V4 1 Installation Guide ...
Page 224: ...Setting Up and Configuring Modems 224 Core Switch 2 64 V4 1 Installation Guide ...


