


Chapter 3
Preparing Superdome for Booting
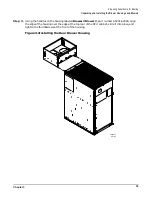
Attaching Side Skins and Blower Side Bezels
36
Attaching Side Skins and Blower Side Bezels
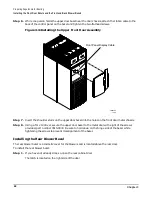
There are two cosmetic side panels that affix to the left and right sides of the Superdome system. In addition,
there are bezels that cover the sides of the blowers. (Later in the installation process you will be given
instructions on how to attach front and back blower bezels.)
IMPORTANT
Be sure to attach the side skins at this time in the installation sequence, especially if the
Superdome is to be positioned at the end of a row of cabinets or between cabinets.
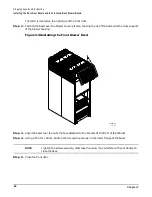
Attaching the Side Skins
There are four side skins: two front-side skins and two rear-side skins.
NOTE
For Superdome 64 Way systems, you attach side skins to the left side of Cabinet 0 and the right
side of Cabinet 1.
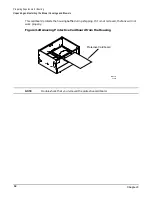
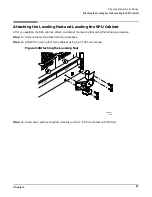
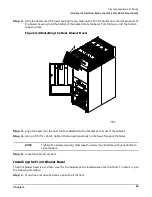
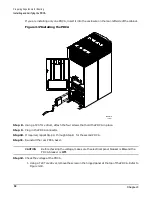
To attach the side skins:
Step 1. Remove the side skins from their boxes and protective coverings, if you have not already done so.
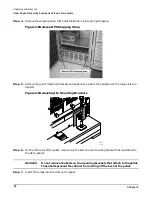
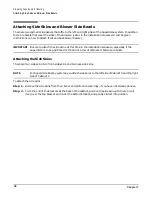
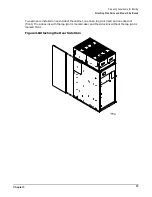
Step 2. From the end of the brackets at the back of the cabinet, position the side skin with the lap joint
(rear) over the top bracket and under the bottom bracket, and gently slide it into position.
Summary of Contents for 9000 Superdome
Page 8: ...Contents 8 ...
Page 9: ...9 Preface ...
Page 21: ...21 IEC 60417 IEC 335 1 ISO 3864 IEC 617 2 International Symbols ...
Page 22: ...22 Figure 9 Superdome Declaration of Conformity Page 1 ...
Page 23: ...23 Figure 10 Superdome Declaration of Conformity Page 2 ...
Page 24: ...24 ...
Page 32: ...Chapter 1 Introduction Installation Warranty 8 ...
Page 130: ...Chapter 4 Verifying and Booting Superdome Enabling iCOD 106 ...
Page 172: ...Appendix A hp Server rx2600 Support Management Station Configuring the SMS 148 ...
Page 184: ...Appendix C Superdome LAN Interconnect Diagram 160 ...
Page 193: ...Appendix F 169 F A180 Support Management Station ...
Page 230: ...Appendix G Connecting Multiple SPU Cabinets Connecting Cables 206 ...
Page 256: ...Appendix H JUST Exploration Tool Error Conditions 232 ...