1
HP 640 RPS/EPS Quick Setup Guide and Safety/Regulatory Information
For more detailed instructions and information to set up your 640 RPS/EPS and connect it with supported switches, view or
download the
HP 640 RPS/EPS Installation and Power Setup Guide
at
www.hp.com/support/manuals
. Search for the HP 640
RPS/EPS under the Networking section.
1.
Unpack and check included parts.
■
HP 640 RPS/EPS
■
Accessory kit (installation hardware)
■
Documentation kit
2.
Prepare for installation. To avoid personal injury or product damage, review the “HP 640 RPS/EPS Safety and
Regulatory Information” on page 3.
3.
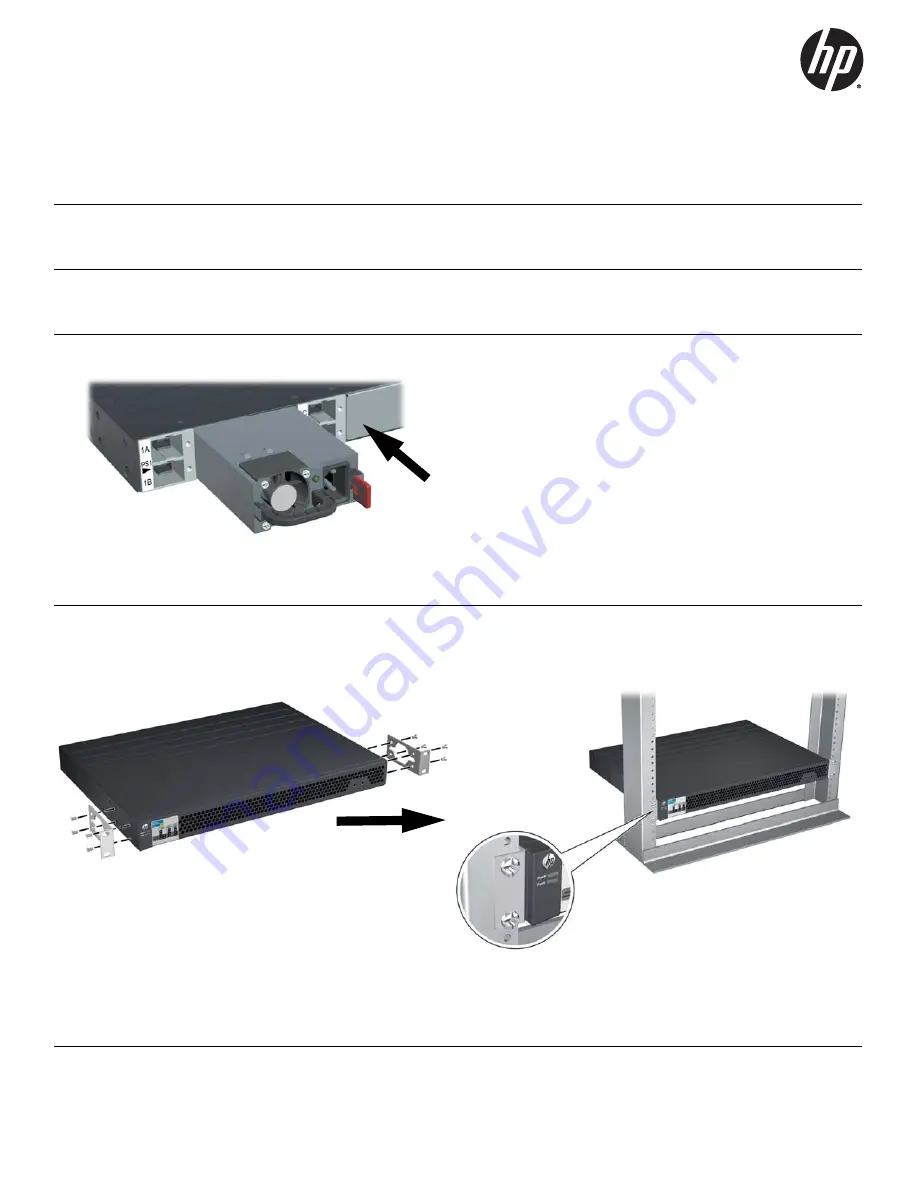
Install one or more compatible HP X331 or HP X332 power supplies into any of the slots in the 640 RPS/EPS.
Caution:
Use a power supply that is compatible with the HP 640.
Incompatible Power Supplies are mechanically keyed to prevent accidental
insertion into the HP 640. Forcing an incompatible Power Supply into the HP
640 may cause permanent damage to the RPS/EPS. See “HP 640 RPS/EPS
Product Specifications” on page 5 for the identities of the compatible power
supplies.
When a compatible Power Supply is fully inserted, the maroon colored latch
will “click” into position to ensure that the Power Supply is correctly secured.
If the Power Supply is not easily pushed into the fully inserted position, re-
verify that a compatible Supply is being used, and re-attempt insertion.
HP produces a variety of Power Supplies in the form factor used in the HP 640
RPS/EPS. Some of these Power Supplies use voltages and power levels that
are not compatible with the HP 640. Verify that the Power Supply you have
chosen is compatible with the HP 640.
4.
Install the 640 RPS/EPS Hardware.
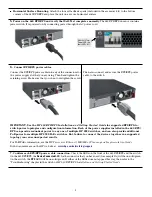
Mount the 640 RPS/EPS in a rack or on a horizontal surface.
■
Rack Mounting:
Use a #1 Phillips (cross-head) screwdriver to attach the accessory kit brackets to the 640 RPS/EPS
using the eight 8-mm M4 screws. Then use the four number 12-24 screws to secure the brackets to the rack.
Note:
A rail kit is available for mounting the 640 RPS/EPS in 4-post racks and equipment cabinets by using the HP X410
Rail Kit (J9583A). For more information, see the
HP 640 RPS/EPS Installation and Getting Started Guide
, and the
documentation that is included with the kit.
Summary of Contents for 640 RPS/EPS
Page 7: ......


