


Display assembly
Full hinge-up displays are not spared. Displays are spared only at the subcomponent level.
Before removing the display panel, follow these steps:
1.
Prepare the computer for disassembly (
Preparation for disassembly on page 33
).
2.
Remove the optical drive (see
3.
Remove the bottom cover (see
).
4.
Remove the battery (see
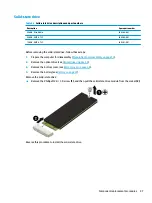
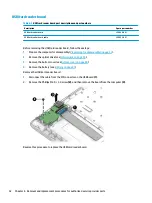
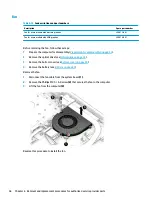
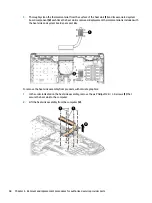
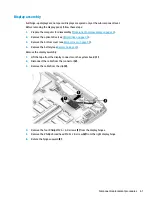
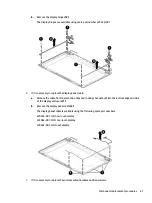
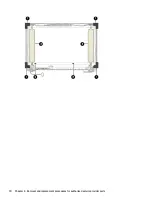
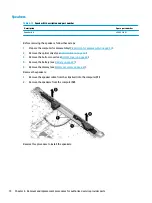
Remove the display assembly:
1.
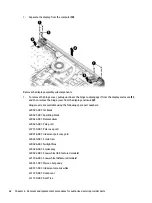
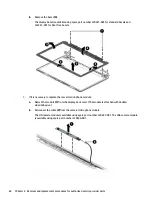
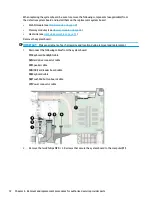
Lift the tape from the display connector on the system board (1).
2.
Disconnect the cable from the connector (2).
3.
Remove the cable from the clip (3).
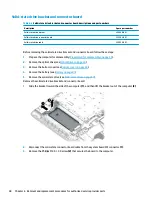
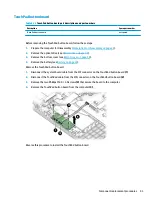
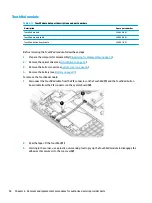
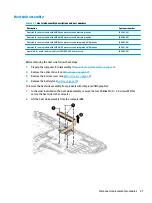
4.
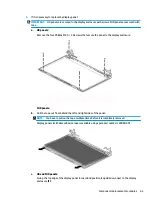
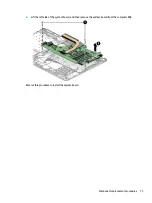
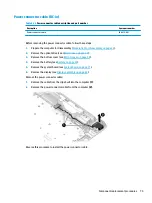
Remove the four Phillips M2.5 × 6.0 screws (1) from the display hinges.
5.
Remove the Phillips broad head M2.0 × 2.0 screw (2) from the right display hinge.
6.
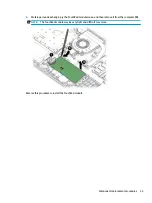
Rotate the hinges upward (3).
Component replacement procedures
61
Summary of Contents for 15 Series
Page 1: ...Maintenance and Service Guide HP 15 Laptop PC ...
Page 4: ...iv Important Notice about Customer Self Repair Parts ...
Page 6: ...vi Safety warning notice ...
Page 10: ...x ...
Page 52: ...42 Chapter 6 Removal and replacement procedures for authorized service provider parts ...
Page 80: ...70 Chapter 6 Removal and replacement procedures for authorized service provider parts ...