

Remember, you may be charged for a service call, if a problem with your appliance is caused by incorrect installation and misuse.
Refer to the User Instructions to see the details of the installation location and the procedures.
●
Wiring and piping may vary with model.
●
It may be necessary to remove both doors if the appliance will not fit through a doorway.
Installation Guide
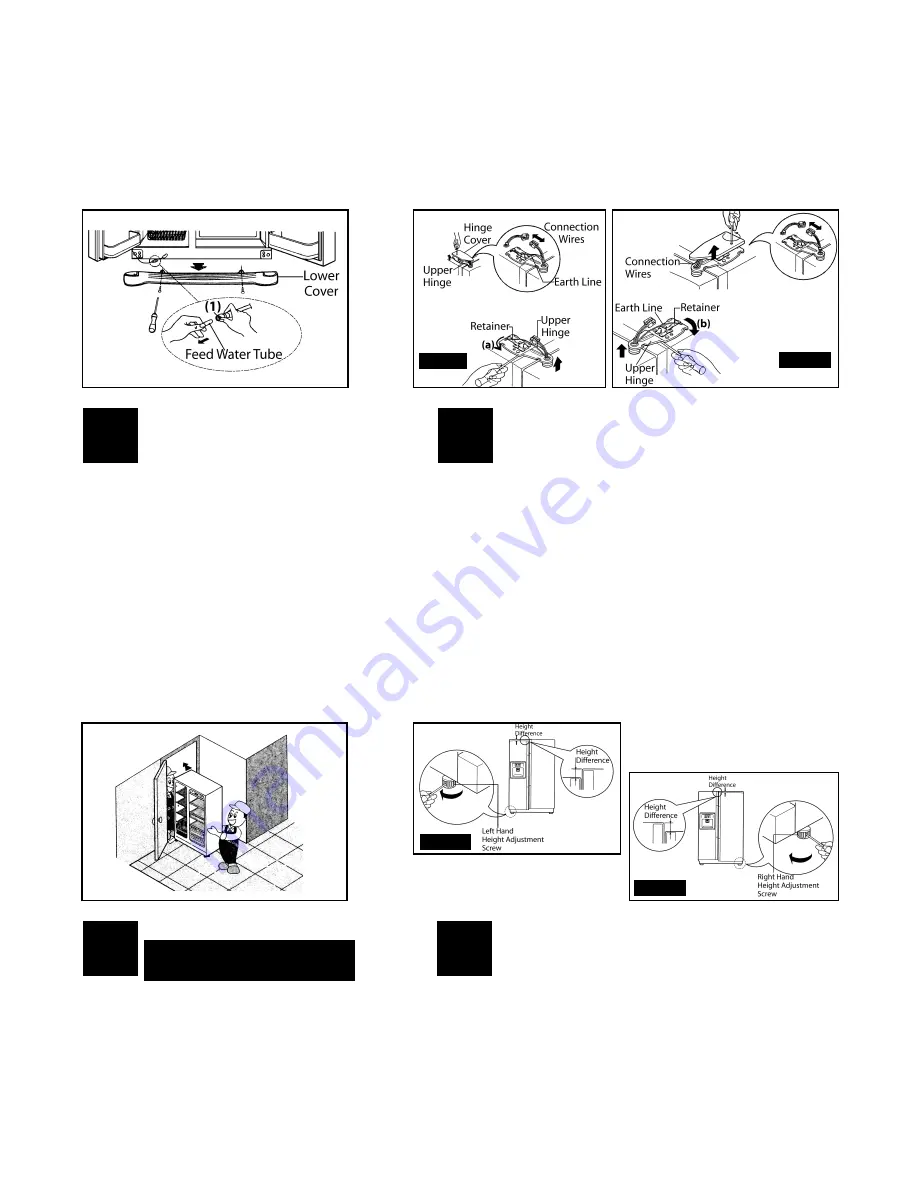
Remove the lower cover and pull out
the feed water tube, while pressing
area (1).
NOTE: Cut away any tube end that is
misshapen or worn.
1
Lift the door off the lower hinge.
2
Carry the doors through the access
door and lay them down on suitable
material eg. the original packaging.
Pass the appliance through the access
door, in its upright position.
Replace both doors by carrying out
directions in Step 2 (above) in reverse
order
3
If the doors are misaligned, they will
not close correctly and performance
will be affected. Realign as follows:
The doors can be levelled by inserting
a flat blade (- type) screwdriver into
the groove of the height adjusting
screw and rotating it, in a clockwise
direction, to the arrow.
●
If the freezer compartment door is lower
adjust the left hand adjustment screw.
●
If the fridge compartment door is lower
adjust the right hand adjustment screw.
4
NOTE: You may need assistance to do
this:
NOTE:
●
Support doors at all times, ensuring
they do not fall forward, as this
could cause injury or damage.
●
Take care not to damage the feed
water tube when laying down the
Freezer compartment door.
Remove the hinge cover and
separate all connection wires, except
for the earth line.
Remove the retainer by rotating it
Freezer = anti-clockwise (a).
Fridge = clockwise (b).
Then remove the upper hinge by
lifting up.
Ensure the Freezer compartment
door is lifted enough for the feed
water tube to be completely pulled
out.
Freezer
Freezer
Fridge
Fridge
NOTE: You may need assistance to do
this:
WARNING!: Your appliance is heavy
and care must be taken when moving
it.