Dissolved Oxygen Calibration & Measurement
The
will start blinking until the reading stabilizes.
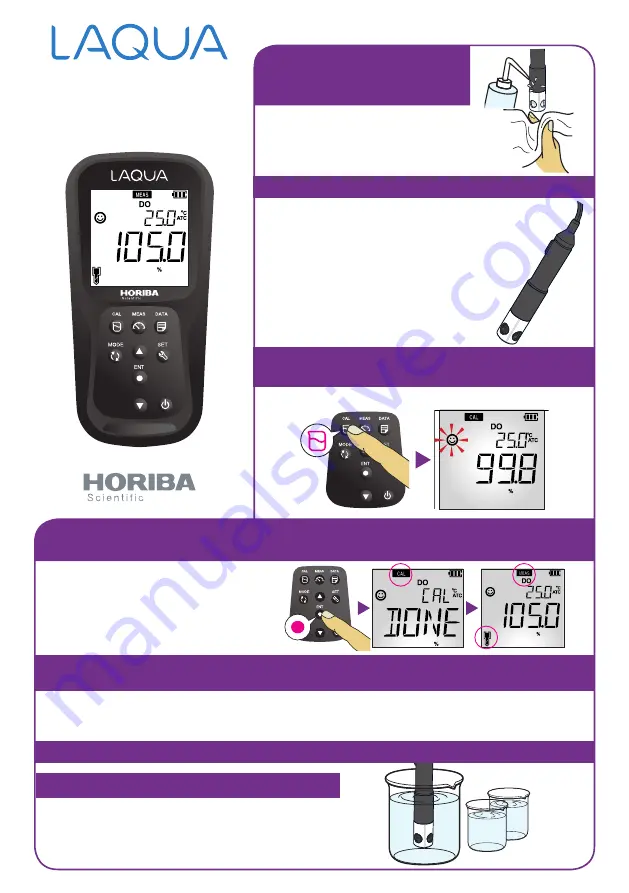
1. Rinse the DO electrode
with clean water and blot
dry with lint-free tissue.
2. Hold the DO electrode still in clean air.
3. Press CAL button on the meter to switch
to calibration mode.
4. Press ENT button to confirm the DO reading. To abort calibration, press
MEAS button.
Perform air calibration in clean air at
a location not subjected to dramatic
temperature change, rain, or direct wind.
Two calibration modes are available in the
DO meter:
1. Saturated oxygen concentration mode (%)
2. Dissolved oxygen measurement mode
(mg/L)
The default mode is the former. Press MODE
button to switch to the latter.
Make sure that the membrane and
temperature sensor of the DO electrode are
fully immersed in the sample.
5. Immerse the DO electrode in zero solution (5% sodium sulfite) and repeat step
nos. 3 - 4 to perform zero calibration (optional).
6. Rinse the DO electrode with clean water and blot dry with lint-free tissue.
7. Immerse the DO electrode in sample.
Make sure that the membrane and temperature sensor of the DO electrode are fully immersed in the
zero solution.
In step no. 3, CAL button must be pressed twice so that the meter will switch to zero calibration mode.
Quick Guide
LAQUA 200 Series
DO210/220 & PD210/220
Handheld Meters
www.horiba-laqua.com
The meter will switch to measurement
mode and the electrode icon will
appear on the screen.
DO210
Press
Press
There should be no water droplets on
the membrane and temperature sensor.


