5 - 70
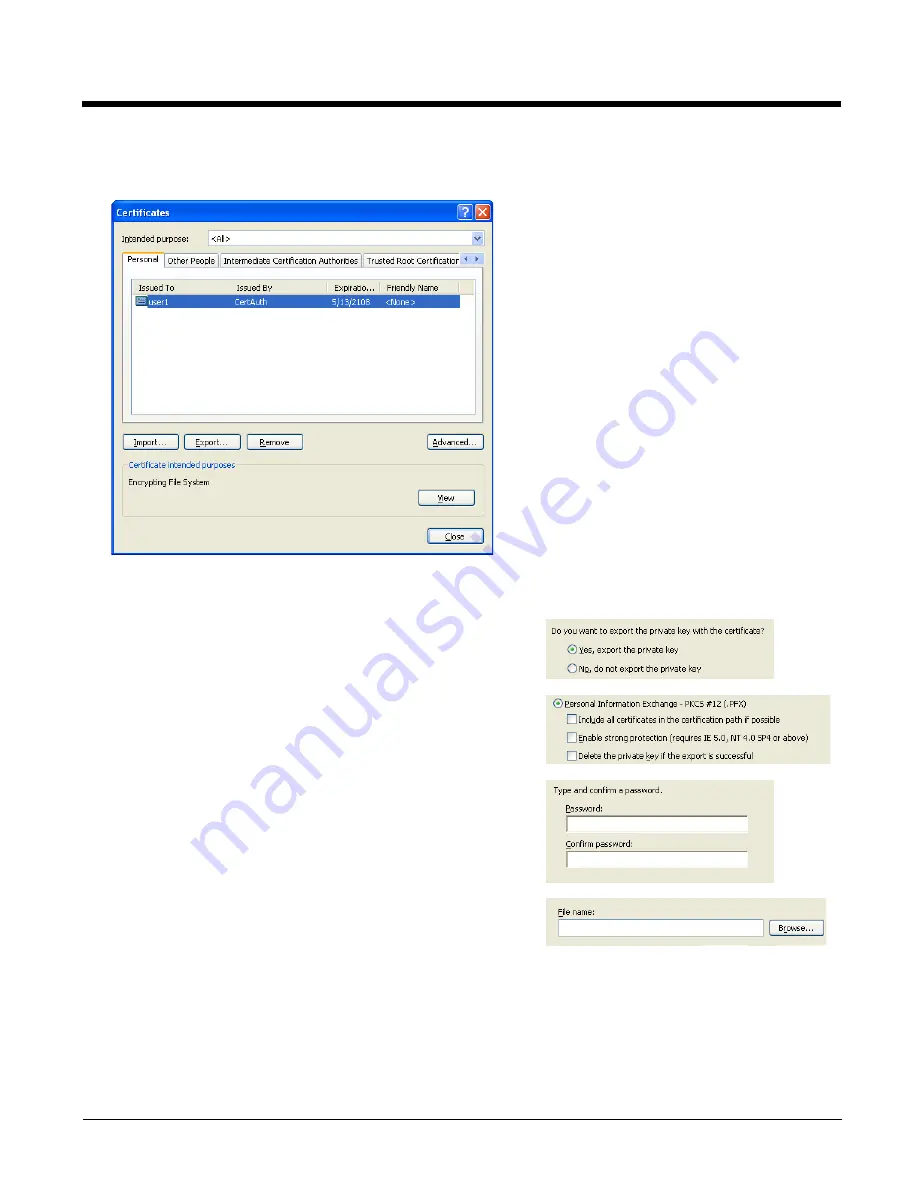
Export a User Certificate
Select
Tools > Internet Options > Content
and click the
Certificates
button.
Make sure the
Personal
tab is selected. Highlight the certificate and click the
Export
button.
The Certificate Export Wizard is started
Click Finish and OK to close the Successful Export message.
Locate the User Certificate in the specified location. Copy to the Thor VX9.
Install a User Certificate
After generating and exporting the user certificate, copy it from the PC to the Thor VX9.
Locate the certificate file (it has a .PFX extension) and double-click on it. Follow the
Certificate Wizard
instructions below.
Select
Yes, export the private key
and click Next.
Uncheck
Enable strong protection
and check
Next
. The certificate
type must be PKCS #12 (.PFX).
When the private key is exported, you must enter the password, con-
firm the password and click
Next
. Be sure to remember the password
as it is needed when installing the certificate.
Supply the file name for the certificate. Use the
Browse
button to
select the folder where you wish to store the certificate. The certificate
is saved with a .PFX extension.
Summary of Contents for Thor VX9
Page 11: ...9 Technical Assistance 8 1 Limited Warranty 8 1 ...
Page 12: ...10 ...
Page 22: ...2 8 ...
Page 42: ...3 20 ...
Page 172: ...5 110 Info This tab displays SIM card modem and system Information ...
Page 178: ...5 116 Start OneClick Internet from the Windows Program Menu or double tap the desktop icon ...
Page 188: ...6 8 ...
Page 197: ...Back Cvr 1 ...


