


PX4ie and PX6ie High Performance Printer User Guide
89
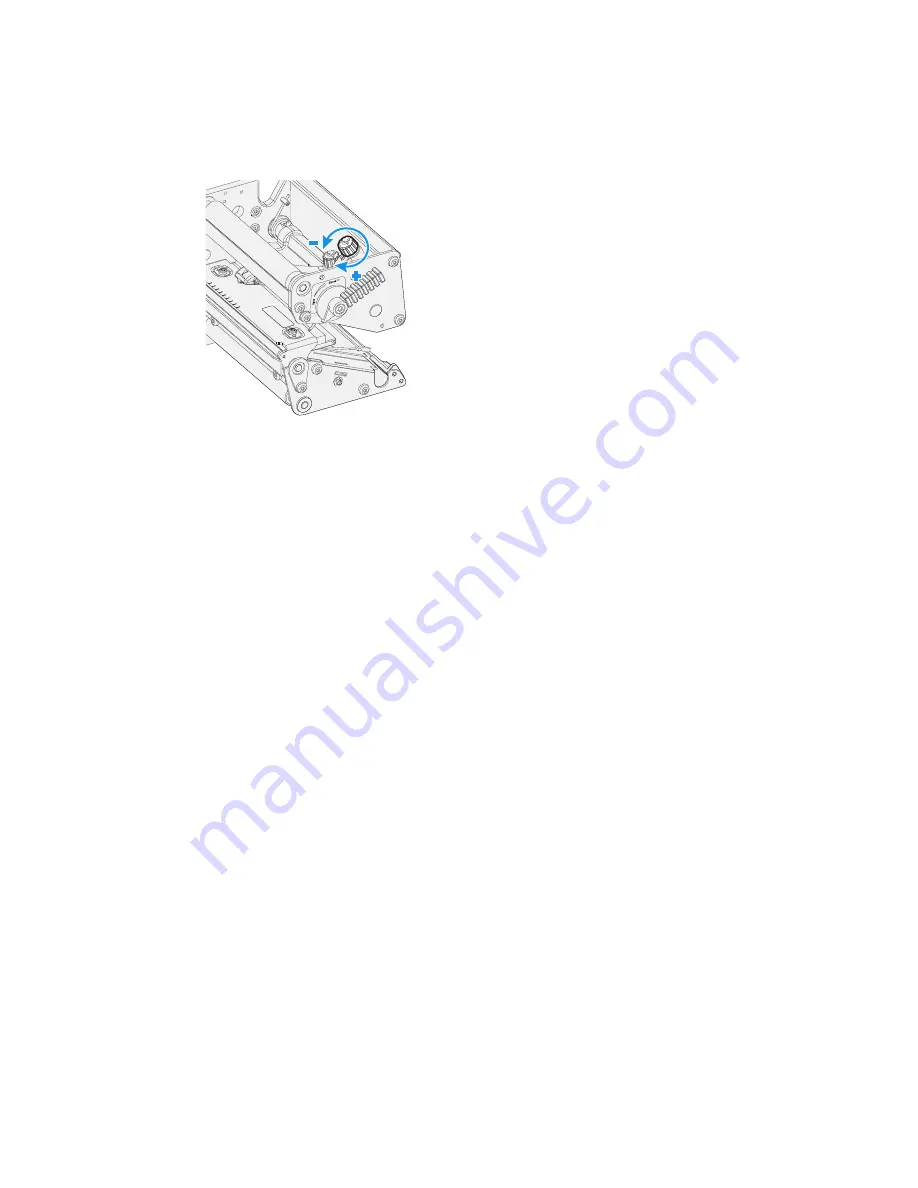
To adjust the printhead pressure
1.
Turn the adjustment knob clockwise for more pressure and a darker printout
(+) or counter-clockwise for less pressure and a lighter printout (-).
2.
Print test labels to check the print quality.
Note:
To return the printhead pressure to the factory default setting, tighten the knob (+) as
much as you can and then loosen it (-) four full times.
Label Taken Sensor Calibration
If your printer has the optional label taken sensor or the label dispenser (which
includes the sensor), use the wizard to calibrate the sensor for your media.
Note:
For best results, calibrate the sensor each time you load media or move the printer to
a different environment. If you installed the label taken sensor module or the label
dispenser in the printer, calibrate the sensor before you begin printing.
Before you calibrate the sensor, load media and ribbon in the printer as necessary.
1. In the Main Menu, select
Wizards > Calibration > Label Taken Sensor
.
2. Follow the prompts to calibrate the sensor.
Summary of Contents for PX4ie
Page 1: ...User Guide PX4ie and PX6ie High Performance Industrial Printer ...
Page 7: ...PX4ie and PX6ie High Performance Printer User Guide v ...
Page 8: ...vi PX4ie and PX6ie High Performance Printer User Guide ...
Page 10: ...viii PX4ie and PX6ie High Performance Printer User Guide ...
Page 88: ...78 PX4ie and PX6ie High Performance Printer User Guide ...
Page 100: ...90 PX4ie and PX6ie High Performance Printer User Guide ...
Page 106: ...96 PX4ie and PX6ie High Performance Printer User Guide Graphic File Types PCX PNG GIF BMP ...
Page 107: ......