


58
RP-2001 Series Manual —
P/N 52985:D5 1/26/2017
Programming
Master Programming Level
Pressing
1
while viewing the Silenceable Screen #2 will program the selected Output as a
SYNC
MUTE
(synchronized mute) circuit. Refer to “Synchronized NAC Operation” on page 59 for a
description of synchronization.
Important
: When an Output Circuit with a mix of audible and visual devices is programmed for
Sync Mute, only the audible devices will be turned off if the Silence key is pressed or if the
Autosilence feature is enabled. The visual devices (strobes, etc.) will continue to operate.
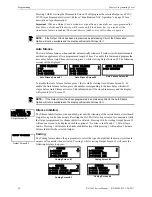
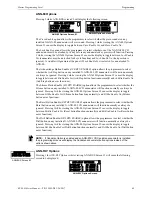
Auto Silence
The Auto Silence feature, when enabled, automatically silences all main circuit board silenceable
notification appliances after a programmed length of time. To enable this feature and program the
time delay before Auto Silence activation, press
2
while viewing Output Screen #2. The following
screens will be displayed:
To disable the Auto Silence feature, press
1
for
No
while viewing Auto Silence Screen #1. To
enable the Auto Silence feature, press the number corresponding to the time delay which will
elapse before Auto Silence activates. This information will be stored in memory and the display
will return to NAC Screen #1.
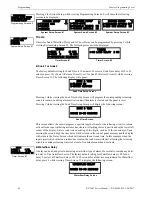
Silence Inhibited
The Silence Inhibit feature, when enabled, prevents the silencing of the selected main circuit board
Output for a period of one minute. Resetting the FACP will also be prevented for one minute while
the Output programmed for silence inhibit is activated. Pressing
3
while viewing Output Screen #2
will cause a screen to be displayed with the options
1=No Silence Inhibit
and
2=1 Min. Silence
Inhibit
. Pressing
1
will disable the Silence Inhibit feature while pressing
2
will enable a 1 minute
Silence Inhibit for the selected Output.
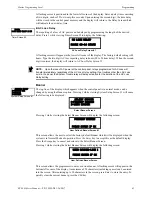
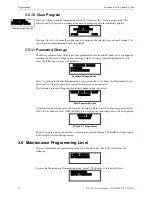
Coding
The Coding feature allows the programmer to select the type of output that the main circuit board
outputs will generate when activated. Pressing
1
while viewing Output Screen #3 will cause the
following displays to appear:
NOTE:
If the Output Circuit has been programmed as a Releasing Circuit, the Silenceable
Option will not be available and the display will indicate
N/A
next to it.
AUTO SILENCE
1=NO
2=5 MINUTES
3=10 MINUTES
AUTO SILENCE
1=30 MINUTES
Auto Silence Screen #1
AUTO SILENCE
1=15 MINUTES
2=20 MINUTES
3=25 MINUTES
Auto Silence Screen #3
Auto Silence Screen #2
NOTE:
If the Output Circuit has been programmed as a Releasing Circuit, the Auto Silence
Option will not be available and the display will indicate
N/A
next to it.
OUTPUT #
1=SILENCEABLE YES
2=AUTO SILENCE NO
3=SIL INHIBITED NO
Output Screen #2
OUTPUT #1=CODING
Output Screen #3
CODING
1=STEADY
2=MARCH TIME
3=CALIFORNIA
Coding Screen #1
CODING
1=TEMPORAL
2=FUTURE USE
3=FUTURE USE
Coding Screen #2
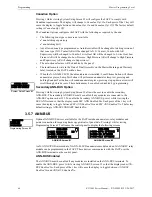
CODING
1=CROSS ZONE
2=SYNC SYSTEM SENSOR
3=SYNC WHEELOCK
Coding Screen #3
CODING
1=SYNC GENTEX
2=SYNC FARADAY
3=SYNC AMSECO
Coding Screen #4