


62
ES-50X Series Manual —
P/N LS10129-000FL-E:D 4/26/2021
Programming
Master Programming Level
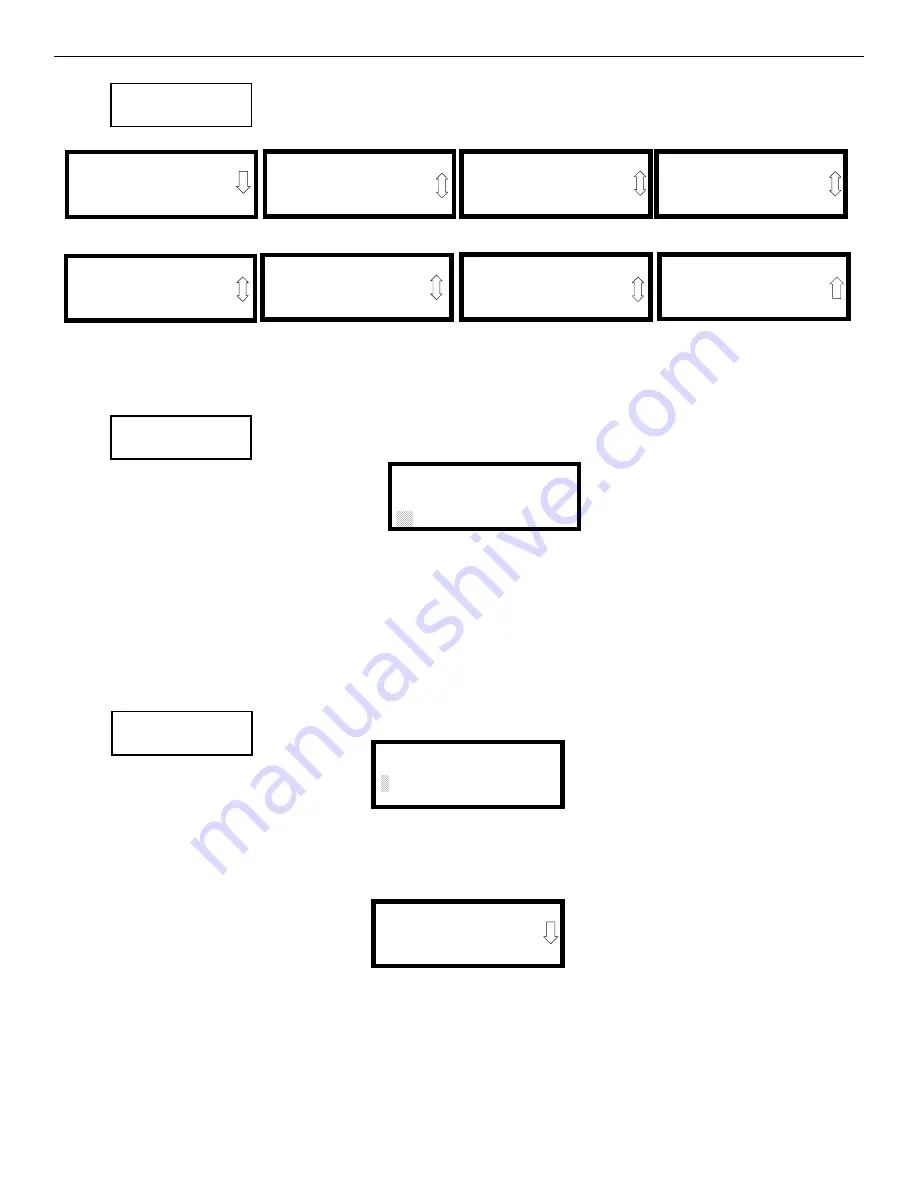
Pressing
2
while viewing the Noun/Adjective Screen will cause the following screen(s) to be displayed. Note
that the keypad
down
arrow key must be pressed to see all the Noun screens. Press the number corresponding to
the noun that is to be used as a descriptor for the location of the monitor module currently being programmed.
Pressing
3
or
4
while viewing the Noun/Adjective Screen will display screens similar to the previous Adjective and Noun Screens. The new
screens will list Custom Adjectives and Nouns which have been programmed into the control panel using the FS-Tools utility.
Description
The Description selection allows the programmer to enter additional information about the monitor module cur-
rently being programmed. This information will be displayed as part of the device label on the LCD display.
Pressing
2
while viewing Edit Monitor Screen #5 will cause the following screen to be displayed:
A flashing cursor will appear at the first asterisk to the left. The programmer can enter additional descriptive information about the device
being programmed. This information will appear on the LCD display along with the standard device label information.
A maximum of 20 characters (including spaces) can be entered. To enter alphanumeric characters from the keypad, repeatedly press the
appropriate key until the desired character is displayed in the first position. For example, to enter the letter
B
, press the
2 (ABC)
key three
times to toggle through the characters
2
,
A
and
B
. Press the right arrow key to move the cursor one position to the right and repeat the process
to enter the next character. To enter a space, press the
* (QZ)
key four times until a blank appears in the desired position. When all characters
have been entered, press the Enter key to store the information. The display will return to the Edit Monitor Screen #4, displaying the new
information at the bottom of the screen.
Edit Module Screen for Control Modules
The programmer can change a module’s existing or factory default programming by pressing
3
in the Modules
Screen. The following screen will be displayed:
A flashing cursor will appear in the position of the first asterisk to the left.
The programmer keys in the three digit module address, such as
002
. When the last digit is keyed-in, if the selected address corresponds to a
control
module, a screen displaying information about the control module with the selected address will be displayed as illustrated in the fol-
lowing:
In the preceding example:
Normal - indicates that the module with the selected address is physically installed on the SLC and communicating with the control
panel (enabled)
ugh.<ADJ><NOUN> - represents the adjective and noun, which have been programmed, describing the location of the displayed
device
Control - indicates that the selected module is a control module
S or * - represents Silenceable (S) or Nonsilenceable (*)
1=STANDARD ADJECTIVE
2=STANDARD NOUN
3=CUSTOM ADJECTIVE
4=CUSTOM NOUN
Noun/Adjective Screen
44444444444444444444
1=BASEMENT
2=BOILER RM
3=CLASSROOM
Noun Screen #1
44444444444444444444
1=CLOSET
2=CORRIDOR
3=ELECTRIC RM
Noun Screen #3
44444444444444444444
1=ELEVATOR
2=ENTRANCE
3=FLOOR
Noun Screen #5
44444444444444444444
1=GARAGE
2=HALLWAY
3=HVAC RM
Noun Screen #7
44444444444444444444
1=KITCHEN
2=LOBBY
3=OFFICE
Noun Screen #2
44444444444444444444
1=STAIRWAY
2=STOREROOM
3=WING
Noun Screen #6
44444444444444444444
1=PATIENT
2=RESTROOM
3=ROOM
Noun Screen #4
44444444444444444444
1=ZONE
Noun Screen #8
EDIT MONITOR
1=NOUN/ADJECTIVE
2=DESCRIPTION
44444444444444444
Edit Monitor Screen #5
DESCRIPTION 1M012
NOUN/ADJECTIVE
44444444444444444444
Noun/Adjective Screen
MODULES
1=ADD
2=DELETE
3=EDIT
Modules Screen
EDIT MODULE
ENTER MODULE ADDRESS
444
Edit Module Screen
NORMAL CONTROL
<ADJ><NOUN>
ZNNN
4
44
1M002
Edit Control Screen #1