


Attention
•
After the modules are grouped, you can click the
Lock all slaves
button to lock the modules at the current
configured address. You can click the
Unlock all slaves
button to unlock the locked modules.
•
To add or delete a module in a slave that is locked and does not have any reserved memory area, you must
unlock the other slaves. However, to modify the network configuration during runtime without causing a break
in the V0 process data delivery to other slave devices, you must lock the other slaves.
•
To add or delete a slave or a module that is locked and has a reserved memory area, you do not have to unlock
the particular slave. The length of the reserved memory is automatically adjusted with the memory area of the
module or the slave that you have added or deleted. In addition, this does not cause any break in the V0
process data delivery to other slaves.
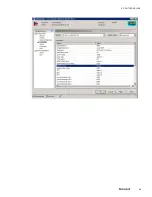
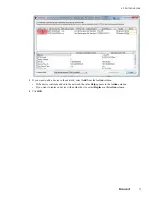
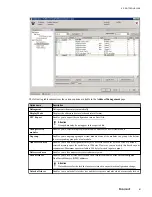
The following figure displays a sample virtual tag name for the grouped modules.
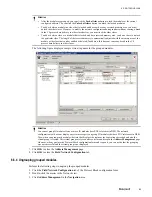
Attention
You cannot group IO modules if one or more IO modules have PDC references in DSB. The network
configuration tool does not display any error message if you group IO modules that have PDC references in DSB.
Also, when you group such modules the status bar displays the status as save operation succeeded and also the
virtual group is created. This virtual group exists even after you close and reopen the
Address Management
page.
However, when you close the Protocol Block configuration form and reopen it, you can notice that the grouping
was not successful and the virtual group is not displayed.
7. Click
OK
to close the
Address Management
page.
8. Click
OK
to close the
Field Network Configuration
tab.
6.6.4 Ungrouping grouped modules
Perform the following steps to ungroup the grouped modules.
1. Click the
Field Network Configuration
tab of the Protocol Block configuration form.
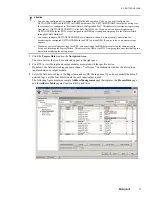
2. Double-click the master in the Network view.
3. Click
Address Management
in the
Navigation
area.
6 PROTOCOL BLOCK
83
Summary of Contents for Experion PKS
Page 1: ...Experion PKS PROFIBUS Gateway Module User s Guide EPDOC XX88 en 431E June 2018 Release 431 ...
Page 8: ...CONTENTS 8 www honeywell com ...
Page 10: ...1 ABOUT THIS GUIDE 10 www honeywell com ...
Page 32: ...4 PROFIBUS GATEWAY MODULE PGM INSTALLATION 32 www honeywell com ...
Page 58: ...5 PROFIBUS GATEWAY MODULE PGM BLOCK 58 www honeywell com ...
Page 69: ...6 PROTOCOL BLOCK 69 ...
Page 103: ...5 Click OK 6 PROTOCOL BLOCK 103 ...
Page 110: ...6 PROTOCOL BLOCK 110 www honeywell com ...
Page 183: ...PDC Details tab Figure 6 Detail Display of PDC Details tab 7 DEVICE SUPPORT BLOCK DSB 183 ...
Page 186: ...7 DEVICE SUPPORT BLOCK DSB 186 www honeywell com ...
Page 231: ...9 PROFIBUS I O MODULE PIOMB FUNCTION BLOCK 231 ...
Page 232: ...9 PROFIBUS I O MODULE PIOMB FUNCTION BLOCK 232 www honeywell com ...
Page 236: ...10 PROFIBUS GATEWAY MODULE PGM CONFIGURATION EXAMPLE 236 www honeywell com ...
Page 264: ...13 PROFIBUS GATEWAY MODULE PGM TROUBLESHOOTING 264 www honeywell com ...


