PCB0001C-01-BHP-PDII0614
Armchair Programming
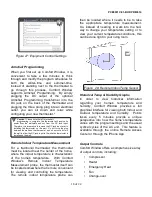
When you first set up Comfort Window, it is
convenient to take a few minutes to think
through and modify the program schedules for
both the winter-time and summer-time.
Instead of standing next to the thermostat to
go through this process, Comfort Window
supports Armchair Programming. By simply
plugging the DC output of the optional
Armchair Programming transformer into the
DC jack on the back of the thermostat and
plugging the three prong plug into an electrical
outlet, you can sit down and relax while
configuring your new thermostat.*
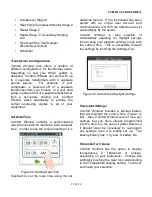
Remote Indoor Temperature Measurement
For a traditional thermostat, the thermostat
must be located near the center of the home,
where the indoor temperature is characteristic
of the home's temperature. With Comfort
Window's Remote Indoor Temperature
Measurement probe, the thermostat itself can
be located somewhere that is more convenient
for viewing and controlling the temperature.
The remote indoor temperature probe can
then be located where it needs to be to take
the appropriate temperature measurement.
So, instead of needing to walk into the hall-
way to change your temperature setting or to
view your current temperature conditions, this
can be done right in your living room.
Historical Temp & Humidity Graphs
In order to view historical information
regarding your home's temperature and
humidity, Comfort Window provides a full
graphical interface for viewing both Indoor and
Outdoor temperature and humidity. Points
taken every 5 minutes provide a unique
perspective into how the home's temperature
varies with the program settings and the usual
cyclical cycles of the AC unit. This feature is
available through the online Remote Access
Center or through the iPhone App.
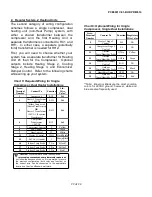
Output Controls
Comfort Window offers a comprehensive array
of output controls, including:
•
Compressor
•
Heater
•
Emergency Heat
•
Fan
•
Change-over
18 of 24
Figure 27: Equipment Control Settings
*
*
*Caution!
Please note that after armchair
programming is complete, the thermostat will receive its
programming is complete, the thermostat will receive its
power from the wall-plate and not from the DC jack input.
Therefore, it is imperative to remove the DC jack input prior to
installing the thermostat on the wall. Do not force the plug
between the wall and the thermostat, and do not cut a hole in
the wall to allow the DC jack input to fit while the thermostat is
installed on the wall.
Figure 28: Remote Indoor Temp Sensor


