Configuring Storage Settings
107
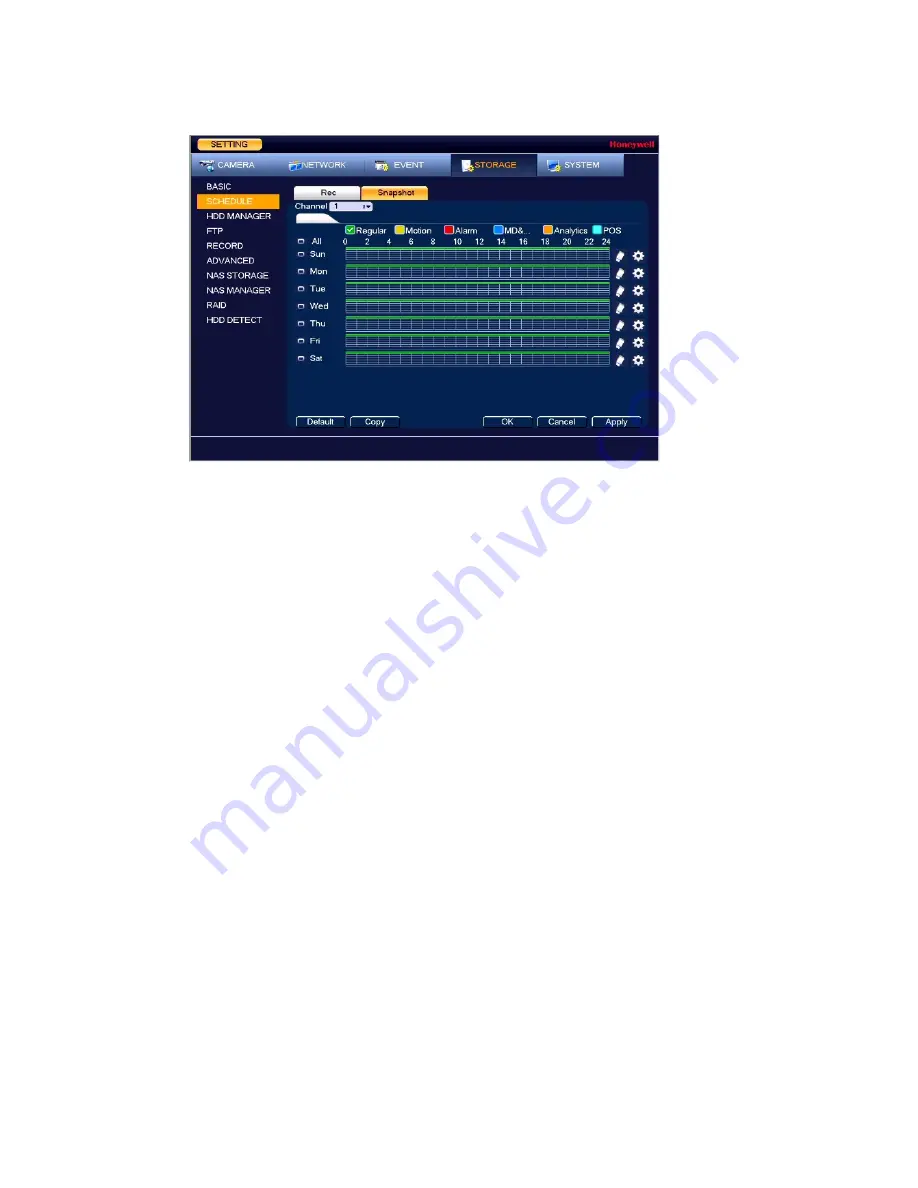
Figure 9-3 Snapshot Schedule Settings
2.
On the
Snapshot
tab, in the
Channel
box, select the channel (camera) for which you want
to configure a snapshot schedule.
3.
At the top of the scheduling table, select the check box(es) of the recording type(s) that
you want to schedule:
Regular:
The regular recording schedule is indicated by a green bar.
Motion:
The motion detection recording schedule is indicated by a yellow bar.
Alarm:
The alarm recording schedule is indicated by a red bar.
MD&Alarm:
The motion detection and alarm schedule is indicated by a blue bar.
Analytics:
The video analytics schedule is indicated by an orange bar.
POS:
The POS schedule is indicated by a light blue bar.
4.
At the left of the scheduling table, select the day(s) of the week for which you want to
configure a snapshot schedule. To configure the same schedule for all of the days at the
same time, select
All
.
5.
Click
or drag the mouse in the scheduling table to set the recording period. To erase a
recording period, click the eraser icon at the right of the table. Alternatively, for the day of
the week that you want to configure, click the gear icon at the right of the table. In the
Period
window, set up to six snapshot recording periods. To copy the settings to
additional days, select the appropriate check box(es) under
Copy
, and then click
Save
.
6.
Click
Apply
to save your settings.
7.
To
copy
the settings to additional channels, click
Copy
, select the channels to which you
want to copy the settings, and then click
OK
.
Configuring HDD Manager Settings
1.
Go to
Main Menu
SETTING
STORAGE
HDD MANAGER
.
Summary of Contents for 2450Cm Series
Page 2: ......
Page 27: ...Getting Started 13 ...
Page 28: ...Performance Series Network Video Recorder User Guide 14 ...
Page 29: ...Getting Started 15 ...


