TUXEDOW INSTALLATION AND SETUP GUIDE
7
Demo Mode
Demo Mode allows the automation and multi-media features to operate in a non-security mode for demonstration purposes
only.
Automation Mode
This mode is primarily used with the Scenes features to automate certain scene actions and does not communicate with the
control panel.
NOTE:
The Automation/Demo Mode option allows the automation and multi-media features to operate in a non-security
mode. When this option is selected, the keypad does not communicate with the control panel and any user can select
Advanced Setup screens.
Automation mode allows you to set the TUXEDOW in two conditions: Residential and Commercial. Scenes can be set to
trigger based on the status of these settings:
•
In
Residential
mode (default), the Arming options are
Home
,
Away
, and
Night.
•
In
Commercial
mode, the Arming options are
Open
,
Close
, and
Night.
Residential Mode
From the “Home” screen, touch
Setup
>
System Setup
>
CS Setup
> Enter your authorized >
Options
; the “OPTIONS and
OPERATING MODES” screen is displayed. Highlight the
Automation Mode
check box to enable the option.
To change the occupancy delay time, (the amount of time you want to allow for authorized entry or exit without causing an
alarm) select a time interval from the
Occupancy Delay
drop-down list: choose from
15, 30, 60, 120
or
225
seconds.
When done, touch
Apply
to save the settings
.
The message is displayed
“
WARNING Keypad will reset to activate changes … Do you want to save changes?”
Select
Yes
or
No.
Commercial Mode
To enter Commercial mode (automation), from the “Home” screen touch following:
Setup
>
System Setup
>
CS Setup.
Enter your authorized code and touch
Options
; the “Options and Operating Modes” screen is displayed.
Highlight the
Automation Mode
check box to enable the option, then select the
Commercial
check box.
To change the occupancy delay time, select a time interval from the
Occupancy Delay
drop-down list: choose from
15, 30,
60, 120
or
225
seconds.
When done, touch
Apply
to save the settings
.
The message displays
“WARNING Keypad will reset to activate changes … Do you want to save changes?”
Select
Yes
or
No
.
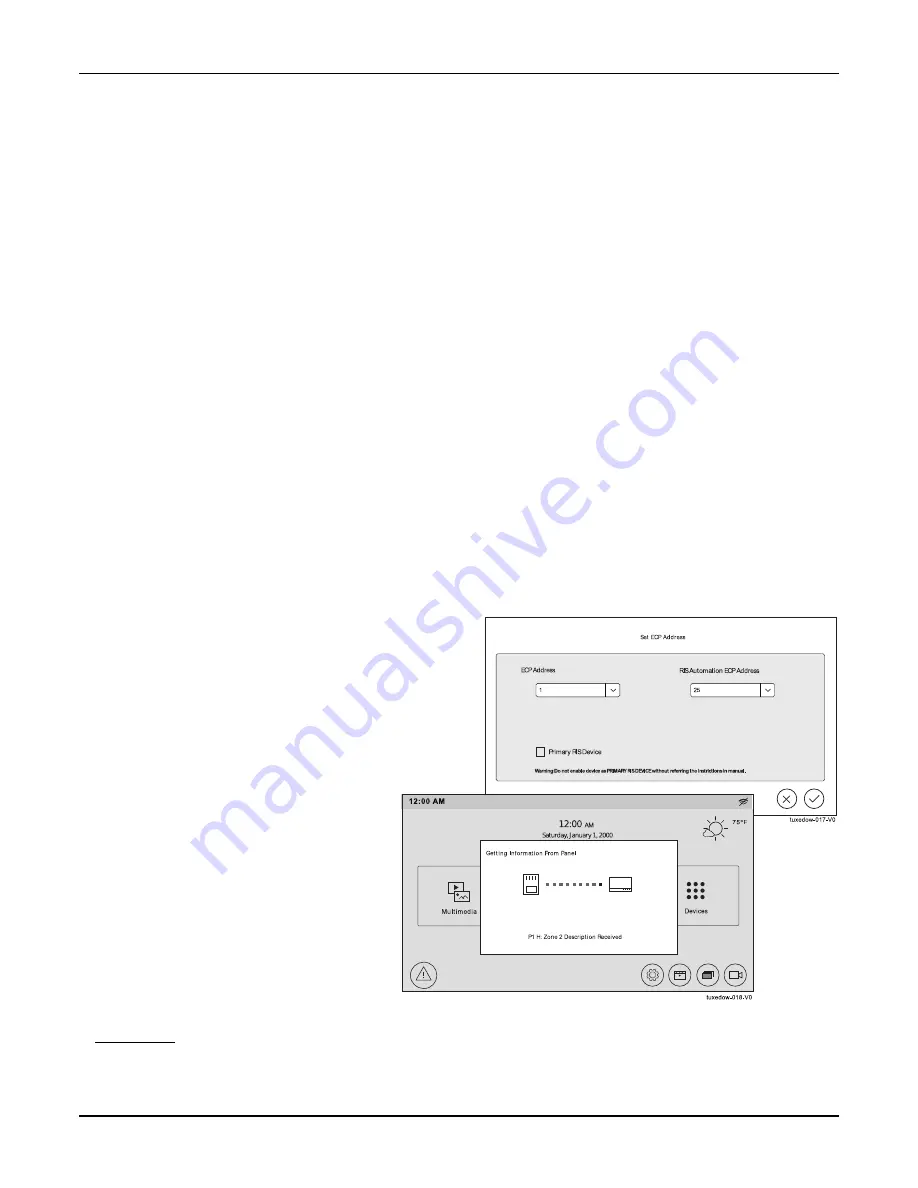
2: Set ECP Address/RIS Automation Address
Review the panels programming for the proper keypad AUI
address.
•
If the system is using only one properly programmed
TUXEDOW (in the control panel), leave the address set to
one and touch
APPLY
, for more information see the
Programming the Control Panel section. The boot-up
process continues until completion.
•
If additional TUXEDOW keypads are installed in the
system, enable each one by assigning it an address, as
described above, then power-up each
TUXEDOW one at a time, and set its address
to one of the addresses enabled in the
control panel.
•
If using Remote Services, set the RIS
Automation Address to the appropriate
RIS address used for Total Connect.
Only select the Primary RIS Device
checkbox if this is the primary device to
be enabled and Total Connect is not
incorporated.
IMPORTANT:
In order for local Z-Wave scenes to function in automation mode, your Vista system requires a system RIS
automation device (keypad or AlarmNet device). If using an AlarmNet Communicator with the RIS option enabled,
uncheck
the Primary RIS Device
feature in the TUXEDOW. Failure to do so can result in unpredictable results. Refer to the Control
Panel Installation Instructions for additional information.
Summary of Contents for TUXEDOW
Page 6: ...iv ...
Page 55: ...TUXEDOW INSTALLATION AND SETUP GUIDE 49 NOTES ...


