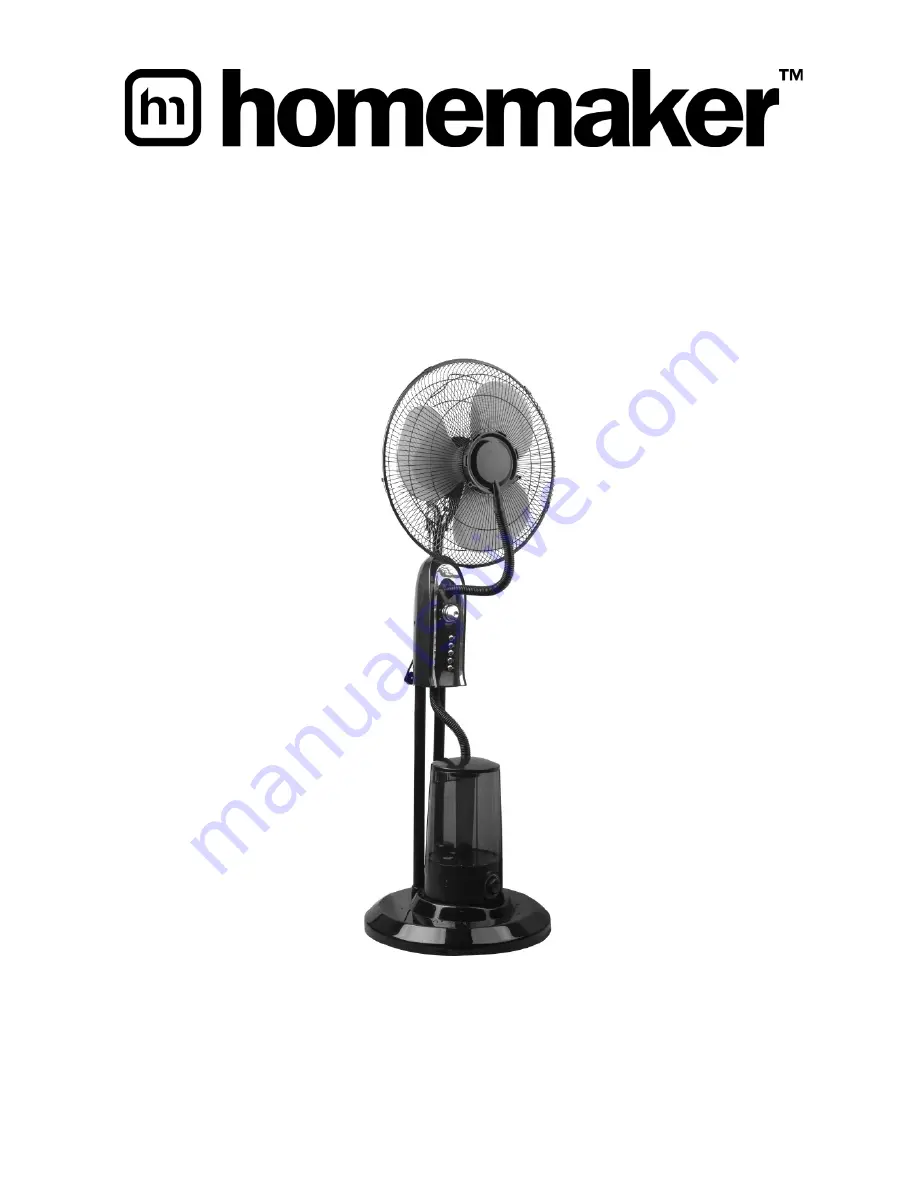
40cm Misting Fan
User Manual
Model No.: LB-FS-40
Item No.: 900285
Rev 3
Note
: The specifications and/or components of this appliance are subject to change without prior notice.
Page 1: ...40cm Misting Fan User Manual Model No LB FS 40 Item No 900285 Rev 3 Note The specifications and or components of this appliance are subject to change without prior notice...
Page 2: ...afety Grille 8 3 4 Misting Generator and Water Tank 10 4 Filling the Water Tank 12 5 Setting the Fan Head Angle 13 6 Fan Timer and Misting Generator Operation 13 6 1 Using the Fan and Timer Function 1...
Page 3: ...hs or showers Always operate the appliance from a power source of the same voltage frequency and rating as indicated on the product identification plate Position the power supply lead properly so that...
Page 4: ...nly There are no user serviceable parts in this appliance If this appliance is used by a third party please supply the instruction manual with it Do not misuse the cord Never carry the appliance by th...
Page 5: ...Page 5 of 16 2 Components Safety Grille Fan Blade 3 Speed and Mist Function Push Button Control Base Water tank Tilt Adjustable Neck Mist Aperture Timer Misting Generator Flexible Mist Hose...
Page 6: ...easily for cleaning or storage 3 1 Base To Assemble the Posts to the Base first place the Heavy Base Weight on a flat level surface Place the flat metal plate with the two holes in the recess as show...
Page 7: ...the underneath can be accessed Take the domed Washer and the Screw and fit as shown Using the small spanner supplied tighten the screw Repeat on the other post Stand the Base on the floor Take the Pla...
Page 8: ...ff Locate the two holes on the underneath of the Fan Head Controller assembly onto the two posts and push down until it stops Tighten the two Thumb Screws until they are secure 3 3 Fan Blade and Safet...
Page 9: ...ar on the motor spindle to ensure correct positioning Fix the blade into place by gently hand tightening the spinner anticlockwise onto the end of the motor spindle The spinner nut is self tightening...
Page 10: ...grille into position and secure it by closing the clips over the outer rim The screw and nut at the bottom of the grille must be fitted 3 4 Misting Generator and Water Tank Place the Misting Generator...
Page 11: ...e hose into the hole in the top of the cap and push in as far as you can Do not kink the hose Attached the other end of the hose to the Mist vent located on the front of the Fan Grille Push the end of...
Page 12: ...om the filling hole Refit the filler cap and turn clockwise to lock in place Important Ensure the filler cap is fully rotated and locked in place DO NOT fill with any other liquid than clean fresh col...
Page 13: ...ting Generator Operation 6 1 Using the Fan and Timer Function The Fan has a three speed selection Ensuring the Fan has been assembled correctly plug into the power point and switch on If not using the...
Page 14: ...r knob to either the ON position or by rotating to set a timer setting press the MIST button of the fan control panel On the Misting Generator switch the On Off Switch to the On I Position At this poi...
Page 15: ...up when the fan head is in the desired position 7 Care and Cleaning Ensure that the fan is switched off from the supply mains before removing the guard Grille Unplug the appliance during filling and...
Page 16: ...n accident misuse abuse or neglect Please retain your receipt as proof of purchase and contact our Customer Service Centre on 1800 124 125 Australia or 0800 945 995 New Zealand or alternatively via em...