Satellite Dish Installation Manual (Ver. 1)
going forward, Home2US recommends that
on this, please call (888)312-2182 for
will be held liable for
Note: H ome2U S does not support th
Section 7: Roof-Mounting the Mast Bracket
e penetrating of any roof nor
any damages resulting from the
mounting of the dish on to or on top of any structure of any kind.
Recommended Tools and Materials:
1. Felt Paper
2. Cinder Blocks
3. Dry Wall Bead
4. Tin Snips
This section will outline a low cost method for installations of this type. However,
it should
never
be used in a public building, a building over two (2) stories, or a
high wind area. If you need clarification
assistance.
Installing the dish on a flat roof can be dangerous if not done properly. Before
you contact a structural engineer to
calculate wind load and stress factors as well as purchase an approved non-
penetrating roof mount with the appropriate number of blocks.
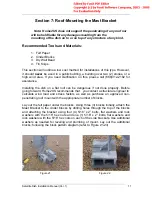
Lay out the felt paper under the blocks. Using three (3) blocks initially, attach the
Mast Bracket to the cinder blocks by drilling holes through the top of the blocks
and attaching the bracket using four (4) 5/16” x 2” bolts, flat washers and lock
washers with the 5/16” hex nuts and one (1) 5/16” x 2” bolts, flat washers and
lock washers with the 5/16” hex nuts on each of the side brackets. Use additional
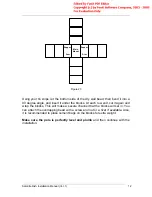
washers as needed for leveling and plumbing of mount. Lay out the additional
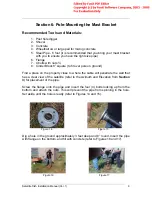
blocks; following the block pattern diagram (refer to Figure 21-23).
Figure 21
Figure 22
11


