

Document No: C-61-00003-3
detection capability of UAM.
If there is contamination around the case, remove it with a clean cloth without touching the optical part.
If there is contamination on the optical mirror remove it with an air blower.
Set a torque wrench to
0.63Nm.
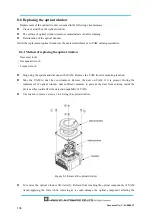
Do not touch the new optical window with bare hands. It is recommended to wear clean thin gloves to
unpack the new optical window.
Check if seal is attached on the surface of the optical window.
Check the direction to insert the optical window and cover slowly from above. Avoid shaking the
optical components.
Confirm that optical window is correctly attached to the body without any inclination.
Use torque wrench to tight the 4 screws 1 to 4.
Confirm that appearance of the UAM is not abnormal before installing it back to original system.
After installing in the system, adjust the optical window as explained in section 8.6.2.
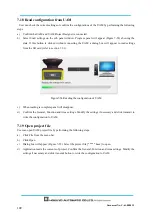
8.6.2 Adjustment of the optical window
During the operation UAM constantly monitors the transmittance of optical window. When it decreases
due to contamination UAM reports an error. Therefore, it is necessary to measure the initial transmittance of
the new optical window and save it into the device. Contamination should not be present while performing
this adjustment.
<Adjustment steps>
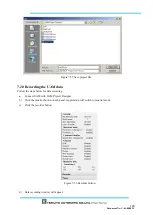
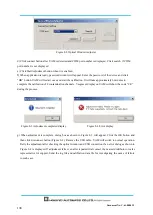
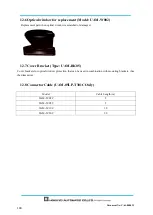
a) Use adjustment software “Optical Window Adjuster” included in the CD. Create a local folder and save
the application into it. Log file generated during the process (format “serial_number_time.log”) and the
adjustment data (format “serial_number_time.csv”) are saved in the same folder where the application is
saved. Retain these files for reference and troubleshooting.
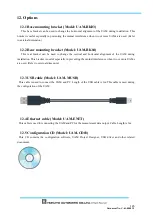
b) Supply the power to UAM and connect with the PC through USB cable.
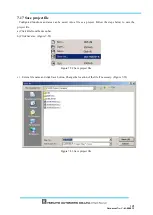
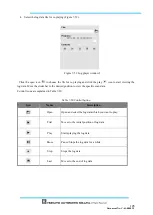
c) Start Optical Window Adjuster. Window as shown in figure 8-2 will appear.
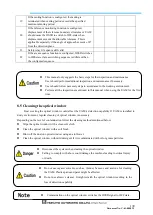
Optical window is a critical part of UAM therefore it should not be contaminated or
scratched during the replacement.
Replace the optical window at clean environment to avoid dust particles from entering
the device affecting the detection capability.
Avoid touching the internal parts of UAM as it may contaminate them decreasing the
detection capability.
After replacing the optical window it is necessary to apply the adjustment UAM is
ready to use only after completing the adjustment.
Summary of Contents for UAM-05LP
Page 1: ... Document No C 61 00003 3 ...
Page 104: ... Document No C 61 00003 3 Figure 7 33 b Function Figure7 33 c Area ...
Page 107: ... Document No C 61 00003 3 Figure 7 36 a Project report tab Figure 7 36 b Error report tab ...
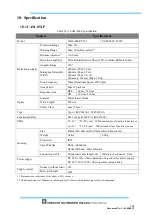
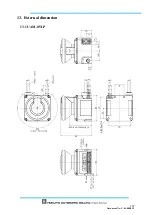
Page 148: ... Document No C 61 00003 3 13 External dimension 13 1 UAM 05LP ...
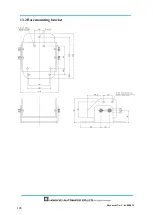
Page 149: ... Document No C 61 00003 3 13 2 Base mounting bracket ...
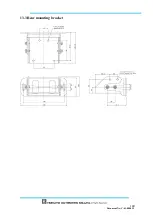
Page 150: ... Document No C 61 00003 3 13 3 Rear mounting bracket ...
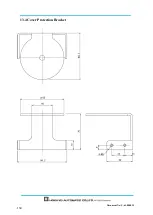
Page 151: ... Document No C 61 00003 3 13 4 Cover Protection Bracket ...
Page 152: ... Document No C 61 00003 3 14 EC Declaration of conformity ...
Page 153: ... Document No C 61 00003 3 ...


