background image

DS65MU01

34

6. 

OSD Menu

An overall view of the On-Screen Display (OSD) 

structure is shown below. You can use it as a 

reference for further adjusting your display.

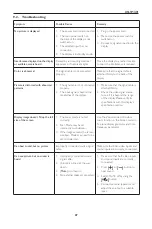
6.1.  Navigating the OSD Menu

6.1.1.  Navigating the OSD menu using the 

remote control

FORMAT

SOURCE

INFO

LIST

OPTIONS

ADJUST

1.  Press 

[ ] 

button on the remote control to 

display the OSD menu.

2.  Press 

[ ] 

or 

[ ] 

button to choose the item you 

want to adjust.

3.  Press [

OK

] or 

[ ] 

button to enter the 

submenu.

4.  In the submenu, press 

[ ] 

or 

[ ]

 button to 

toggle among items, press 

[ ]


or 

[ ]

 button 

to adjust settings. If there is a submenu, press [

OK

or 

[ ]

 button to enter the submenu.

5.  Press 

[

]

 button to return to the previous 

menu, or press 

[ ]

button to exit the OSD 

menu.

6.1.2.  Navigating the OSD menu using the 

display’s control buttons

1.  Press [

MENU

] button to display the OSD menu.

2.  Press [ ] or [ ] button to choose the item 

you want to adjust.

3.  Press [

]

 button to enter the submenu.

4.  In the submenu, press [

] or [

] button to 

toggle among items, press [ ] or [ ] button to 
adjust settings. If there is a submenu, press [ ] 

button to enter the submenu.

5.  Press [

MENU

] button to return to the previous 

menu, or press [

MENU

] button several times to 

exit the OSD menu.

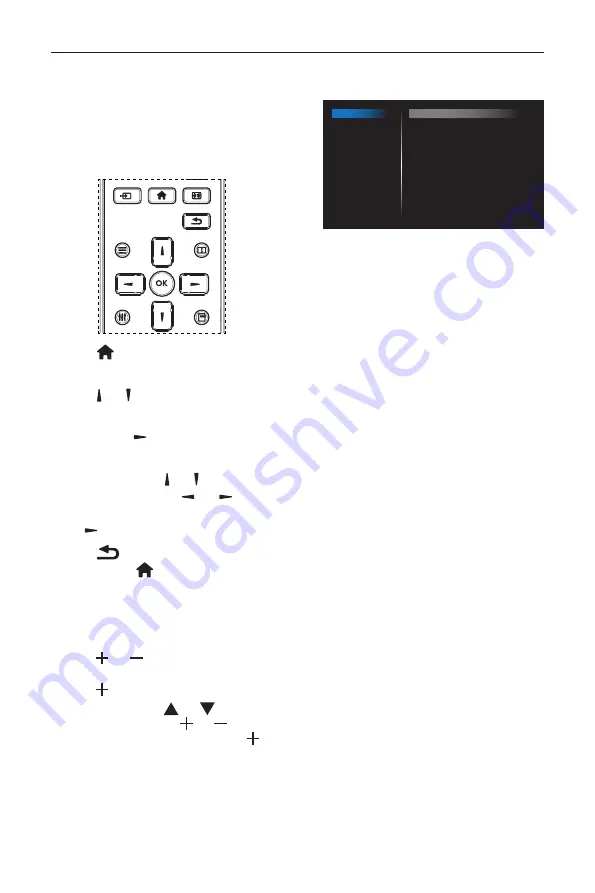
6.2.  OSD Menu Overview

6.2.1.  Picture menu

Picture

Screen

Audio

Configuration 1

Configuration 2

Advanced option

Brightness

Contrast

Sharpness

Black level

Tint

Color

Noise reduction

Gamma selection

Color temperature

Color control

Smart power

Overscan

90

50

20

50

50

55

Medium

Native

Native

Action

Off

Off

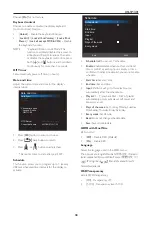
Brightness(Picture)

Adjust the overall image and background screen 

brightness(backlight).

Contrast

 Adjust the image contrast ratio for the input signal.

Sharpness

This function is digitally capable to keep crisp image 

at any timings.
It is adjustable to get a distinct image or a soft one 

as you prefer and set independently for each picture 

mode.

Black level

Adjust the image brightness for the background.
NOTE: sRGB picture mode is standard and cannot 

be changed.

Tint (Hue)

Adjust the tint of the screen.
Press + button the flesh tone color becomes 

greenish.
Press - button the flesh tone color becomes purplish.
NOTE: VIDEO mode only.

Color(Saturation)

Adjust the color of the screen.
Press + button to increase color depth.
Press - button to decrease color depth.
NOTE: VIDEO mode only

Noise Reduction

Adjust the noise reduction level.

Gamma selection

Select a display gamma. It’s refer to the brightness 

performance curve of signal input. Choose from 

{Native} / {2.2} / {2.4} / {s gamma} / {D-image}.
NOTE: sRGB picture mode is standard and cannot 

be changed.

Summary of Contents for DS65MU01

Page 1: ...DS65MU01 User Manual English ...

Page 2: ......

Page 3: ...sly injured or there is a possibility of accident or death CAUTION means If you ignore the caution message you may be slightly injured or the product may be damaged NOTE means The note helps you understand and use the product safely Please read the note carefully before using the product Warning This equipment is compliant with Class A of EN55032 CISPR 32 In a residential environment this equipmen...

Page 4: ...N Power Switch are disconnect device the location on the apparatus and the function of the switch shall be described and the switch shall remain readily operable 1 1 2 Installation Warning Do not install near any heat sources such as radiators or other devices that produce heat It may cause electric shock or fire When mounting a product on the wall make sure not to install the product by hanging t...

Page 5: ... so that they cannot be tripped over pulled or grabbed Do not stick metal objects or any other conductive material into the power cord Do not touch the end of the power cord while it is plugged in It may result in fire electric shock Unplug this product during lightning storms or when unused for long periods of time Do not block any ventilation openings Install in accordance with the manufacturer ...

Page 6: ...rews are fastened tightly If they are not fastened securely enough it may tilt forward after being installed 1 2 MAINTENANCE 1 2 1 Cleaning Warning When cleaning unplug the power cord and wipe gently with a soft dry cloth to prevent scratching Do not spray water or other liquids directly on the screen as electric shock may occur Do not clean with chemicals such as alcohol thinners or benzene 1 2 2...

Page 7: ...Connection 11 4 Operation 12 4 1 Watch the ConnectedVideo Source 12 4 2 Change Picture Format 12 4 3 Overview 12 4 4 Media Player introduction 13 4 5 Browser manual 14 4 6 PDF reader play 16 4 7 CMS 18 4 8 Custom App 18 5 Signage display 19 5 1 Setting 19 5 2 Ethernet 19 5 3 Proxy 20 5 4 Signage Display 20 5 5 SystemTools 28 5 6 Clone Media File 29 5 7 Display 30 5 8 Apps 30 5 9 Security 30 5 10 D...

Page 8: ...ontrol and AAA Batteries NOTES For all other regions apply a power cord that conforms to the AC voltage of the power socket and has been approved by and complies with the safety regulations of the particular country Type H05W F 2G or 3G 0 75 or 1 mm2 should be used You might like to save the package box and packing material for shipping the display 1 3 Installation Notes Due to the high power cons...

Page 9: ...t use M6 mounting screws having a length 10 mm longer than the thickness of the mounting bracket and tighten them securely 5 Unit without base weight 24 8 kg The equipment and its associated mounting means still remain secure during the test For use only with UL Listed Wall Mount Bracket with minimum weight load 24 8 kg 6 Portrait is not allowed 1 4 1 VESA Grid DS65MU01 400 H x 400 V mm Caution To...

Page 10: ...bar down to adjust the selected item while OSD menu is on Decrease the adjustment while adjust value 8 MENU button Return to previous menu while OSD menu is on or to activate the OSD menu when OSD menu is off 9 Remote control sensor and power status indicator Receives command signals from the remote control Indicates the operating status of the display without OPS Lights green when the display is ...

Page 11: ...n 6 DisplayPort IN DisplayPort video input 7 HDMI1 IN 8 HDMI2 IN 9 HDMI3 IN 10 HDMI4 IN HDMI video audio input 11 IR OUT 12 IR IN IR signal input output for the loop through function NOTES This display s remote control sensor will stop working if the jack IR IN is connected To remotely control your A V device via this display refer to page 9 for or IR Pass Through connection 13 VGA IN D Sub VGA vi...

Page 12: ...touch exposed battery acid as it can damage your skin NOTE If you do not intend to use the remote control for a long period remove the batteries 2 2 2 Handling the remote control Do not subject to strong shock Do not allow water or other liquid to splash the remote control If the remote control gets wet wipe it dry immediately Avoid exposure to heat and steam Other than to install the batteries do...

Page 13: ... Menu Go to Audio source OSD Main Menu Move the highlight bar down to adjust the selected item IR Daisy Chain Menu Decrease controlled Group ID number Main Menu go to previous level menu Source Menu Exit source menu Volume Menu Decrease AudioVolume Main Menu go to next level menu or set selected option Source Menu Go to selected source Volume Menu Increase AudioVolume 7 button Root Menu Go to IR d...

Page 14: ... Change Image Zoom Mode Full 4 3 Real 21 9 Custom 13 BACK button Return to the previous menu page or exit from the previous function 14 INFO button Show Information OSD 15 OPTIONS button No function 16 VOLUME button Adjust volume ...

Page 15: ...ontrol For example press 0 and 1 for display No 1 press 1 and 1 for display No 11 The numbers available are from 01 255 2 Not pressing any button within 10 seconds will exit the ID Mode 3 If an error pressing of buttons other than the digits occured wait 1 second after the red LED lights off and then lights up again then press the correct digits again 4 Press ENTER button to confirm The red LED bl...

Page 16: ...o input DVD VCR VCD HDMI 3 IN HDMI 4 IN IR IN IR OUT HDMI 1 IN HDMI 2 IN HDMI Out HDMI IN 3 2 Connecting a PC 3 2 1 UsingVGA input PC AUDIO IN IR IN IR OUT AUDIO OUT D SUB VGA IN VGA AUDIO IN VGA Out D Sub 15 pin Audio Out 3 2 2 Using HDMI input PC HDMI 3 IN HDMI 4 IN IR OUT HDMI 1 IN HDMI 2 IN HDMI Out HDMI IN ...

Page 17: ...IO OUT 3 4 Connecting Multiple Displays in a Daisy chain Configuration You can interconnect multiple displays to create a daisy chain configuration for applications such as a menu board 3 4 1 Display control connection Connect the RS232 OUT connector of DISPLAY 1 to the RS232 IN connector of DISPLAY 2 DISPLAY 1 PC DISPLAY 2 RS 232C IN RS 232C RS 232C OUT RS 232C IN DISPLAY 1 PC DISPLAY 2 RJ 45 RS ...

Page 18: ...2C OUT RS 232C IN NOTE 1 This display s remote control sensor will stop working if the IR IN is connected 2 IR loop through connection can support up to 9 displays 3 IR in daisy chain via RS232 connection can support up to 9 displays 3 6 IR Pass through Connection DVD VCR VCD DVD VCR VCD Remote Control IR OUT IR IN ...

Page 19: ...e screen will go to android PD launcher When you return to android PD launcher the screen will show hint image the hint image only show 5 second as below The hint image will notify you can press source key to change source 2 Admin mode You can press Home 1668 to enter admin mode Please make sure you see the Home OSD menu after Home is pressed and then press 1668 in sequence Two continuous Home key...

Page 20: ...placed in signage of directory For example videos in signage video photos in signage photo music in signage music 5 You could edit or delete a non empty playlist just choose the desired playlist which is with pencil icon 6 Once you start to edit a playlist you will see below screen Source files in storage Playlist files in playlist There are 4 icons which map to the keys of remote controller Optio...

Page 21: ...ge has three parts Repeat Mode Slideshow Effect and Effect Duration Repeat Mode play mode Slideshow Effect photo slideshow effect Effect Duration photo effect duration 12 Media Hotkey Play Playback file Pause Pause file Fast forward forward 20 second Rewind back 20 second Stop Stop file and return to start If the gif file it like the pause 4 5 Browser manual 1 Home page of Browser app this page ha...

Page 22: ...e all url record on right side Back left side list will be closed 4 1 Import Click import Choose storage Choose file contains urls Import file and url will show on list File format for import Format should be like below with file extension txt 4 2 Export Click export Choose storage Dialog shows path file will be saved and file s name ...

Page 23: ... 2 Schedule Set OSD menu Advanced option Schedule On time1 Off time2 Input be BROWSER any day you want of week and Play List Finally check the right box Then PD will show web page with Url in Browser app at time1 and finish at time2 4 6 PDF reader play 1 Home page of Pdf app this page has three items Play Compose and Settings Play select playlist to play Compose edit playlist Settings setting play...

Page 24: ...ck return 7 If you choose Sort in the slidebar you can change the order of files one by one 8 Select Settings on home page this page has two parts Repeat Mode and Effect Duration Repeat Mode play mode Effect Duration photo effect duration Media Hotkey Play Playback file Pause Pause page Fast forward go to next page if the page is end of the file it will go to next file Rewind back to last page if ...

Page 25: ...enu operation RCU Source Custom If set up customer APK PD will open customer app when switch source to Customer mode If no set up customer APK PD will show Black screen when switch source to Customer mode 4 8 2 Function Introduction Save Select the App click the Save will perform the function of storage Forget After press the Forget can remove previously stored information Cancel Don t do any chan...

Page 26: ...A DHCP B Static IP C IP Address D Netmask E DNS Address F Gateway 2 Mac Address Connection Type Static IP Mac Address 00 24 67 21 57 ea Ethernet Configuration Main Switch Disable Enable To see available networks turn Ethernet on Ethernet 5 2 1 DHCP DHCP mode 1 Cannot modify IP Address Netmask DNS Address and Gateway 2 If connect successfully it will display current network configuration Connection...

Page 27: ...witch Disable Enable Proxy Note Proxy type in HTTP HTTPS SOCKS4 SOCKS5 are support Only support the connection through the proxy server withTCP port 80 443 5228 Proxy server with authentication on Windows Sever Series is not support 5 4 Signage Display Divide into 4 groups General Settings Server Settings Source Settings Security 1 General Settings A Signage Display Name B Boot Logo C Screenshot 2...

Page 28: ...bootanimation zip to data local and set it as boot logo c Forget Press Forget key to delete data local bootanimation zip and not show boot logo d Cancel Close dialogue w o changes Scenario introduction Case 1 The user don t settle customized boot logo PD does not find any bootanimation zip file under SD and USB The list will be blank Save and Forget button will be gray and useless Case 2 The users...

Page 29: ...2 Just press Back key to exit dialog for Set up 3 Start time cannot be newer than End time It will show Error toast 3 EndTime Set up screenshot End time Note 1 If no End time the screen will show current time automatically 2 Start time cannot be newer than End time It will show error toast 4 Repeat Set screenshot repeat cycle User can choose screenshot time frame Multiple selection 5 Save to Set u...

Page 30: ...count and set up SMTP server Security type and port item Note Password input limitation 1 Length 6 20 characters 2 Format no limit 3 unavailable port 5000 Gmail safety setting If Gmail is not working when setting is complete please test Gmail account via PC and link below URL https www google com settings security lesssecureapps And confirm Access for less secure apps item is Turn On Yahoo Email S...

Page 31: ...mat I English a z and A Z II Number 0 9 FTP password display 1 Will show symbol to instead password if set up password via remote control 2 After set up the password text will show as symbol Before password input After password input Set up completed screen 3 Storage Path Show default path Internal storage Note Can only display Internal storage cannot be modified Only show path 4 Will show Server ...

Page 32: ...Will show network is disconnected if not yet connects to network 2 Will show Server is disconnected if network connected but remote control server disconnected 3 Will show Server is unbinded if Remote control server feedback unbinded status 4 Will show Server is binded if Sever binded successfully 5 Will show Error PIN code if input incorrect PIN code 4 SICP Network Port Change SICP Network Port N...

Page 33: ...dit page 2 Browser Can edit Bookmark configuration 1 Open Browser setting page 3 CMS 1 Server Setup CMS server address 2 Account Setup CMS account 3 PIN Code Setup CMS PIN code 4 Version Ver 3 5 Content There are internal storage SD card USB storage 3 options for selecting WhenVer 3 Server Account PIN code is available 4 PDF Player Can edit PDF Player Play List and Effect Settings ...

Page 34: ...ll show Black screen when switch source to Customer mode Function introduction 1 Save Select App and press Save key to save it 2 Forget Press Forget key to clean previous stored data 3 Cancel No change close window directly If no customer installed apk the list will be blank No option for choose Save and Forget key will be gray and unavailable User can select customer installed apk in list No setu...

Page 35: ...able Platform Web API 5 5 SystemTools System tools 4 main functions 1 Clear Storage 2 Factory Reset 3 Import Export 4 Clone Media Files 5 5 1 Clear Storage The purpose is to clear all data in OTS folders Divided into 4 mode 1 Clear all OTS folders 2 Only clear OTS folder under Internal storage 3 Only clear OTS folder under USB storage 4 Only clear OTS folder under SD card Pop up the window to disp...

Page 36: ...storage internal SD USB 5 5 3 2 Import Signage Display Settings Import settings db from OTS folder under USB or SD card 1 Import settings db Include OSD setting Android settings but Signage Display Name and Boot Logo 2 Auto install 3rd party apk from OTS app List all available storage Internal SD USB Show notification dialog before database import 5 6 Clone Media File Clone media file from Interna...

Page 37: ...ar OSD menu to control AutoTime On Off Note Add new NTP server to display current server IP 5 11 Developer options Android developer options 5 12 About Main info in About 1 System updates 2 Android version 3 Kernel version 4 Build number 5 12 1 System updates Will automatically search update zip in USB Will be shown in list for user selection if found Note 1 Only support Android Full image 2 file ...

Page 38: ...y time Folder1 mode Loop delay time Folder2 An example of a desc txt file is 1920 1080 30 p 1 0 part0 p 0 0 part1 a The first line 1920 and 1080 define the width and height of the screen resolution 30 is the frame rate in fps frames per second i e number of images to display per second b The second and third lines have a same format The first p defines play mode is immediately stop playing when bo...

Page 39: ... by Chromium browser and then go to internal storage path Download by File Manager 2 1The rest of steps is the same as above Please note each model may have different internal storage path b Via Adb Shell 1 Make sure that your PC can connect to OTS Android Signage Display using adb 2 Prepare your apk in a folder for example C apkfolder on PC 3 Execute the following instruction by command line tool...

Page 40: ...DS65MU01 33 intent putExtra packageName com example apk_ name intent putExtra activityName com example apk_ name MainActivity sendBroadcast intent ...

Page 41: ...SD menu 6 2 OSD Menu Overview 6 2 1 Picture menu Picture Screen Audio Configuration 1 Configuration 2 Advanced option Brightness Contrast Sharpness Black level Tint Color Noise reduction Gamma selection Color temperature Color control Smart power Overscan 90 50 20 50 50 55 Medium Native Native Action Off Off Brightness Picture Adjust the overall image and background screen brightness backlight Con...

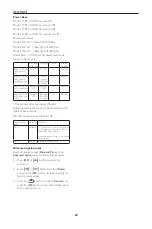
Page 42: ...Screen Audio Configuration 1 Configuration 2 Advanced option H position V position Clock Clock phase Zoom mode Custom zoom Auto adjust Screen reset 50 50 97 0 Full Action Action Action H position Control Horizontal Image position within the display area of the LCD Press button to move screen to right Press button to move screen to left NOTE VGA input only V position ControlVertical Image position ...

Page 43: ...lues 6 2 3 Audio menu Picture Screen Audio Configuration 1 Configuration 2 Advanced option Balance Treble Bass Volume Audio Out Line Out Maximum Volume Minimum Volume Mute Audio source Audio reset Audio Out Sync 50 50 50 30 30 100 0 Off Digital Action Off Balance Adjust to emphasize left or right audio output balance Treble Adjust to increase or decrease higher pitched sounds Bass Adjust to increa...

Page 44: ...boot up Playlist select playlist index for Media player Browser PDF player 0 no play list Same as switch source from OSD 1 7 playlist number No failover function system will keep source even the source is no signal input WOL Choose to turn on or off the wake on LAN function Choose from Off On RGB Range Manual correction gray scale color Configuration1 reset Reset all settings in Configuration1 men...

Page 45: ...odel name Serial NO Operation hours SW Version DS65MU01 N A 0 FB01 06 HDMIVersion Set the HDMI version to 1 4 or 2 0 this setting is only valid on HDMI input Configuration2 reset Reset all settings in Configuration2 menu to the factory preset values 6 2 6 Advanced option menu Picture Screen Audio Configuration 1 Configuration 2 Advanced option IR control Power LED Light Keyboard control Off Timer ...

Page 46: ...ws you to program up to 7 seven different scheduled time intervals for the display to activate Schedule Schedule list Enable Start time End time Input Playlist Days of the week Every week 1 Back SAVE Schedule list You can set 7 schedules Enable Enable disable schedule If set start end time is conflict or empty input is empty or time conflict with other schedule list you cannot enable schedule Star...

Page 47: ...CP off WOL off no auto on off Backlight OFF Backlight ON show no signal X ARM OFF This product does not support Mode 2 Following table is the action for Android board with different power mode DC off on press power button by RC Power mode in OSD Mode 1 2 Mode 3 4 DC off shutdown 1 The current source APK such as MediaPlayer Broswer PDF or SmartCMS will be closed 2 Android system will go to the defa...

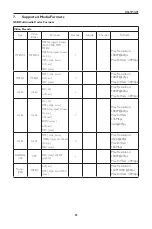
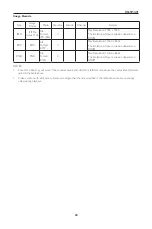
Page 48: ...n 1080P 60fps Max Bit Rats 40Mbps H 263 H 263 FLV flv AVI avi V Max Resolution 1080P 60fps Max Bit Rats 40Mbps H 264 H 264 FLV flv MP4 mp4 mov MPEG transport stream ts trp ASF asf WMV wmv AVI avi MKV mkv V Max Resolution 1080P 60fps Max Bit Rats 135Mbps 4k2k 30fps H 265 H 265 MP4 mp4 mov MPEG transport stream ts trp MKV mkv V Max Resolution 4K2K 60fps Max Bit Rats 100Mbps GOOGLE VP8 VP8 MKV mkv We...

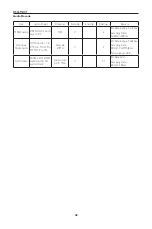
Page 49: ... MP3 V 2 Bit Rate 8kbps 320Kbps Sampling Rate 16KHZ 48KHz Windows Media Audio WMAVersion 7 8 9 10 pro M0 10Pro M1 M10 Pro M2 Decode WMA V 2 Bit Rate 8kbps 768Kbps Sampling Rate 8KHZ 96 M10 KHz Non support LBR AAC Audio MAIN ADIF ATDS Header AAC LC and AAC HE File Format AAC M4A V 5 1 Bit Rate N A Sampling Rate 8KHZ 48KHz ...

Page 50: ...on 15360 x 8640 The limitation of max resolution depends on DRAM PNG PNG File Format PNG V Max Resolution 15360 x 8640 The limitation of max resolution depends on DRAM NOTES Sound or video may not work if the contents have a standard bit rate frame rate above the compatible Frame sec listed in the table above Video content with a Bit rate or Frame rate larger than the rate specified in the table a...

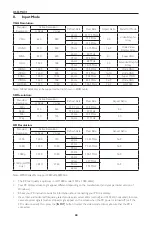
Page 51: ... 13 5 MHz 4 3 480p 59 94 Hz 27 MHz 576i 720 576 25 Hz 13 5 MHz 4 3 576p 50 Hz 27 MHz HD Resolution Standard Resolution Active Resolution Refresh Rate Pixel Rate Aspect Ratio H Pixels V Lines 720p 1280 720 50 Hz 74 25 MHz 16 9 60 Hz 1080i 1920 1080 25 Hz 74 25 MHz 16 9 30 Hz 1080p 1920 1080 50 Hz 148 5 MHz 16 9 60 Hz 2160p HDMI only 3840 2160 30 Hz 297 MHz 16 9 50 Hz 594 MHz 60 Hz Note OPS DisplayP...

Page 52: ...mode check PC power saving mode or cable connections The display settings table complies to the IBM VESA standards and based on the analog input The DVI support mode is regarded as same to the PC support mode The best timing for the vertical frequency to each mode is 60Hz ...

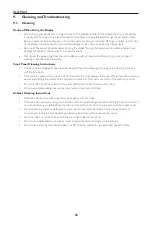
Page 53: ...int free cloth If the surface becomes dirty soak a soft lint free cloth in a mild detergent solution Wring the cloth to remove excess liquid Wipe the surface of the display to remove dirt Then use a dry cloth of the same type to dry Do not scratch or hit the surface of the panel with fingers or hard objects of any kind Do not use volatile substances such as insert sprays solvents and thinners Cabi...

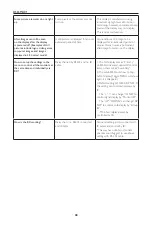
Page 54: ...e sure that the signal cable is attached firmly 2 Check the video signal source to see if it is beyond the range of the display Please verify its specifications with this display s specification section Display image doesn t fill up the full size of the screen 1 The zoom mode is not set correctly 2 Scan Mode may be set incorrectly to underscan 3 If the image exceeds the screen size Scan Mode may n...

Page 55: ... to remain on the display How to setup the settings in the menu to control all the monitors at the same time and individually via RC Daisy chained by RS232 and no IR cable 1 The first display sets as Primary on OSD Advanced option IR control item others set as Secondary 2 The setup OSD will show onTop Left of display Toggle MENU will show again if it disappear 3 Default setting ID NO 0 GP NO 0 thi...

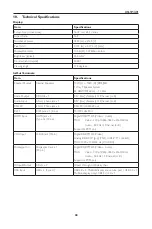
Page 56: ...hone jack x 1 0 5V rms Normal 2 Channel L R RS232C 2 5mm Phone jack x 2 RS232C in RS232C out RJ 45 RJ 45 Jack x 1 8 pin 10 100 LAN Port HDMI Input HDMI Jack x 4 Type A 19 pin Digital RGB TMDS Video Audio MAX Video 720p 1080p 3840 x 2160 60 Hz Audio 48 KHz 2 Channel L R Supports LPCM only VGA Input D SUB jack 15pin Digital RGB TMDS Video Analog RGB 0 7V p p 75Ω H CS V TTL 2 2kΩ MAX 1920 x 1080 60 H...

Page 57: ...Without Stand 24 8 Kg Gross Weight Without Stand 39 3 Kg Environmental Condition Item Specifications Temperature Operational 0 40 C Storage 20 60 C Humidity Operational 20 80 RH No condensation Storage 5 95 RH No condensation Altitude Operational 0 3 000 m Storage Shipment 0 9 000 m Internal Speaker Item Specifications Type 1 Way 1 Speaker Input 10 W RMS Impedance 8Ω Output Sound Pressure 82 dB W ...

Page 58: ......

Page 59: ...Q41G65M177901A ...

Reviews: