


3 Servicing
Cycle components
SMGB0120 rev.0 - 11/2017
77
3
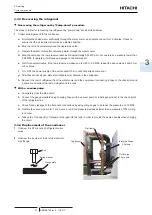
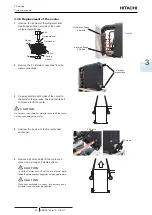
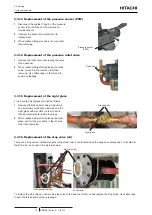
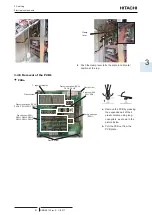
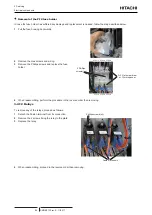
3.3.22
Thermistor (Cooler water outlet, THMwo2)
1
Unscrew the nut of the cable gland
2
Gently pull the sensor wiring upwards.
!
C A U T I O N
Sensor sheath is full of sealing silicone. Use gloves
and eye goggles for protection in order to avoid
possible injuries to eyes and skin.
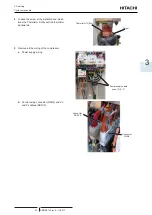
3
Disconnect the 3 and 1 Faston terminals or
the CN5 connector at the E-box
4
Replace the thermistor in reverse order than
removing.
?
N O T E
Use sealant silicone inside the sensor sheath to
protect and avoid any leakage.
Thermistor
(THMwo2)
Cable gland
Fitting adaptor Sensor sheath
Sensor
Sensor wiring
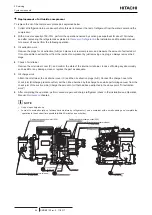
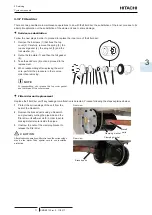
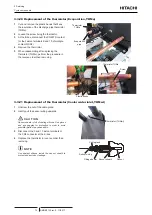
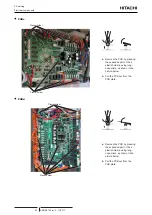
3.3.23
Thermistor (Cooler water outlet, THMwo)
To remove the thermistor THMwo, proceed as follows:
1
Unscrew the nut of the cable gland
2
Gently pull the sensor wiring upwards.
?
C A U T I O N
Sensor sheath is full of sealing silicone. Use gloves
and eye goggles for protection in order to avoid
possible injuries to eyes and skin.
3
Disconnect the 3 and 1 Faston terminals or
the CN5 connector at the E-box
4
Replace the thermistor in reverse order than
removing.
?
N O T E
Use sealant silicone inside the sensor sheath to
protect and avoid any leakage.
Cable gland
Fitting adaptor
Sensor sheath
Sensor
Sensor wiring
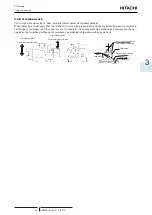
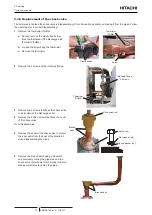
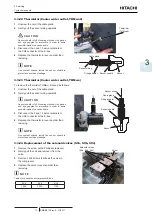
3.3.24
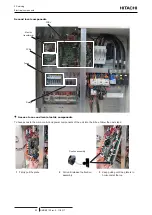
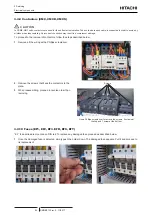
Replacement of the solenoid valves (SVa, SVb, SVc)
1
Remove the screw with a Phillips screwdriver.
2
Gently pull the coil and remove it from the
valve.
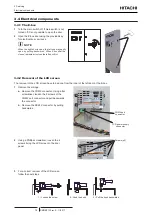
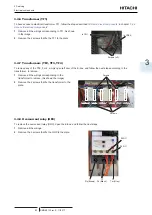
3
Remove 2 M6 screws that fixes the valve in
the compressor.
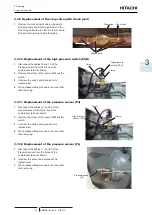
4
Replace the valve in reverse order than
removing.
?
N O T E
Table of connections at compressor E-box
SVa
SVb
SVc
15/16
13/14
11/12
Screw
Solenoid valves
(SVa, SVb, SVc)