


4.4 Using Real-time Function (Fluctuation Recording)
79
Chapter 4
Set
ting t
h
e Meas
urement
Condit
ions
(
W
hen you want t
o
c
u
st
omize t
h
e
sett
ings)
4
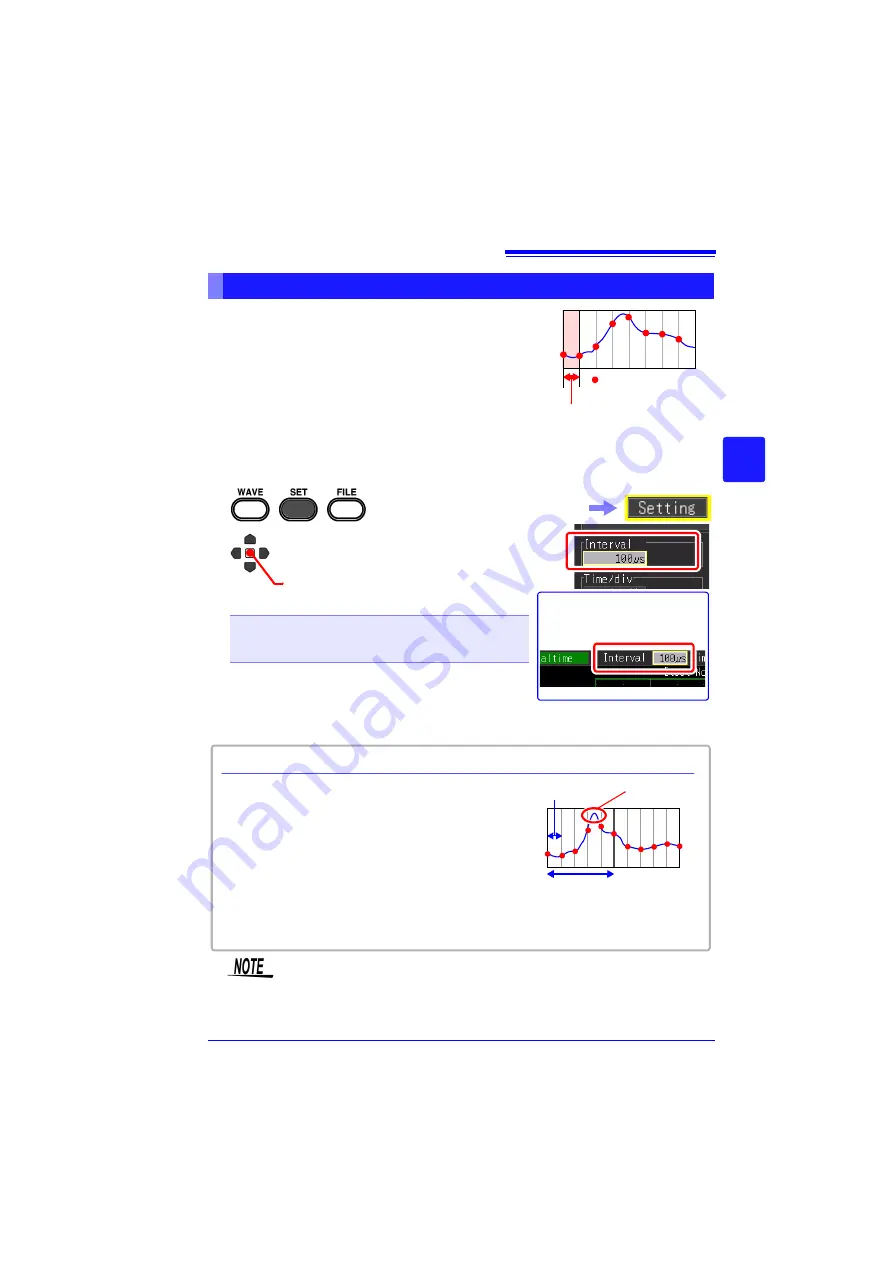
Set the interval for acquiring data
Select the data acquisition interval to suit your mea-
surement objectives.
If a short recording interval is selected, the recording
time for which data can be stored in the internal buffer
memory will be short. If you want to retain the data for a
long period of time, we recommend setting continuous
recording to
[On]
and saving in real time to external storage media.
Setting the Interval for the Data to Record (Recording Interval)
: Measurement data
Recording interval
1
2
(Open/confirm the setting information.)
Select from the setting options of
[Interval]
.
Setting options (
∗
. default setting)
100
μ
s
∗
, 200
μ
s, 500
μ
s,
1ms, 2ms, 5ms, 10ms, 20ms, 50ms, 100ms, 200ms,
500ms, 1s, 2s, 5s, 10s, 20s, 30s, 1min
The setting can also be
changed on the Waveform
screen. ([Wave+Set] Display)
Select the
[Setting]
screen.
Some waveform peaks may not be displayable
with certain interval settings.
Example: When the recording interval is set to 1
s and the horizontal axis is set to 5 s/div, a state
in which the waveform peak cannot be recorded
is displayed.
To make sure the peak is recorded:
"Retaining Records of Maximum and Minimum
Values (Envelope)" (p. 84)
Recording Interval and Waveform Peak
Horizontal axis: 5 s/div
Recording interval: 1s Peak
If real time saving, [Envelope] function, and [Numerical Calc.] are set at
the same time, the recording interval cannot be set to 100 µs and 200
µs.
Summary of Contents for MR8880-20
Page 2: ......
Page 12: ...Procedure 2 ...
Page 40: ...1 3 Screen Configuration and Display 30 ...
Page 76: ...3 4 Measurement Using Setting Wizard PRESETS key 66 ...
Page 174: ...6 4 Data Management 164 ...
Page 186: ...7 7 Performing a Printer Check 176 ...
Page 196: ...8 4 Numerical Value Calculation Expressions 186 ...
Page 216: ...10 4 Making System Settings 206 ...
Page 222: ...11 3 Communication Using Commands 212 4Click Next to start install ing Installing Click ...
Page 226: ...11 3 Communication Using Commands 216 ...
Page 254: ...13 6 Setting Wizard Function PRESETS 244 ...
Page 292: ...Appendix 10 Installing Waveform Viewer A30 ...
Page 297: ......
Page 298: ......
Page 299: ......
Page 300: ......


