


4.9 Recording Using Specific Conditions (Trigger Function)
115
Chapter 4
Set
ting t
h
e Meas
urement
Condit
ions
(
W
hen you want t
o
c
u
st
omize t
h
e
sett
ings)
4
It is possible to record not only the waveform after the
trigger is applied but also the waveform before the
trigger is applied. The options that can be set differ
depending on the function.
This can be set on the [Trig] screen and [Wave+Trg]
display.
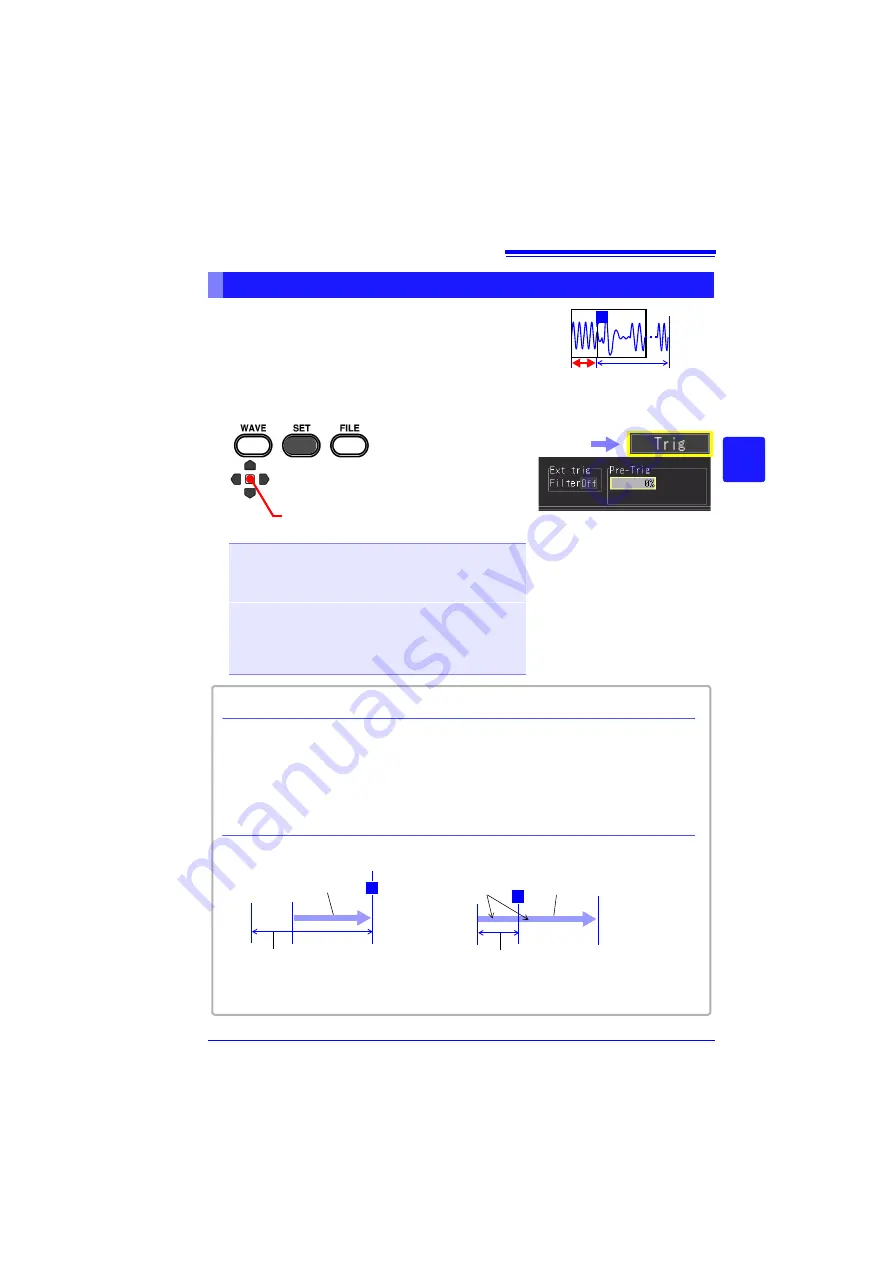
Recording Data Before Trigger Applied (Pre-trigger)
80%
20%
T
1
2
Apply
Select from the setting options
of
[Pre-Trig]
Setting options (
∗
. default setting)
(When High-speed Function)
0%, 5%, 10%, 20%, 30%, 40%, 50%, 60%, 70%, 80%,
90%, 95%, 100%
Set percentage in relation to entire recording length
(When Real-time Function)
Hours, minutes, and seconds can be set (up to maximum
recording time)
Up to 1,000,000 data when continuous recording is set to
[On]
(however, up to 500,000 when envelope is set to On)
Select the
[Trig]
screen.
When measurement is started, the specified pre-trigger length is recorded. This period
is indicated as the
[Waiting for pre-trigger]
. After the specified pre-trigger length has
been recorded, the period indicated as
[Waiting for trigger]
continues until a trigger
occurs. During the
[Waiting for pre-trigger]
period, trigger events are not recognized
even when the trigger criteria are met.
T
Pre-Trig:
2 minutes
Recording ends at
trigger event
Recording Time shorter than
Pre-Trigger Time
Recording Time longer than
Pre-Trigger Time
T
Pre-Trig:
1 minutes
Records both before and
after trigger event
Recording ends when record-
ing length has passed
Pre-Trigger vs. Recording Time (When Real-time Function)
Pressing the
MONITOR
key when either
[Waiting for pre-trigger...]
or
[Waiting for
trigger..]
is displayed allows you to confirm the waveform currently being input.
Difference between [Waiting for pre-trigger] and [Waiting for trigger]
Recording length
(1 minutes)
Recording length (2 minutes)
Summary of Contents for MR8880-20
Page 2: ......
Page 12: ...Procedure 2 ...
Page 40: ...1 3 Screen Configuration and Display 30 ...
Page 76: ...3 4 Measurement Using Setting Wizard PRESETS key 66 ...
Page 174: ...6 4 Data Management 164 ...
Page 186: ...7 7 Performing a Printer Check 176 ...
Page 196: ...8 4 Numerical Value Calculation Expressions 186 ...
Page 216: ...10 4 Making System Settings 206 ...
Page 222: ...11 3 Communication Using Commands 212 4Click Next to start install ing Installing Click ...
Page 226: ...11 3 Communication Using Commands 216 ...
Page 254: ...13 6 Setting Wizard Function PRESETS 244 ...
Page 292: ...Appendix 10 Installing Waveform Viewer A30 ...
Page 297: ......
Page 298: ......
Page 299: ......
Page 300: ......


