


4.9 Recording Using Specific Conditions (Trigger Function)
111
Chapter 4
Set
ting t
h
e Meas
urement
Condit
ions
(
W
hen you want t
o
c
u
st
omize t
h
e
sett
ings)
4
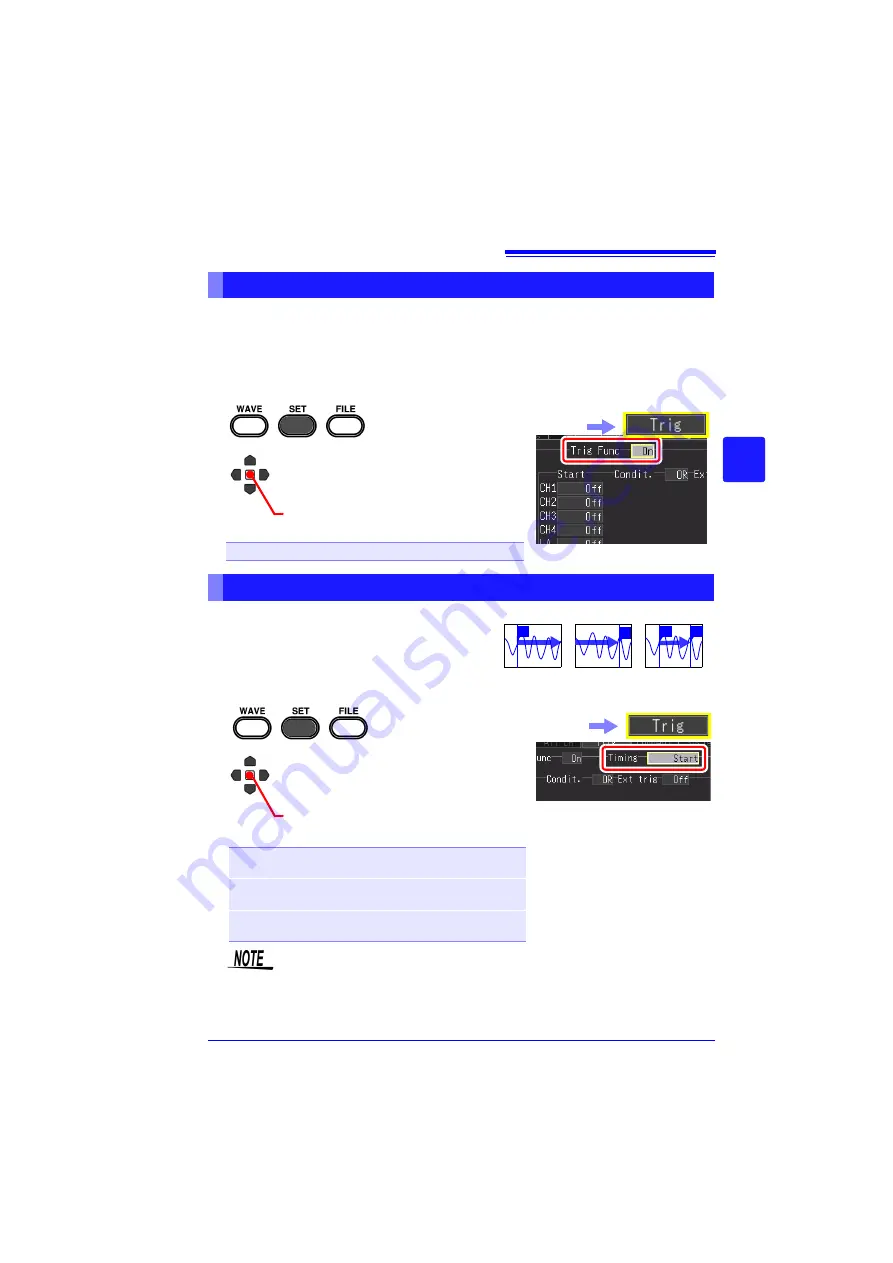
The trigger function is disabled (Off) when the instrument is shipped from the factory
or the settings are restored to the default settings. Before setting trigger conditions,
enable the trigger function (On).
The trigger can be enabled in the
[Wave+Trg]
display,
[CH]
screen, and
[Trig]
screen.
You can set the timing (starting and stopping of
measurement) for enabling the trigger. This can
be set only for the Real-time Function.
This can be set on the [Trig] screen and
[Wave+Trg] display.
Enabling the Trigger Function
1
2
(Open/confirm the setting information.)
Select from the setting options of
[Trig Func]
([Trig] screen).
Setting options (
∗
. default setting)
Off
∗
, On
Select the
[Trig]
screen.
Setting the Trigger Timing
Recording
T
Start
Stop
Start/Stop
T
T
T
1
2
(Open/confirm the setting information.)
Select the trigger timing from the set-
ting options of
[Timing]
([Trig]
screen).
Setting options (
∗
. default setting)
Start
∗
Use a trigger as the condition for starting
measurement.
Stop
Use a trigger as the condition for stopping
measurement.
Start/Stop
Use a trigger as the condition for starting
and stopping measurement.
Set the start/stop condition for
each input signal.
Only the start/stop condition se-
lected for the timing is enabled.
See:
"Types of trigger for
which [Timing] can be
set" (p. 112)
Select the
[Trig]
screen.
If you selected
[Start & Stop]
for the trigger timing, there will be a dead time
from when the start trigger is accepted until when the stop trigger is accept-
ed. The dead time will be whichever is the longer of 1 ms and a two sample
portion.
Summary of Contents for MR8880-20
Page 2: ......
Page 12: ...Procedure 2 ...
Page 40: ...1 3 Screen Configuration and Display 30 ...
Page 76: ...3 4 Measurement Using Setting Wizard PRESETS key 66 ...
Page 174: ...6 4 Data Management 164 ...
Page 186: ...7 7 Performing a Printer Check 176 ...
Page 196: ...8 4 Numerical Value Calculation Expressions 186 ...
Page 216: ...10 4 Making System Settings 206 ...
Page 222: ...11 3 Communication Using Commands 212 4Click Next to start install ing Installing Click ...
Page 226: ...11 3 Communication Using Commands 216 ...
Page 254: ...13 6 Setting Wizard Function PRESETS 244 ...
Page 292: ...Appendix 10 Installing Waveform Viewer A30 ...
Page 297: ......
Page 298: ......
Page 299: ......
Page 300: ......


