


4.6 Setting the Screen Display
93
Chapter 4
Set
ting t
h
e Meas
urement
Condit
ions
(
W
hen you want t
o
c
u
st
omize t
h
e
sett
ings)
4
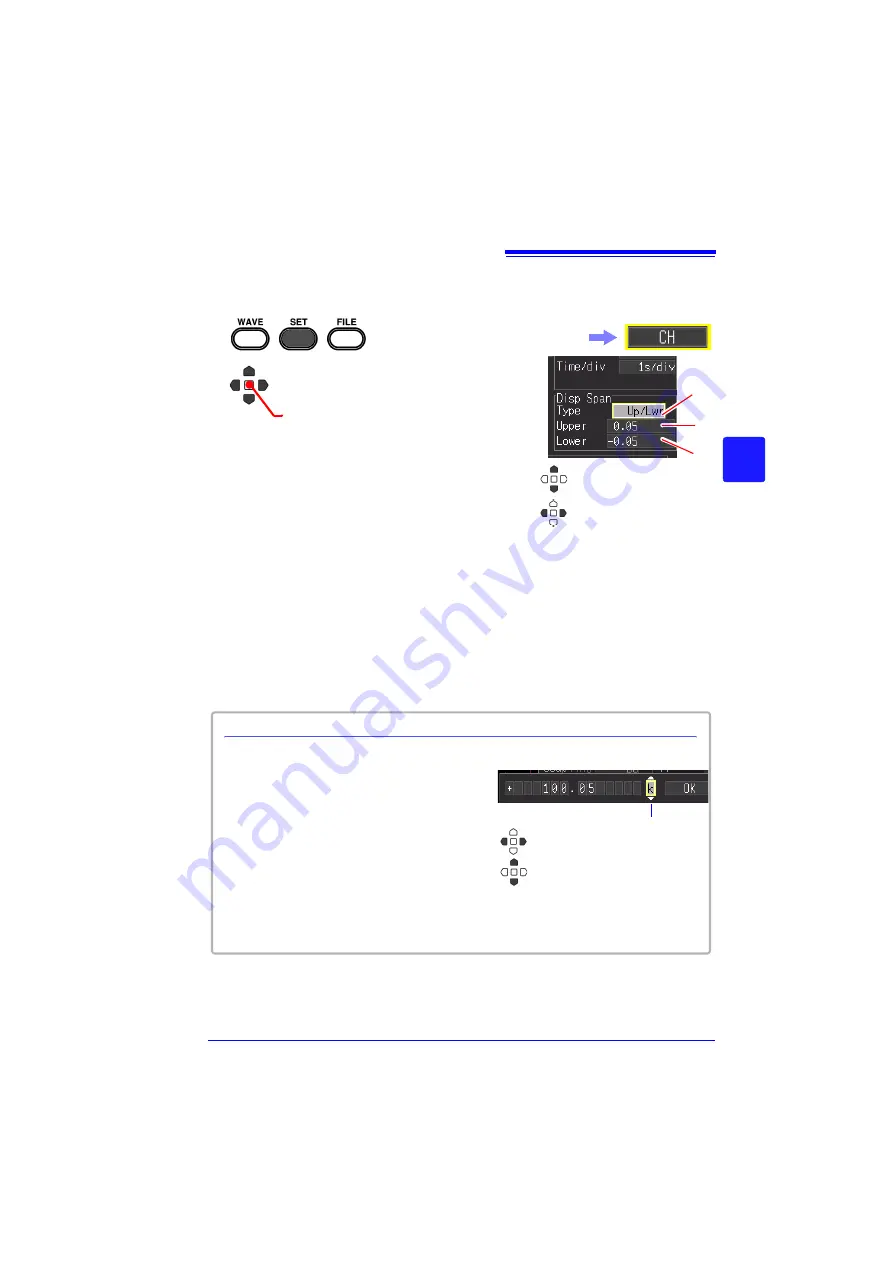
Setting the Display Range of the Waveform with the Upper and Lower
Limit Values
1
2
(Open/confirm the setting information.)
Select
[Up/Lwr]
from
[Type]
of the
display range (Disp Span).
3
Specify the
[Upper]
value for the top of the
display.
Move the cursor to the numerical value input field,
and then press the
ENTER
key to display the nu-
merical value setting dialog box.
For how to enter numerical values, see below.
4
Specify the
[Lower]
value for the bottom of
the display.
Set this in the same way as the upper limit value.
The display range and scaling settings are inter-
linked.
In the following steps, use the same operation to con-
figure settings.
The setting can also be changed
on the Waveform screen.
([Wave+Set] Display)
Change 1's digit
The expansion/compres-
sion range depends on
the selected magnifica-
tion.
Numerical value setting dialog box
Optional unit
Change 1’s digit and +/-
Select another digit
1. Select a digit to change with the left/right
cursor keys, and increment/decrement the
digit with the up/down keys.
(The rightmost character is for an optional
measurement unit symbol.
Pressing the up/down keys selects from
among E - P - T - G - M - k - (blank) - m - u -
n - p - f- a.
If no unit symbol is needed, it can be left
"blank.")
2. When the desired value is selected, press
[OK]
.
2
3
4
Select the
[CH]
screen.
Numerical Value Entry
Summary of Contents for MR8880-20
Page 2: ......
Page 12: ...Procedure 2 ...
Page 40: ...1 3 Screen Configuration and Display 30 ...
Page 76: ...3 4 Measurement Using Setting Wizard PRESETS key 66 ...
Page 174: ...6 4 Data Management 164 ...
Page 186: ...7 7 Performing a Printer Check 176 ...
Page 196: ...8 4 Numerical Value Calculation Expressions 186 ...
Page 216: ...10 4 Making System Settings 206 ...
Page 222: ...11 3 Communication Using Commands 212 4Click Next to start install ing Installing Click ...
Page 226: ...11 3 Communication Using Commands 216 ...
Page 254: ...13 6 Setting Wizard Function PRESETS 244 ...
Page 292: ...Appendix 10 Installing Waveform Viewer A30 ...
Page 297: ......
Page 298: ......
Page 299: ......
Page 300: ......


