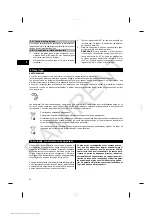
6.4.1 Charging a new battery for the first time
Charge the battery fully before using it for the first time.
NOTE
Make sure the system to be charged is standing securely.
6.4.2 Charging a previously used battery
Ensure that the outer surfaces of the battery are clean
and dry before inserting it in the tool.
Li-ion batteries are ready for use at any time, even when
only partly charged. During charging, progress is indic-
ated by the LEDs on the tool.
6.5 Fitting the battery
2
DANGER
Use only the Hilti batteries and Hilti mains adapters
listed under “Accessories”.
CAUTION
Before inserting the battery in the tool, check that
the terminals of the battery and the tool are free from
foreign objects.
1. Push the battery into the tool.
2. Turn the catch in a clockwise direction to the second
detent (the “locked” symbol is displayed).
6.6 Removing the battery
3
1. Turn the catch in a counterclockwise direction from
the second detent back to the “open” position (the
“unlocked” symbol is displayed).
2. Pull the battery out of the tool.
6.7 Options for charging the battery
DANGER
The PRA 85 mains adapter is for indoor use only.
Avoid ingress of moisture.
6.7.1 Charging the battery in the tool
4
NOTE
When charging, check that the temperature is within the
recommended charging temperature range (0 to 40°C/
32 to 104°F).
1. Swing the cover to the side so that the charging
cord socket becomes accessible.
2. Connect the charging cord from the mains adapter
or car charging connector to the battery.
3. During charging, the charge status is indicated by
the battery status LEDs on the tool (the tool must be
switched on).
6.7.2 Charging the battery outside the tool
5
NOTE
When charging, check that the temperature is within the
recommended charging temperature range (0 to 40°C/
32 to 104°F).
1. Remove the battery from the tool and connect it to
the mains adapter or car charging connector.
2. The red LED on the battery lights while charging is
in progress.
6.7.3 Charging the battery while the tool is in
operation
CAUTION
Avoid ingress of moisture.
Moisture may cause a short
circuit resulting in a risk of burning injury or fire.
1. Rotate the cover so that the charging cord socket
becomes accessible.
2. Connect the charging cord from the mains adapter
to the battery.
3. The tool continues to operate while charging is in
progress.
4. During charging, the charging status is indicated by
the LEDs on the tool.
7 Operation
7.1 Working in the horizontal plane
1. Set up the tool in a steady position suitable for the
application, e.g. on a tripod.
2. Press the on / off button.
The auto-leveling LED blinks green.
3. The laser switches on and the beam begins to rotate
as soon as the tool has leveled itself.
The green auto-leveling LED lights constantly.
7.2 Working with the laser receiver
The PRA 30 laser receiver can be used at distances (ra-
diuses) of up to 200m (650ft). The laser beam is indicated
by visual and audible signals.
7.2.1 Working with the laser receiver as a hand-
held unit
1. Press the on / off button.
2. Hold the PRA 30 with the receiving window in the
plane of the rotating laser beam.
The laser beam is indicated by visual and audible
signals.
7.2.2 Working with the laser receiver in the PRA 80
receiver holder
6
1. Open the catch on the PRA 80.
2. Place the PRA 30 laser receiver in the PRA 80
receiver holder.
3. Close the catch on the PRA 80.
4. Switch the laser receiver on by pressing the on/off
button.
5. Turn the rotating grip to the open position.
6. Fit the PRA 80 receiver holder onto the telescopic
staff or leveling staff and secure it by tightening the
rotating grip.
en
18
Printed: 27.05.2013 | Doc-Nr: PUB / 5070326 / 000 / 01
RAMIRENT


