


•
Programmable options are in lower case letters and do not finish with a question mark, but
instead: Yes/No, or other options, such as User / Manager.
•
To navigate through the menu system, answer the questions in the main and sub-menus.
For example, if the question is: LEARN USER CODES KEYFOBS & TAGS?, pressing
t
will take
you into the sub-menu User Codes/Tags/Learn Keyfobs?, and pressing
t
again will then take
you into the programmable options of this sub-menu. If at this point you press
x
, you will be
taken out of the individual option. Continue to press
x
and you will navigate through the sub-
menus and eventually return to the main menu.
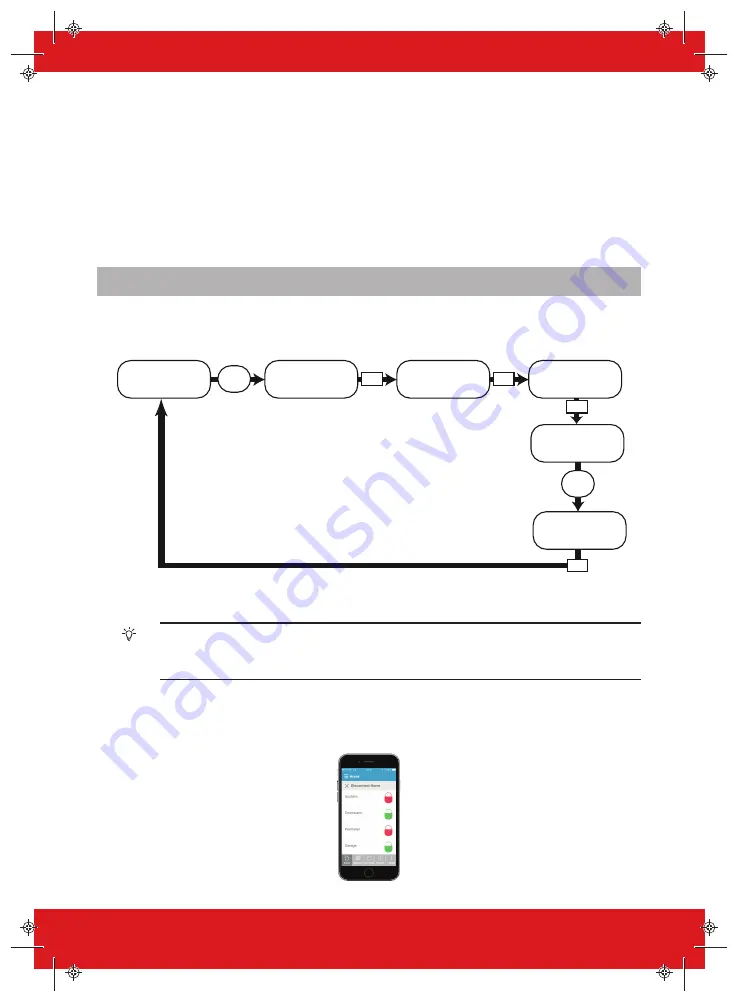
Arming the System
There are four ways that you can arm your system.
1. Enter your User Code on the keypad. The User Code needs to be programmed in the Master
Menu.
t
PCX
Enter Your Code
Arm Areas
Please Wait. . .
Arming Wireless
Arming [029]
Area A
User
Code
User
Code
Stop Arming?
t
t
t
Press the 0, 1, 2, 3, A, B, C or D
keys to select the area to be armed
Time 10:09 c
[******]
[0123ABCD]
[******]
2. Present your tag and deselect any areas that are not to be armed, then press the
t
button.
Options 1 & 2 only function if ‘Arm Area Choice’ is selected as ‘Yes’ in the Learn User
Codes/Tags/Keyfobs?
menu. If selected as ‘No’, then all areas allocated to your user will
arm.
3. Open the Home App on your smart device and sign into your system with your User
Code and password details. Then touch the green (disarmed) padlock icons to turn them to red
padlock icons and arm those areas.
100%
9:41 AM
8
PCX User Guide
102017853 - V01