


DS-PR1-60 User Manual
UM DS-PR1-60 090920NA
13
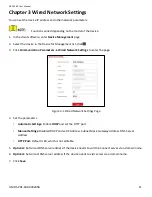
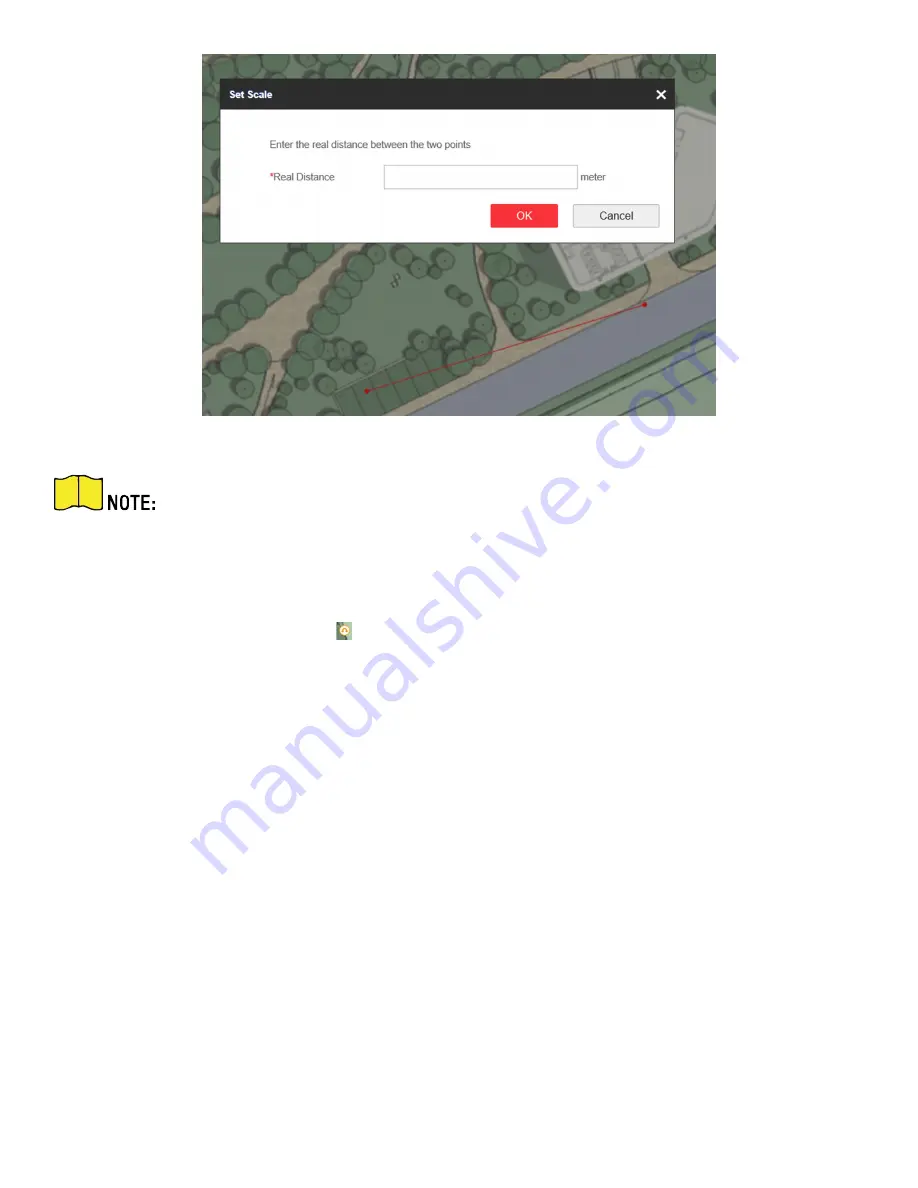
Figure 4-1 Edit Scale
The word range is the predicted distance range of system. You should enter the number in
the this range.
9.
Click
OK
.
10.
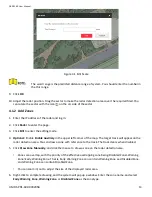
Adjust the radar position. Drag the sector to make the radar detection area cover the required filed. You
can rotate the sector with the icon
on the arc side of the sector.
4.1.2
Add Zones
1.
Enter the IP address of the radar and log in.
2.
Click
Radar
to enter the page.
3.
Click
Edit
to enter the editing mode.
4.
Optional:
Enable
Enable Auxiliary
in the upper left corner of the map. The target track will appear on the
radar detection area. You can draw a zone with reference to the track. The track clears when disabled.
5.
Click
Draw Zone Manually
, and click the mouse to draw a zone on the radar detection area.
•
Zones can overlap, with the priority of the effective overlapping zone being: Disabled Zone>Warning
Zone>Early Warning Zone. That is, Early Warning Zone can contain Warning Zone and Disabled Zone,
and Warning Zone can contain Disabled Zone.
•
You can zoom in/out to adjust the size of the displayed radar area.
6.
Right-click to complete drawing, and the system will pop up a window. Enter the zone name, and select
Early Warning Zone
,
Warning Zone
, or
Disabled Zone
as the zone type.
Summary of Contents for DS-PR1-60
Page 1: ...DS PR1 60 Security Radar User Manual...
Page 42: ...DS PR1 60 User Manual UM DS PR1 60 090920NA 42...
Page 69: ...DS PR1 60 User Manual UM DS PR1 60 090920NA 69...
Page 70: ...DS PR1 60 User Manual UM DS PR1 60 090920NA 70...
Page 71: ...DS PR1 60 User Manual UM DS PR1 60 090920NA 71 UD13649B...