


DS-7108HI-S series Net DVR User Manual
43
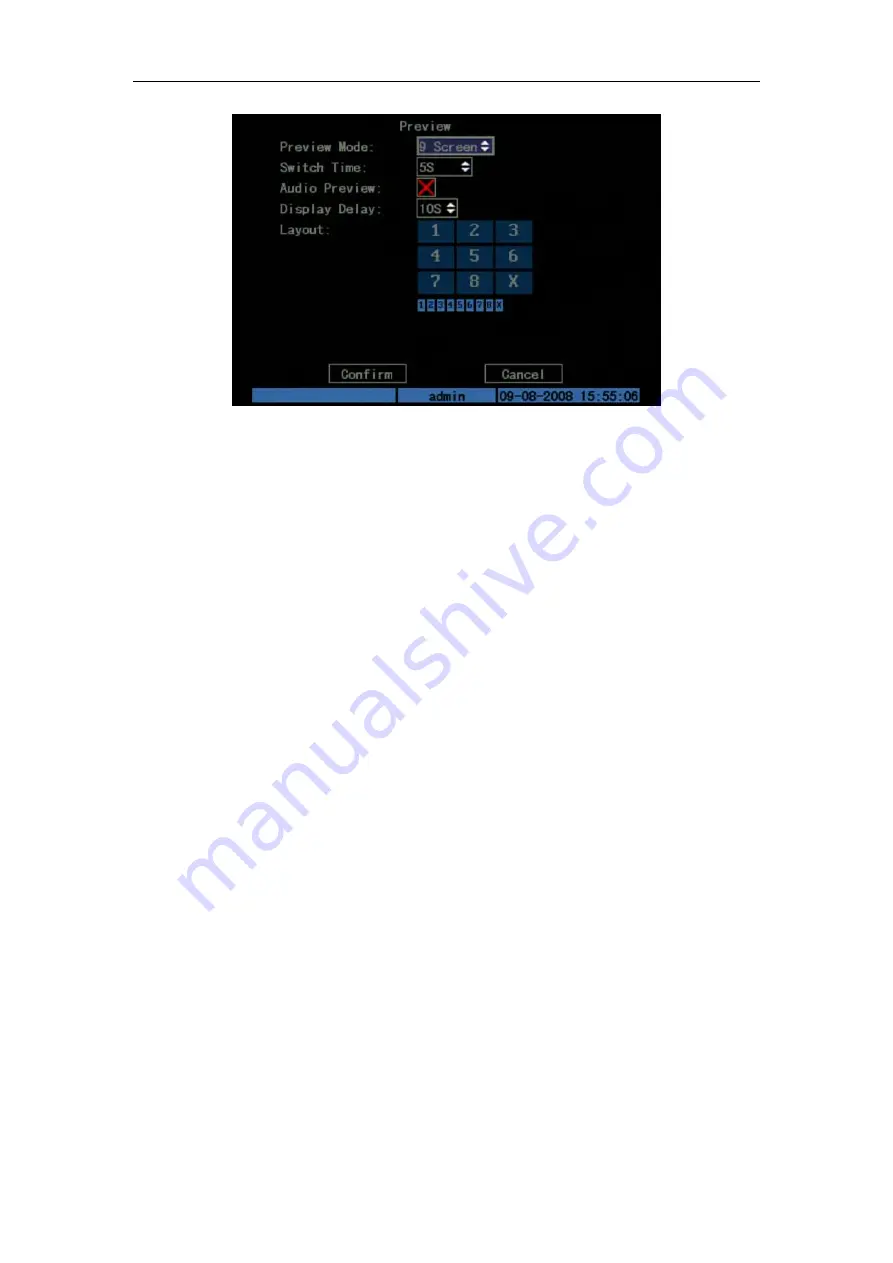
Fig. 5.20 Setup preview mode
Step 2: Preview properties:
Preview mode:
For preview mode item, you can use [↑] [↓] key to select one mode. In this
DVR, you can select one screen, four screens or nine screens as the preview display mode.
Switch time:
That is screen preview switch time. You can use [↑] [↓] keys to select switch
time. There are many options, including “5S”, “10S”, “20S”, “30S”, “60 S”, “120S”, “300S” and
“Never”. If you select “Never”, the preview screen will not be switched automatically. For
example, if you select “4 Screen” preview mode and “20 Seconds” switch time, DVR will cycle
display 4 channels screen every 20 seconds.
Audio preview:
If you enable audio preview (“
”), when you preview single camera, DVR
will play the audio of that channel. And if you preview multi-channels, the playing audio will be
the first channel.
Preview layout setup:
There is a square frame divided into many windows. If you select “9
Screen” preview mode, this frame is divided into 9 windows. Each window represents one camera.
You can move “Active Frame” among the windows. There is one bar under the square to display
the preview order of all cameras.
First select the biggest screen preview mode, for example, select “9 Screen” preview mode so
that all windows will be displayed in the square.
Secondly, move “Active Frame” to one of these windows, press numeric keys to input
camera index. The small window will display that camera number. In this way you can change the
display order. If you press 0, then the corresponding window will not display live video.
After you define the camera preview order, you can select preview mode to meet your
demand.
Save setup:
Press “Confirm” button to save preview properties. Press “Cancel” or [ESC] key
to invalidate.
5.12 Recording Setup
In main menu, there is an icon named “Recording”. You can enter recording menu as follows:


