


17730-241
57
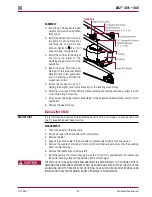
Component Replacement
AR2
™
40K • 46K
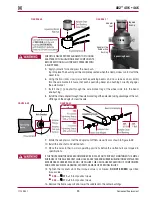
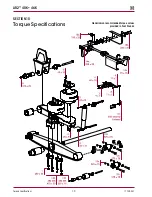
TRANSVERSE TORquE ROdS
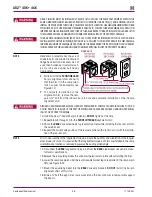
AR2 SUSPENSIONS INCORPORATE TRANSVERSE RODS FOR VEHICLE STABILITY . IF THESE COMPONENTS
ARE DISCONNECTED OR ARE NON-FUNCTIONAL, THE VEHICLE SHOULD NOT BE OPERATED . FAILURE
TO DO SO CAN RESULT IN ADVERSE VEHICLE HANDLING, ADVERSE VEHICLE HANDLING, POSSIBLE TIRE
CONTACT WITH THE FRAME, PREMATURE COMPONENT DAMAGE, OR SEVERE PERSONAL INjURY .
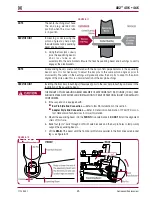
dISASSEMBLY
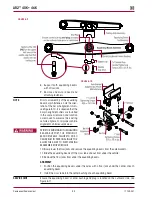
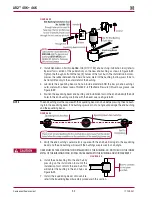
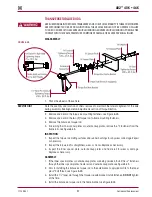
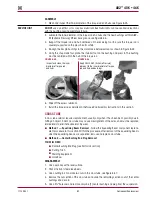
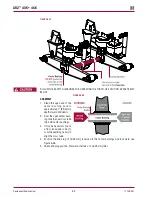
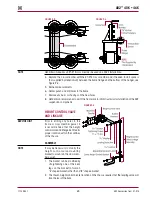
FIguRE 8‑35
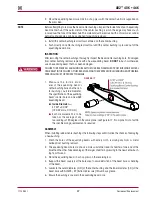
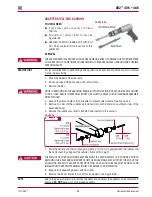
1 . Chock the wheels of the vehicle .
SERVICE HINT
Note the quantity and location of shims removed to maintain the lateral alignment of the axle
during assembly . See Alignment & Adjustments section of this publication .
2 . Remove and discard the torque rod mounting fasteners, see Figure 8-35 .
3 . Remove and discard the two (2) torque rod-to-frame mounting fasteners .
4 . Remove the transverse torque rod .
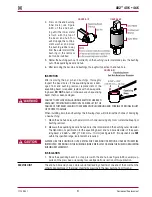
5 . If servicing the inner spacer plates or outer backup plates, remove the
5
⁄
8
" fasteners from the
frame rails, see Figure 8-35 .
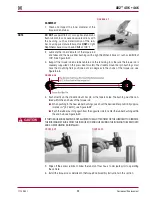
INSpECTION
1 . Inspect the torque rod mating surfaces and rubber bushings for any wear or damage . Repair
as necessary .
2 . Inspect the torque rod for straightness, wear, or cracks . Replace as necessary .
3 . Inspect the inner spacer plate, outer backup plates and frame rail for wear or damage .
Replace as necessary .
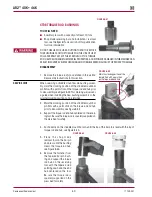
ASSEMBLY
1 . If the inner spacer plates or outer backup plates are being serviced, install the
5
⁄
8
" fasteners
through the inner spacer plates, frame rail, and outer backup plate, see Figure 8-35 .
2 . Prior to installing the transverse torque rod to the axle bracket, apply red Loctite to the taper
pin
5
⁄
8
" bolt thread, see Figure 8-35 .
3 . Install the 1
1
⁄
4
" taper pin through the torque rod axle bracket . Install fasteners,
dO NOT
tighten
at this time .
4 . Install the transverse torque rod to the frame bracket, see Figure 8-35 .