


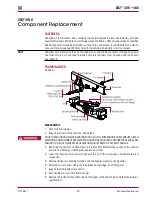


Component Replacement
36
17730-241
AR2
™
40K • 46K
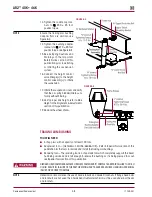
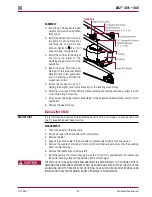
10 . Remove frame hanger and spacer plate (supplied by vehicle manufacturer) located between
the frame hanger and lower cross member flange .
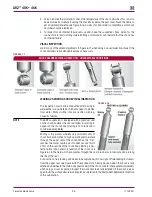
11 . Inspect the trailing arm bushing for wear or damage, refer to the Preventive Maintenance sec-
tion of this publication . Replace as necessary .
ASSEMBLY
1 . Install the frame hanger .
2 . Install the spacer plate (supplied by vehicle manufacturer) between the bottom of the frame
hanger and lower cross member flange .
3 . Clamp the bottom of the frame hanger to the cross member flange .
FAILURE TO CLAMP THE FRAME HANGER AGAINST THE UNDERSIDE OF THE FRAME WHILE TIGHTENING THE
FRAME BOLTS CAN RESULT IN COMPONENT DAMAGE AND PERSONAL INjURY OR PROPERTY DAMAGE .
4 . Install the fasteners that attach the frame hanger to the vehicle frame web and snug the bolts .
5 . Install the frame hanger fasteners that attach the frame hanger to the spacer plate and cross
member and snug the bolts .
6 . Tighten all frame hanger fasteners to the vehicle manufacturer’s torque specification and
remove the clamp .
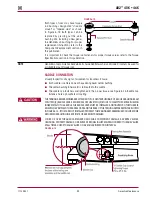
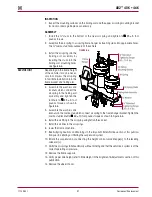
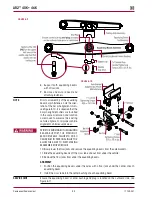
7 . If raised, lower the frame rail back to ride height . Position the trailing arm into the new frame
hanger .
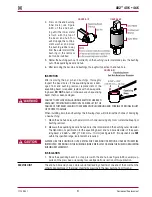
8 . Install the trailing arm bushing fasteners and adapter assembly .
9 . Tighten trailing arm bushing locknut to 470 ± 25 foot pounds torque .
10 . See additional Air Spring Cautions and Warnings in the Important Safety Notice section of this
publication prior to deflating or inflating the air system .
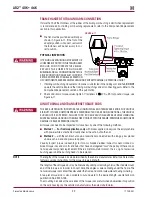
11 . Connect the height control valve linkage rod(s) to the height control valve arm(s) to inflate the
suspension properly .
12 . Remove frame supports .
13 . Remove the wheel chocks .
TRAILING ARM
dISASSEMBLY
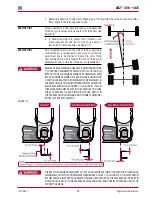
1 . Chock the wheels
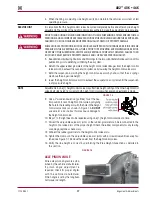
PRIOR TO AND DURING DEFLATION AND INFLATION OF THE AIR SUSPENSION SYSTEM, ENSURE THAT ALL
PERSONNEL AND EQUIPMENT ARE CLEAR FROM UNDER THE VEHICLE AND AROUND THE SERVICE AREA,
FAILURE TO DO SO CAN CAUSE SERIOUS PERSONAL INjURY, DEATH, OR PROPERTY DAMAGE .
2 . See Air Spring Cautions and Warnings in the Important Safety Notice section of this publica-
tion prior to deflating or inflating the suspension system .
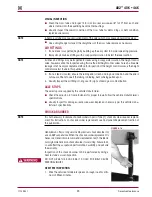
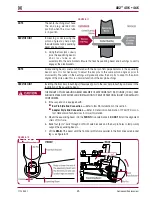
3 . Lower the leveling valve arm(s) to exhaust the air in the air springs and deflate the rear
suspension .
4 . Lift and support the axles with safety stands .
5 . Remove the tires .
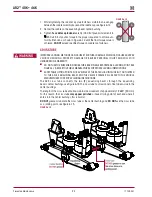
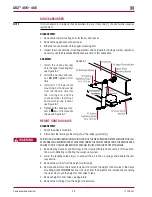
6 . Remove saddle cap fasteners and disconnect the saddle caps from trailing arm .
7 . Disconnect the shock absorber from the trailing arm .
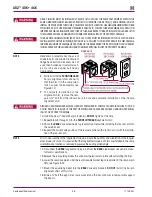
8 . Disconnect the air lines from the air springs .
9 . Remove upper and lower air spring fasteners .
10 . Raise the frame to full suspension rebound travel .


