background image

Helmer Scientific i.Series

®

 - Platelet Agitator

Operation Manual 

360390/A

5

2 Installation

2.1 

Location Requirements

  Stand Alone

Installed in Incubator


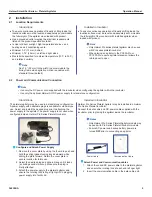
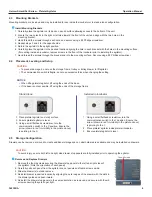
To ensure continuous operation of linearly shifting loads, the  

  location surface must be level and adequately accommodate  

  the full weight of the agitator when loaded with product.


Has a grounded outlet meeting the electrical requirements  

  listed on the product specification label.


Is clear of direct sunlight, high temperature sources, and   

  heating and air conditioning vents.


Minimum 0.5” (13 mm) behind.


Minimum 0.75” (20 mm) on left and right sides. 


♦ Meets limits specified for ambient temperature (15˚C to 35˚C) 


  and relative humidity.

 Note

Add 1.5” (38 mm) to the width to accommodate the 

trolley frame when agitation motion is enabled with 

standard throw (default).


To ensure continuous operation of linearly shifting loads, the  

  location surface must be level and adequately accommodate  

  the full weight of the incubator with installed agitator when  

  loaded with product.

 Note

•  Only Helmer Pro series platelet agitator may be used  

  with Pro series platelet incubator.
•  When placing an agitator in the PC900-Pro or  

  PC1200-Pro, ensure agitator placement allows the  

  roll-top door to open

2.2 

Power and Communication Connection

 Note

• 

Use only the DC power cord supplied with the incubator when configuring the agitator within the incubator.

• 

Use only the optional Helmer AC/DC power supply for stand-alone configuration.

  Stand Alone

Installed in Incubator

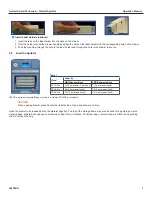
The platelet agitator may be used in a stand-alone configuration. 

A power supply with adaptable plugs is available for stand-alone 

use. Select and install the desired plug prior to attaching the 

power supply to the agitator. The power supply is not used when 

configured inside a Helmer Pro Series Platelet Incubator. 

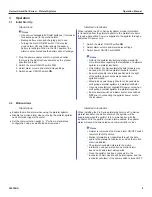
Helmer Pro Series Platelet Agitator may be installed in a Helmer 

Pro Series Platelet Incubator.
Connect the data cable and DC power cable supplied with the 

incubator prior to placing the agitator inside the incubator. 


 Configure and Attach Power Supply

1.  Remove the cover plate by using the thumb to push and  

  hold the spring loaded locking key downward while  

  sliding the plate forward. Retain the cover plate in  

  secure location for future use.
2.  Select the desired plug and slide in place until it locks  

  (a clicking sound will occur).Make sure the plug is  

  firmly attached.

3.  Attach the power supply to the platelet agitator, and  

  ensure the rotating lock is finger tight prior to plugging 


  power supply into facility AC.

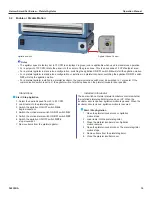
 Notes

•  Only Helmer Pro Series Platelet Agitator models may  

  be used with Pro Series Platelet Incubator models.
•  Ensure AC power and backup battery power are  

 turned 

OFF

 prior to connecting an agitator.


Power Cable 


Communication Cable

 Attach Power and Communication cables 

1.  Attach the coiled DC power cable to the platelet agitator,  

  and ensure the rotating lock at each end is finger tight.

2.  Insert the communication cable in the data cable port.

Summary of Contents for i Pro Series

Page 1: ...360390 A Platelet Agitator Operation Manual i Series Pro Models Countertop PF15 Pro PF48 Pro PF96 Pro ...

Page 2: ...Helmer Inc All other trademarks and registered trademarks are the property of their respective owners Helmer Inc doing business as DBA Helmer Scientific and Helmer Disclaimer This manual is intended as a guide to provide the operator with necessary instructions on the proper use and maintenance of certain Helmer Scientific products Any failure to follow the instructions as described could result i...

Page 3: ...ion Requirements 5 2 2 Power and Communication Connection 5 2 3 Mounting Brackets 6 2 4 Placement Leveling and Setup 6 2 5 Storage Configuration 6 2 6 Load the Agitator 7 3 Operation 8 3 1 Initial Start Up 8 3 2 Motion Alarm 8 3 3 Motion Alarm Controls 9 3 4 Enable or Disable Motion 10 4 Specifications 11 4 1 Operating Standards 11 5 Compliance 12 5 1 Safety Compliance 12 5 2 Environmental Complia...

Page 4: ...rect the interference at his own expense Helmer platelet agitators are intended to provide the continuous gentle agitation conditions required for the storage of platelet products The devices are intended to be operated by personnel who have procedures in place for meeting FDA AABB EU or any other applicable regulations for the processing and storage of platelet products 1 4 Safety Precautions and...

Page 5: ...is enabled Avoid sharp edges when working inside the electrical compartment Ensure biological materials are stored at recommended temperatures determined by standards literature or good laboratory practices Proceed with caution when adding and removing products from the platelet agitator Use only manufacturer supplied power supply cord when operating stand alone or within incubator Using the equip...

Page 6: ...the optional Helmer AC DC power supply for stand alone configuration Stand Alone Installed in Incubator The platelet agitator may be used in a stand alone configuration A power supply with adaptable plugs is available for stand alone use Select and install the desired plug prior to attaching the power supply to the agitator The power supply is not used when configured inside a Helmer Pro Series Pl...

Page 7: ...nds of the base If the base is not accessible lift using the ends of the storage frame Stand Alone Installed in Incubator 1 Place platelet agitator on sturdy surface 2 Ensure platelet agitator is level 3 Using a small flathead screwdriver turn the communication switch to the X position Ensure the arrow shown in red for visibility in the picture above is pointing to the X 1 Using a small flathead s...

Page 8: ...ith platelet bags shown in a Helmer PC900 Pro incubator CAUTION When opening drawer grasp handle not label holder Open one drawer at a time Open the drawer to be loaded and lay the platelet bags flat The top of the storage frame may also be used for bag storage Avoid stacking bags Maintain enough space around each bag for air circulation For thicker bags remove drawers Place the bag tubing under o...

Page 9: ...le is carefully positioned to the right of the agitator to prevent damage caused by agitation motion Stand alone power supply should not be used when configuring a platelet agitator in a platelet incubator Use only manufacturer supplied DC power cord when configuring a platelet agitator in a platelet incubator Ensure power switch and alarm switch are switched OFF prior to connecting the agitator p...

Page 10: ...o external devices is suppressed Alarm Delay The duration of time between when agitation stops and when the alarm sounds is the alarm delay The alarm delay is set using the alarm delay control Notes The minimum alarm delay that can be set is approximately 10 seconds Maximum alarm delay is approximately 10 minutes The default motion alarm delay is set at the halfway point approximately 4 to 5 minut...

Page 11: ...itator will not start stop based on the platelet incubator door position Stand Alone Installed in Incubator Start Stop Agitation 1 Select the desired speed from 40 to 80 CPM 2 Load items into the platelet agitator 3 Switch the agitation ON OFF switch ON to begin movement 4 Switch the motion alarm switch ON OFF switch ON 5 Switch the motion alarm switch ON OFF switch OFF 6 Switch the agitation ON O...

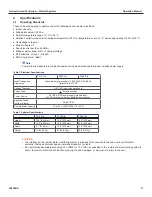
Page 12: ...and alone power supply 100 240 VAC 50 60 Hz Agitator Unit 24VDC Voltage Tolerance 10 AC input to power supply Power Draw 16 Watts nominal Power Source 24VDC AC DC power supply stand alone 24VDC umbilical cable configured with incubator Agitation Speed cycles minute 40 80 CPM Remote Alarm Capacity 1 A at 33 V AC RMS or 70 V DC Table 3 Agitator Specifications PF15 Pro PF48 Pro PF96 Pro Height 13 5 3...

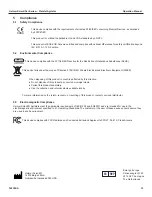
Page 13: ...When disposing of this product in countries affected by this directive Do not dispose of this product as unsorted municipal waste Collect this product separately Use the collection and return systems available locally For more information on the return recovery or recycling of this product contact your local distributor 5 3 Electromagnetic Compliance Helmer Scientific Agitators meet the applicable...

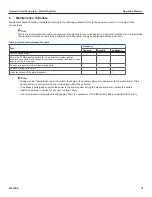
Page 14: ...e 9V NiMH backup battery for the motion alarm system after an extended power failure and change it if necessary or change the battery if it has been in service for one year ü Check moving parts for wear Clean moving parts ü Replace moving parts if worn ü Clean the exterior of the platelet agitator ü Notes During a power failure when the motion alarm is enabled the backup battery provides power to ...

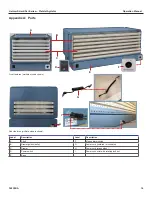
Page 15: ...ures multiple models shown Rear features multiple models shown Label Description Label Description A Shelf F Motion alarm switch B Drawer guides trolley G Power cord installed in incubator C Drawer H Power cord stand alone D Power switch I Power connector with rotating lock nut E Base C G F E D B I H A ...

Page 16: ...res multiple models shown Label Description Label Description A Drawer stop panel E Agitator communication setting B Agitator speed control stand alone configuration only F Data cable port C Alarm volume control G Communication cable for use with Pro Series Incubator D Alarm delay control F E D C B A G ...

Page 17: ...Helmer Scientific i Series Platelet Agitator Operation Manual 360390 A 16 ...

Page 18: ...Helmer Scientific 14400 Bergen Boulevard Noblesville IN 46060 USA Copyright 2018 Helmer Inc 360390 A ...

Reviews: