Manual Operation and Setup
14.9 Compensating workpiece misalignment with 3-D touch probe
(option 17)
14
528
HEIDENHAIN | TNC 620 | ISO Programming User's Manual | 9/2016
14.9
Compensating workpiece
misalignment with 3-D touch probe
(option 17)
Introduction
HEIDENHAIN only gives warranty for the function of
the probing cycles if HEIDENHAIN touch probes are
used.
Make sure during probing that the axis angles
match the set tilt angles. The control checks
this automatically if the
chkTiltingAxes
machine
parameter (no. 204601) is activated.
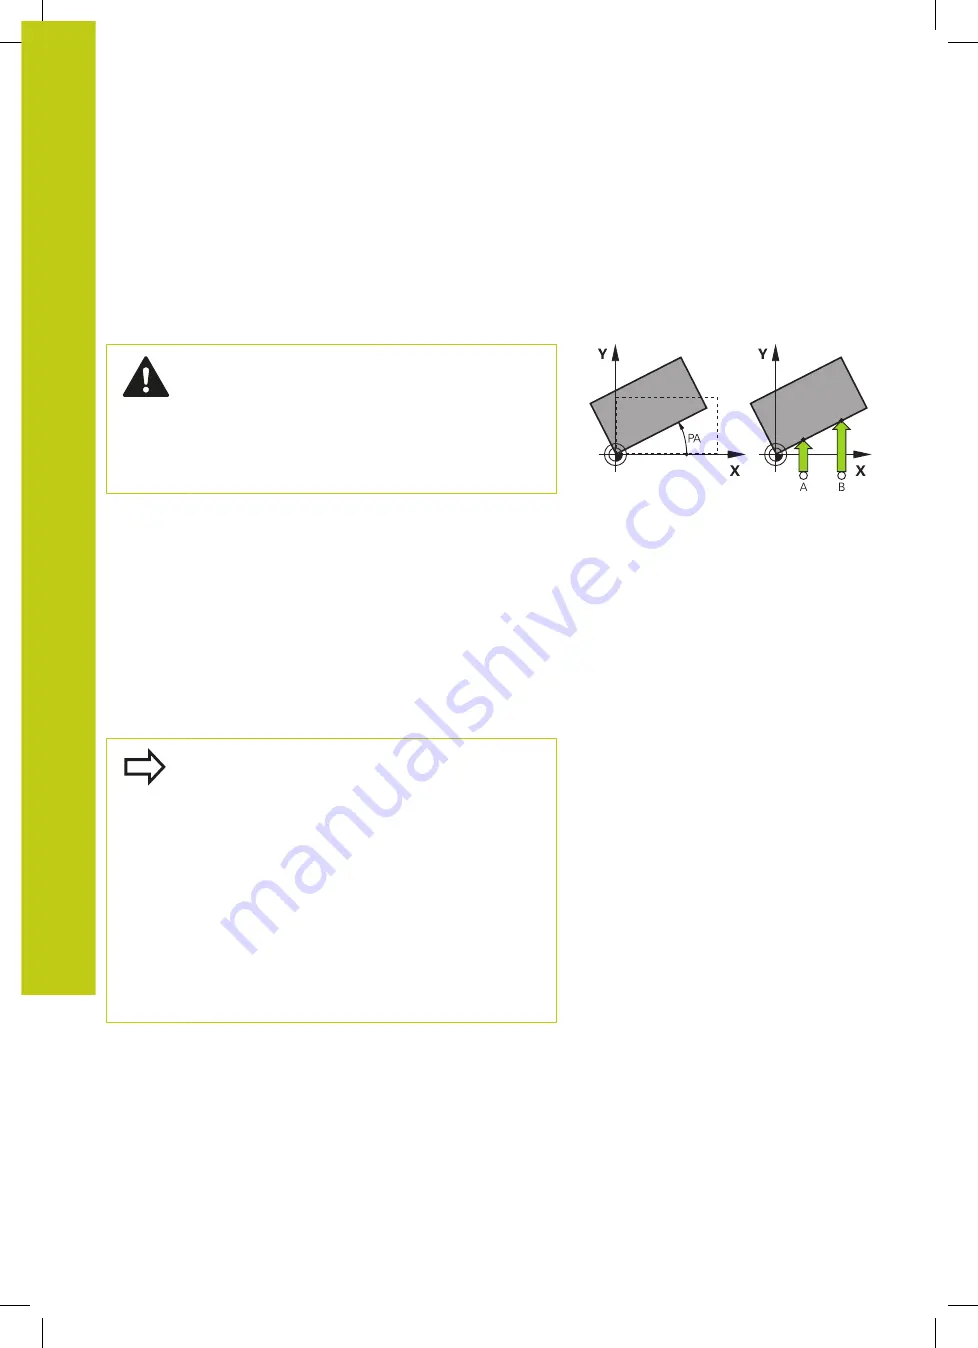
The TNC electronically compensates workpiece misalignment by
computing a "basic rotation."
For this purpose, the TNC sets the rotation angle to the desired
angle with respect to the reference axis in the working plane.
The TNC interprets the measured angle as rotation around the tool
direction, and saves the values in the columns SPA, SPB or SPC of
the preset table.
To identify the basic rotation, probe two points on the side of the
workpiece. The sequence in which you probe the points influences
the calculated angle. The measured angle goes from the first to the
second probing point. You can also identify the basic rotation by
holes or studs.
Select the probe direction perpendicular to the
angle reference axis when measuring workpiece
misalignment.
To ensure that the basic rotation is calculated
correctly during program run, program both
coordinates of the working plane in the first
positioning block.
You can also use a basic rotation in conjunction with
the PLANE function. In this case, first activate the
basic rotation and then the PLANE function.
You can also activate a basic rotation without probing
a workpiece. For this purpose enter a value in
the basic rotation menu and press the
SET BASIC
ROTATION
soft key.
Summary of Contents for TNC 620 Programming Station
Page 4: ......
Page 5: ...Fundamentals ...
Page 28: ...Contents 28 HEIDENHAIN TNC 620 ISO Programming User s Manual 9 2016 ...
Page 57: ...1 First Steps with the TNC 620 ...
Page 77: ...2 Introduction ...
Page 110: ......
Page 111: ...3 Fundamentals file management ...
Page 166: ......
Page 167: ...4 Programming aids ...
Page 194: ......
Page 195: ...5 Tools ...
Page 234: ......
Page 235: ...6 Programming contours ...
Page 284: ......
Page 285: ...7 Data transfer from CAD files ...
Page 304: ......
Page 305: ...8 Subprograms and program section repeats ...
Page 323: ...9 Programming Q parameters ...
Page 384: ......
Page 385: ...10 Miscellaneous functions ...
Page 407: ...11 Special functions ...
Page 433: ...12 Multiple axis machining ...
Page 475: ...13 Pallet management ...
Page 480: ......
Page 481: ...14 Manual Operation and Setup ...
Page 549: ...15 Positioning with Manual Data Input ...
Page 554: ......
Page 555: ...16 Test Run and Program Run ...
Page 590: ......
Page 591: ...17 MOD Functions ...
Page 622: ......
Page 623: ...18 Tables and Overviews ...


