


Ver 2019-
A
IMPORTANT
PLEASE READ THIS BEFORE INSTALLATION
This thermostat is tested and certified by Pepper One Gmbh
according to the requirements put forward by the Z-Wave
Alliance. This is a Z-wave Plus product with the 500 series chip.
If the product does not work with your gateway, then the
gateway manufacturer has not made an integration or
implemented such a thermostat with their gateway. We do not
give any guarantee towards integration.
PRINCIPLES FOR REGULATION
The Heatit Z-Wave is designed for controlling electrical heating
cables and electrical radiators/convectors. The thermostat
has built in temperature sensors and has 3 algorithms for
temperature compensation.
After you have set the temperature, the thermostat will use
a hysteresis to regulate the temperature. The hysteresis is
adjustable.
TEMPERATURE SHOWN IN DISPLAY
The temperature shown in the display is the actual temperature
for floor sensor and the external room sensor. You are able to
calibrate the sensor values.
When using the built in room sensor, the temperature shown
is the set point. When using the built in sensor, the thermostat
can seem somewhat inaccurate. This is due to heat generation
inside the thermostat, draft and other external influences.
If the thermostat is to be used with waterbased heating systems,
you have to use an external sensor.
Z-WAVE THERMOSTAT – SETUP
This manual describes the most essential functions and
technical specifications of the thermostat.
These instructions help the user to control the thermostat, and
the electrician to install and setup the thermostat.
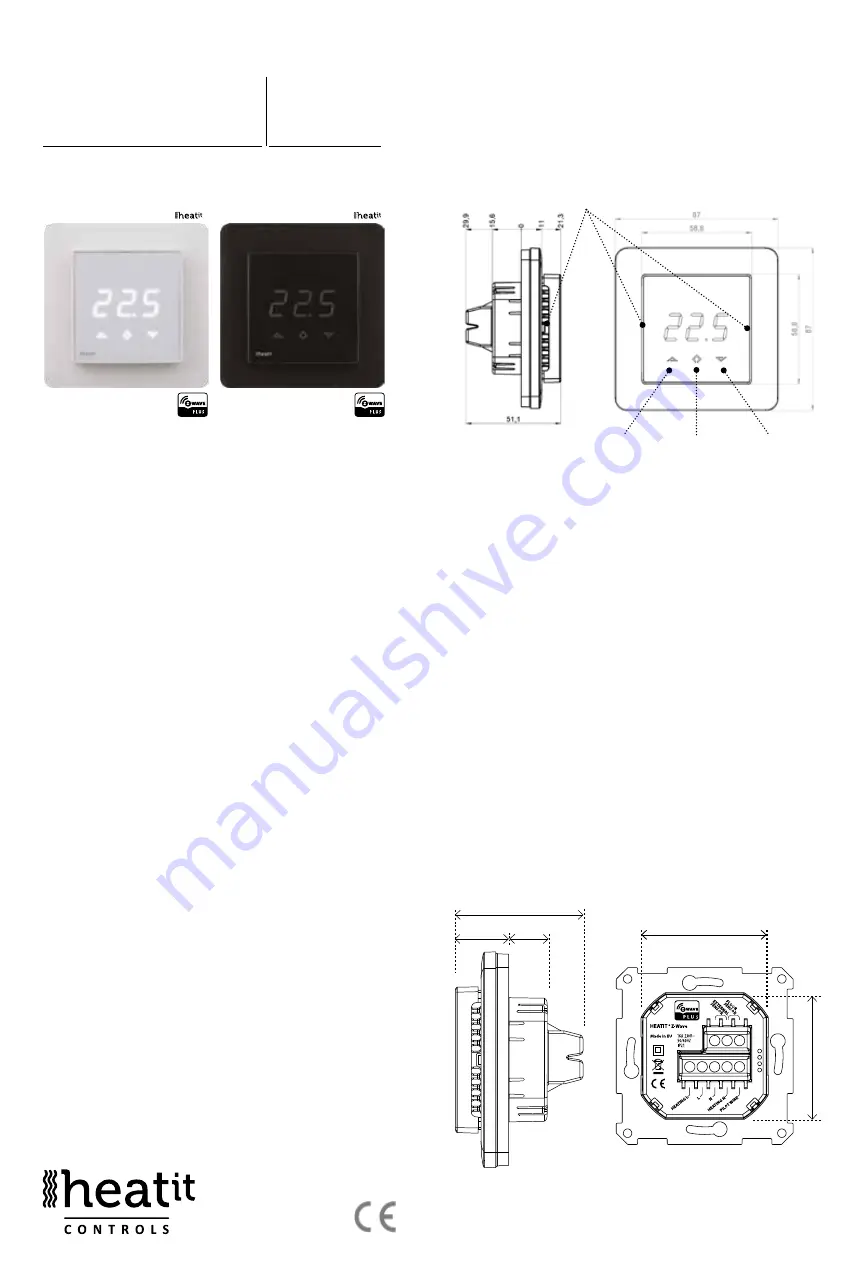
INSTALLATION
Installation must be done by a qualified electrical installer in
accordance with the National Building codes. Before installation,
disconnect any power to the thermostat’s mains. During
installation of the thermostat, power to the thermostat must be
disconnected AT ALL TIMES!
Use e.g. a small slotted screwdriver. Start by carefully removing
the front cover by pushing the release springs. The front cover
and the frame can now be removed.
Now connect the wires to the thermostat’s terminals:
Use 1,5mm² or 2,5mm² according to load.
HEATING (N)
Heating cable connection (Neutral)
N
Power connection (Neutral) 230V
L
Power connection (Live) 230V
HEATING (L)
Heating cable connection (Live)
PILOT
230V pilot signal (ECO temp)
FLOOR SENSOR
NTC type (10, 12, 15, 22, 33 or 47kΩ).
Default
10kΩ.
EXTERNAL SENSOR
NTC type (10, 12, 15, 22, 33 or 47kΩ).
Default
10kΩ.
Next, position the thermostat and fasten it onto the wall’s
mounting box using 2-4 screws. Position the frame, then position
and carefully press the front cover until it snaps in place. Check that
the front cover has snapped in place properly on both left and right
side. The front cover should now be firmly fixed on all sides.
NOTE!
Top cover has to be installed when the thermostat is
connected to mains.
The thermostat is not SELV product.
All voltage parts are considered as 230VAC.
Release spring
1: Left
3: Right
2: Center
HEATIT
Z-WAVE
Firmware 1.8
01.07.2019
Installers manual
51,1mm
15,6mm
21,3mm
49,
5m
m
TF 021
49,5mm


