86
Cleaning the housings
If the camera becomes dirty, clean it with a soft, clean cloth lightly moistened with water
only. Do not use any other solvents and do not allow water to seep in the openings.
Cleaning with an E-Wipe
E-wipes are individually packed wet tissues.
1. Tear at the notch to break seal.
2. Remove e-wipe from its packaging and continue without delay.
3. Fold the tissue to match the width of the IR filter.
4. Apply firm pressure using two or three fingers at the edge of the wipe to ensure an
even, firm contact with filter surface. Wipe the surface in one unbroken motion.
1
2
Basic cleaning procedure
1, 2
1. Discharge any static electricity that may have built up on your body by touching the
CFV housing.
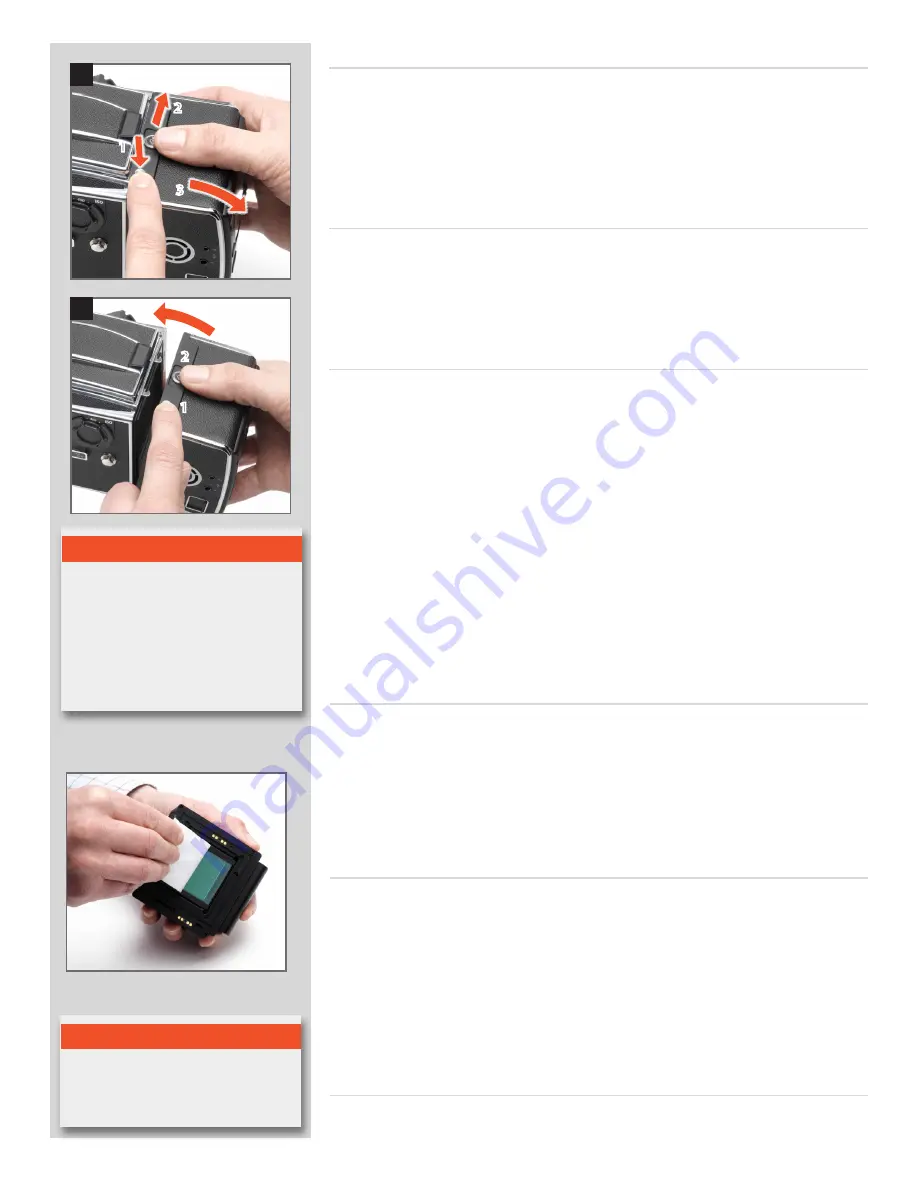
2. While keeping the lock safety button depressed, slide the lock button to the right.
3. The top of the CFV will be released (while it rests on the magazine retaining hooks)
and it can be swung away from the camera body.
4. Clean the outside surface of IR Filter by spraying it with clean compressed air. If this
is not enough, then use one of the procedures outlined below.
5. If you still see spots on your shot after you have cleaned the outside of the infrared
filter, then you may have dust on either on the inside of the IR filter or on the CCD
itself. This can only be removed at the Hasselblad factory. Contact your Hasselblad
dealer for assistance.
6. When reattaching the CFV to the camera, keep the lock safety button depressed and
the lock button to the right. Check that the CFV is firmly in place.
Cleaning the CCD Infrared Filter
If you see dark or colored spots or lines in your images, then you may need to clean the
outer surface of CFV’s infrared (IR) filter. In most cases, the careful use of compressed air
will be adequate, but sometimes small particles will get stuck to the surface of the IR filter,
requiring for a more thorough cleaning, involving either fluid or wipes. For a good safe
cleaning, follow descriptions below.
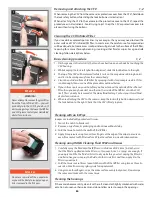
Removing and attaching the CFV
1, 2
When removing the CFV from the camera (or protective cover from the CFV), hold down
the lock safety button while sliding the lock button as in illustration 1.
When attaching the CFV to the camera (or the protective cove to the CFV), repeat the
procedure as in illustration 2. Avoid trying to just ‘snap’ the CFV or protective cover into
place without using the buttons.
N o t e
WARNING
!
Never attempt to remove the glass filter
from the front of the CCD—you will
probably ruin the CCD if you do so. If
dust manages to get between the IR filter
and CCD, please contact your Hasselblad
dealer for assistance.
N o t e
Do not use same side of the e-wipe twice
as you will be likely to reapply any par-
ticles removed in the first pass.
Cleaning using HAMA Cleaning Fluid 5902 and tissues
1. Carefully spray the fluid onto the IR filter at a distance of 10-15 cm (4-5 inches), so
that the fluid is applied onto the filter as a thin, even haze. 1-2 sprays are enough. If
you apply too little, the fluid will start to dry up before you start wiping the filter. As
an alternative you can spray the fluid onto the tissue first, and then apply it to the
filter as you wipe it.
2. Fold the tissue several times to match the width of the IR filter using two or three tis-
sues at a time if necessary (glossy side facing outward).
3. Using two or three fingers, wipe the entire surface evenly (only once). Do not wipe
the same area twice with the same tissue.
2
1
3
1
2
3
Summary of Contents for CFV
Page 1: ...User Manual 503CW 503CWD CFV CFVII CFV 39 CFV 50 Version 10 ...
Page 2: ...2 Welcome to Hasselblad 503CW 503CWD CFV ...
Page 6: ...6 1 General Information Photo JoaoCarlos HasselbladMasters ...
Page 28: ...28 1 Overview Photo ClaudioNapolitan HasselbladMasters ...
Page 42: ...42 2 Getting Started Photo MarkHolthusen HasselbladMasters ...
Page 51: ...51 3 Previews Photo MarkZibert HasselbladMasters ...
Page 55: ...55 4 Batches Browsing Photo BangPeng HasselbladMasters ...
Page 61: ...61 5 IAA Instant Approval Architecture Photo LyleOwerko HasselbladMasters ...
Page 66: ...66 6 Delete Format Copy Photo JoaoCarlos HasselbladMasters ...
Page 72: ...72 7 Settings Photo NinaBerman HasselbladMasters ...
Page 73: ...73 Navigating the USER INTERFACE settings ...
Page 85: ...85 8 Cleaning Photo DirkRees HasselbladMasters ...
Page 87: ...87 9 Appendix Photo MarkHolthusen HasselbladMasters ...

