37
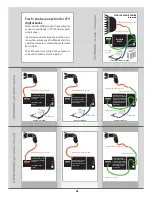
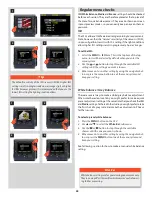
Studio flash/strobe units when tethered to a desktop computer
If the 503CWD/CFV is tethered to a computer that is connected to a regular electricity sup-
ply system as well as a studio flash/strobe unit that is also connected to a regular electricity
supply system/generator system, then make the following connections instead. For your
own safety and to protect the electronics in the CFV, please ensure you do this correctly.
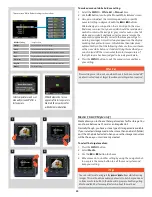
a) Connect the
flash input sync cable
from the sync contact (PC connector) on the lens
to the
flash sync IN terminal
on the CFV.
b) Connect the
flash output sync cable
from the
flash sync OUT terminal
on the CFV to
a regular flash/strobe sync cable that is connected to the unit.
Flash / Strobe
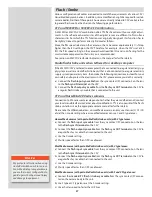
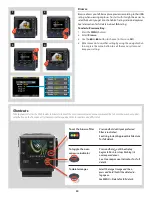
Various configurations of cables are needed to match the requirements of various CFV /
Hasselblad body combinations. In addition, some modification might be required for certain
camera bodies. Neither of these points however are directly related to CFV use but rather
to general flash use. See the chart on the following page for details.
CFV and 503CWD or 503CW+CFV combination
A 503CWD or 503CW+CFV combination offers TTL flash control with some slight adjust-
ments. As the reflective characteristics of the digital sensor are different to film surface
characteristics (for which the TTL function was originally designed), this function has to
be slightly ‘tricked’ to perform correctly. Proceed as follows:
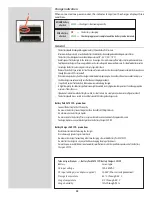
Move the film speed selector on the camera so that is becomes approximately 12⁄3 f/stop
higher than the ISO setting on the CFV. Therefore, for example, when the CFV is set at 50
ISO, the ‘film speed setting’ on the camera should read 160 ISO, and so on. Testing for the
most suitable compensation that suits you is recommended.
See section on 503CW /Viewfinder indicator in this manual for further details.
Modified cameras (with portable flash/strobe units) with F and CF type lenses:
a) Connect the
standard PC /flash / strobe sync cable
from the sync contact (PC connec-
tor) on the camera body to the unit.
b) Use F type or CF type lenses at the F-mode setting.
c) Use a shutter speed no faster than 1/90 sec.
Modified cameras (with portable flash/strobe units) with C type lenses:
a) Connect the
flash input sync cable
from the sync contact (PC connector) on the lens
to the
flash sync IN terminal
on the CFV.
b) Connect the
flash output sync cable
from the
flash sync OUT terminal
on the CFV to
a regular flash sync cable that is connected to the unit.
c) Use the C-mode setting.
d) Shutter speeds faster than 1/90 sec allowed.
Unmodified cameras (with portable flash/strobe units) with C type lenses:
a) Connect the
flash input sync cable
from the sync contact (PC connector) on the lens
to the
flash sync IN terminal
on the CFV.
b) Connect the
flash output sync cable
from the
flash sync OUT terminal
on the CFV to
a regular flash sync cable that is connected to the unit.
c) Use the C-mode setting.
d) Shutter speeds faster than 1/90 sec allowed.
CFV and Hasselblad 200 series cameras
Connection to 200 series cameras depends on whether they are modified or not (contact
your local Hasselblad Service Center about modification). TTL is also possible if the flash/
strobe unit allows. See the appropriate camera manual for further details.
Please note the difference below – unmodified cameras can only use C lenses (C/ CF /CFi
etc) at the C-mode setting whereas modified cameras can use C and F-type lenses.
N o t e
Pay particular attention when using
studio flash/strobe units in conjunc-
tion with a desktop computer. Ensure
you use the correct configuration to
guard against both personal injury
and damage to equipment.
Summary of Contents for CFV
Page 1: ...User Manual 503CW 503CWD CFV CFVII CFV 39 CFV 50 Version 10 ...
Page 2: ...2 Welcome to Hasselblad 503CW 503CWD CFV ...
Page 6: ...6 1 General Information Photo JoaoCarlos HasselbladMasters ...
Page 28: ...28 1 Overview Photo ClaudioNapolitan HasselbladMasters ...
Page 42: ...42 2 Getting Started Photo MarkHolthusen HasselbladMasters ...
Page 51: ...51 3 Previews Photo MarkZibert HasselbladMasters ...
Page 55: ...55 4 Batches Browsing Photo BangPeng HasselbladMasters ...
Page 61: ...61 5 IAA Instant Approval Architecture Photo LyleOwerko HasselbladMasters ...
Page 66: ...66 6 Delete Format Copy Photo JoaoCarlos HasselbladMasters ...
Page 72: ...72 7 Settings Photo NinaBerman HasselbladMasters ...
Page 73: ...73 Navigating the USER INTERFACE settings ...
Page 85: ...85 8 Cleaning Photo DirkRees HasselbladMasters ...
Page 87: ...87 9 Appendix Photo MarkHolthusen HasselbladMasters ...

