13
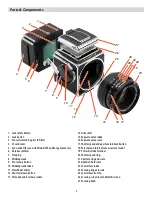
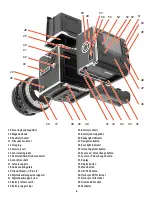
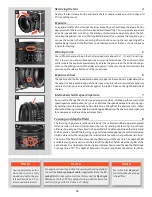
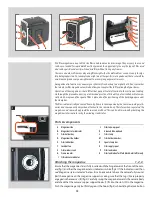
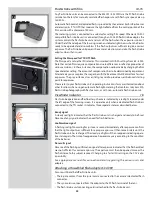
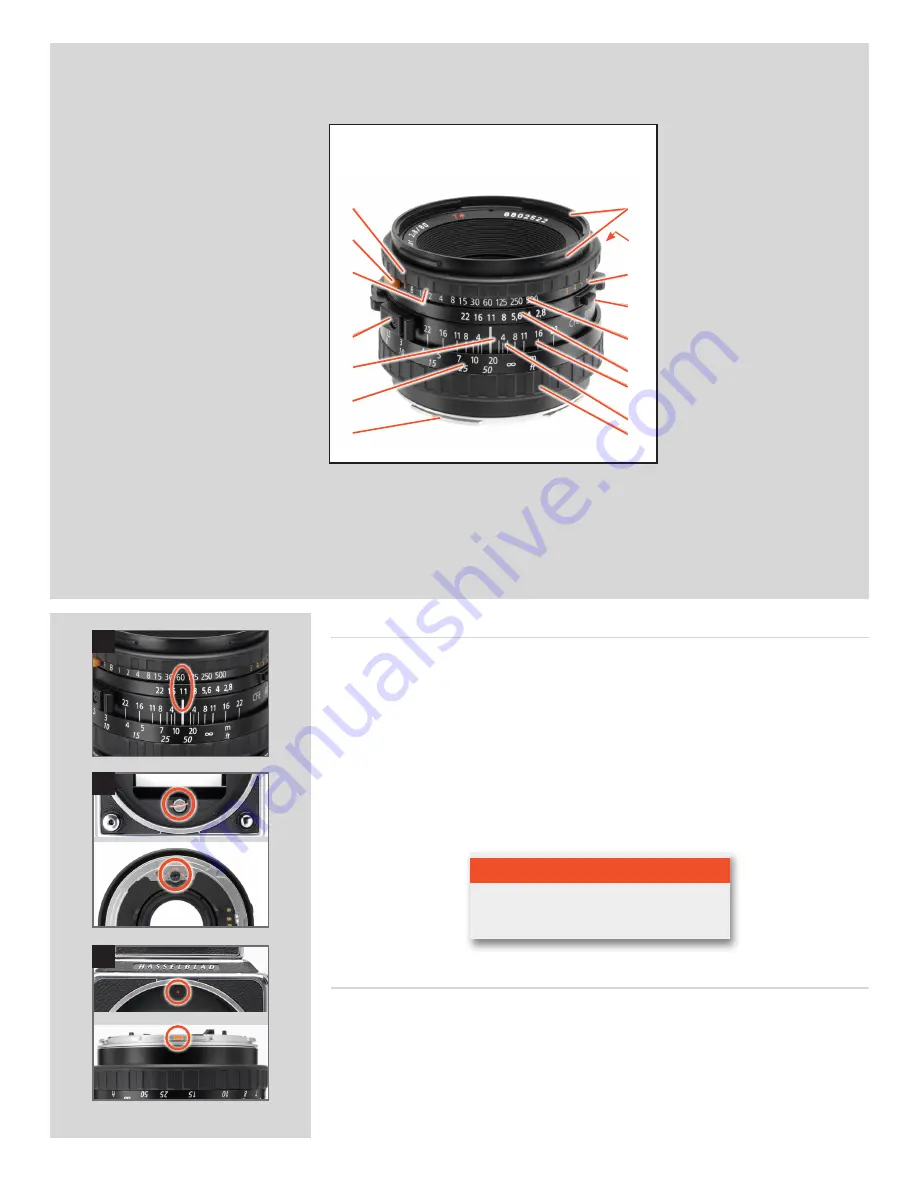
1. Shutter speed ring
2. F-setting button
3. Warning mark
4. Depth-of-field preview knob
5. PC-socket with positive lock
6. Central lens index
7. Focusing distance scale
8. Lens bayonet plate with red index
9. External and internal front bayonets
10. EV index
11. Exposure value (EV) scale
12. Shutter speed/aperture interlock button
13. Shutter speed scale
14. Aperture ring and scale
15. Depth-of-field scale
16. Infrared focusing index
17. Focusing ring
The illustrations show the
CFE version of the 2.8/80
mm lens but the layout of
the parts is identical on all
CFi /CFE lenses.
Zeiss Planar CFE 2.8/80 mm
1
2
3
4
5
6
7
8
9
10
11
12
13
14
15
16
17
1
3
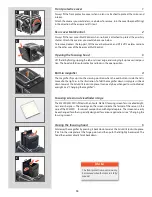
Attaching the lens
2, 3
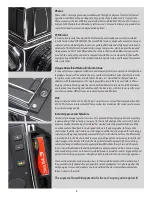
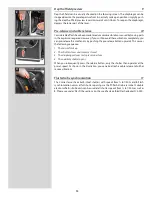
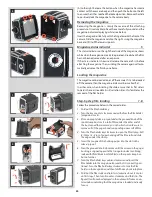
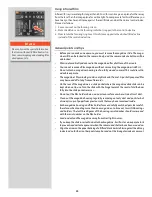
Make sure that both camera and lens are fully wound. Illustration 2 shows the correct re-
lationship between the drive shaft, the lens drive coupling and their indexes. If the lens is
not wound, you can insert a small coin or similar in the coupling slot and rotate it clockwise
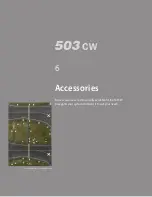
until it locks (about 4/5 of a turn) When you have aligned the red index on the lens with the
one on the camera (illus 3), the lens will drop easily into the bayonet fitting. You can then
rotate it clockwise until it stops with a faint click as the lens catch locks it in place.
Shutter speed and aperture
1
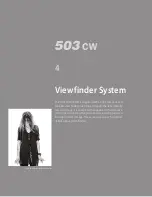
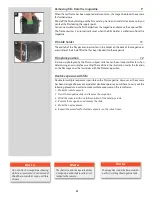
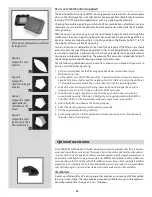
The shutter speed selector ring is the ring located closest to the front of the lens. To set the
speed, turn the ring until the desired marked shutter speed position aligns with the central
lens index. The white scale shows the shutter speeds, and the orange scale the exposure
values (EV). The aperture setting ring is the second closest ring to the front of the lens. The
aperture value is also set against the central lens index. The diaphragm is automatic and
stops down to the preset working aperture at the start of the exposure sequence. Therefore
in the illustration, the exposure setting is 1/60 second at f/11.
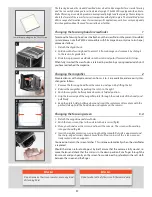
The orange ‘F’ setting is used only when the lens is attached to a Hasselblad camera in the
200 or 2000 series with a focal plane shutter. The operation of the diaphragm is not affected.
The ‘F’ setting can only be engaged/disengaged when the orange lever is pressed.
2
N o t e
If the F setting is used, exposure errors will
occur because the shutter remains open.
Summary of Contents for CFV
Page 1: ...User Manual 503CW 503CWD CFV CFVII CFV 39 CFV 50 Version 10 ...
Page 2: ...2 Welcome to Hasselblad 503CW 503CWD CFV ...
Page 6: ...6 1 General Information Photo JoaoCarlos HasselbladMasters ...
Page 28: ...28 1 Overview Photo ClaudioNapolitan HasselbladMasters ...
Page 42: ...42 2 Getting Started Photo MarkHolthusen HasselbladMasters ...
Page 51: ...51 3 Previews Photo MarkZibert HasselbladMasters ...
Page 55: ...55 4 Batches Browsing Photo BangPeng HasselbladMasters ...
Page 61: ...61 5 IAA Instant Approval Architecture Photo LyleOwerko HasselbladMasters ...
Page 66: ...66 6 Delete Format Copy Photo JoaoCarlos HasselbladMasters ...
Page 72: ...72 7 Settings Photo NinaBerman HasselbladMasters ...
Page 73: ...73 Navigating the USER INTERFACE settings ...
Page 85: ...85 8 Cleaning Photo DirkRees HasselbladMasters ...
Page 87: ...87 9 Appendix Photo MarkHolthusen HasselbladMasters ...


