6 - Maintenance
1. 12
Pump Valves & Diaphragms Replacement
363 Pumps
μ
Attention: Before removal of components, take note of correct
orientation so that they may be replaced correctly when
reassembling.
÷
Note: It is recommended to apply a light amount of rubber
grease to all rubber seals.
÷
Note: Check the drain hole at base of pump for blockages
÷
Note: If fluids have reached the crankcase (ie. if the
diaphragm has ruptured) re-grease the pump thoroughly.
÷
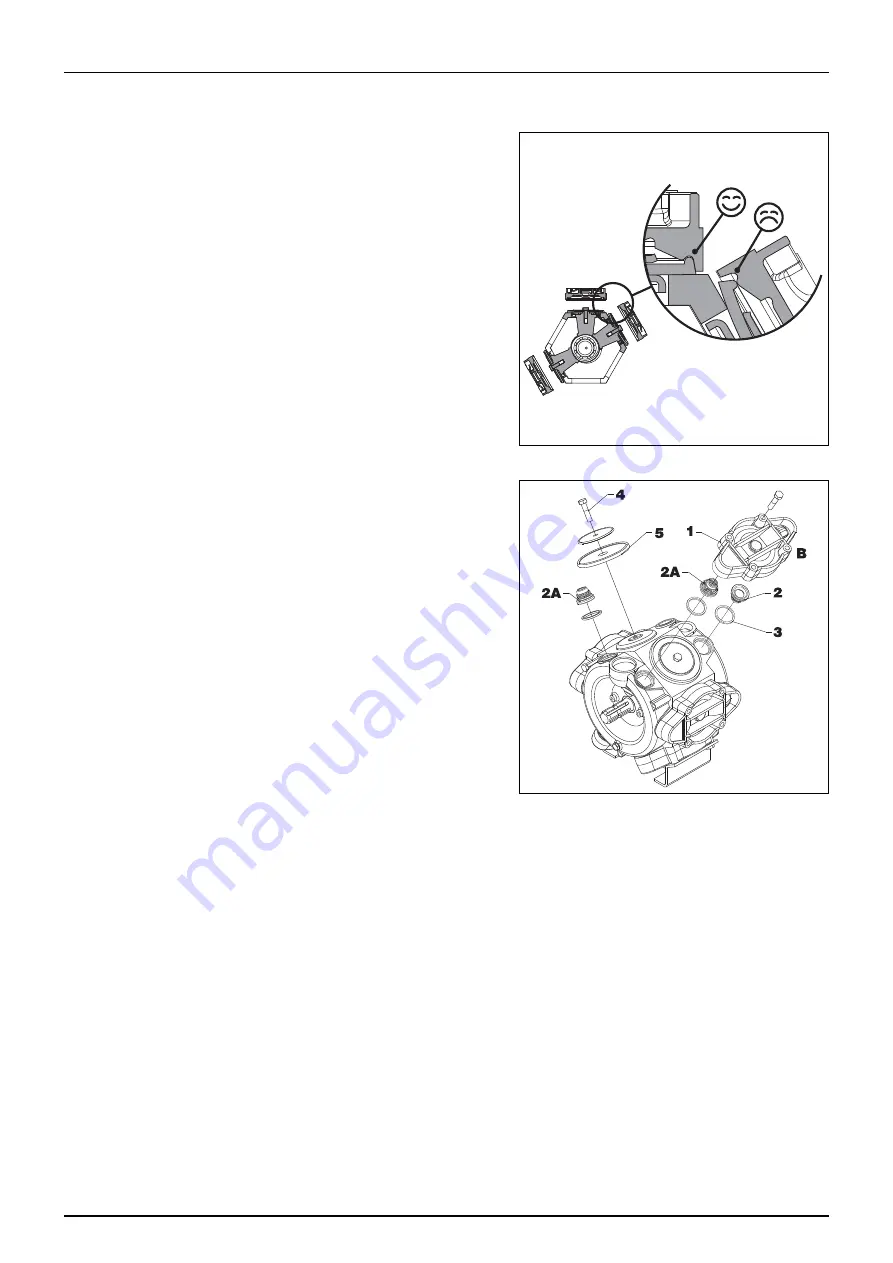
Note: Make sure that diaphragms are properly seated when
reassembling. Poor sealing will lead to worn components
and frequent pump repair.
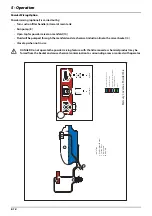
Valves
•
Remove valve cover (1)
•
Remove valve (2A & 2)
•
Replace O-rings (3)
•
Reinstall components and torque Valve Cover to 45 ft/lb (60
Nm)
Diaphragms
•
Remove the diaphragm bolt (4)
•
Change the diaphragm (5)
•
Reinstall components and torque;
•
Diaphragm Bolt to 45 ft/lb (60 Nm),
•
Diaphragm Cover to 50 ft/lb (70Nm)
363 Pump
μ
Attention: A special valve with white flap (2A) is used at the two upperside inlets. It has to be placed in the valve
openings as shown. All others are the type with black flap. It is recommended to use new gaskets (3) when changing
or checking the valves.
÷
Note: It is recommended to apply a light amount of rubber grease to all seals.
Flow Meter Inspection
An inspection of the paddle wheel inside the flowmeter should be carried out every year to check for wear or if you
suspect the flowmeter to be faulty.
Checks to verify functionality of the flowmeter are detailed in the fault finding section of this manual.
Summary of Contents for Mercury Covamax series
Page 1: ...MERCURY COVAMAX Operator Instruction Manual 67002404 100 HAU 08 2009 www hardi com au...
Page 10: ...Table of Contents TOC 8...
Page 18: ...2 Safety 2 6...
Page 88: ...6 Maintenance 1 18 Maintenance Activity Record Date Service Performed...
Page 92: ...7 Fault Finding 1 4...
Page 100: ...8 Technical Specifications 8 8...


