10_
installation & connection
installation & connection
INSTALLATION
Precautions before installation
Ensure you read out the following instructions before installing the camera:
~
It must be installed on the area (ceiling or wall) that can withstand 5 times the weight of the camera
including the installation bracket.
~
Stuck-in or peeled-off cables can cause damage to the product or a fire.
~
For safety purposes, keep anyone else away from the installation site.
And put aside personal belongings from the site, just in case.
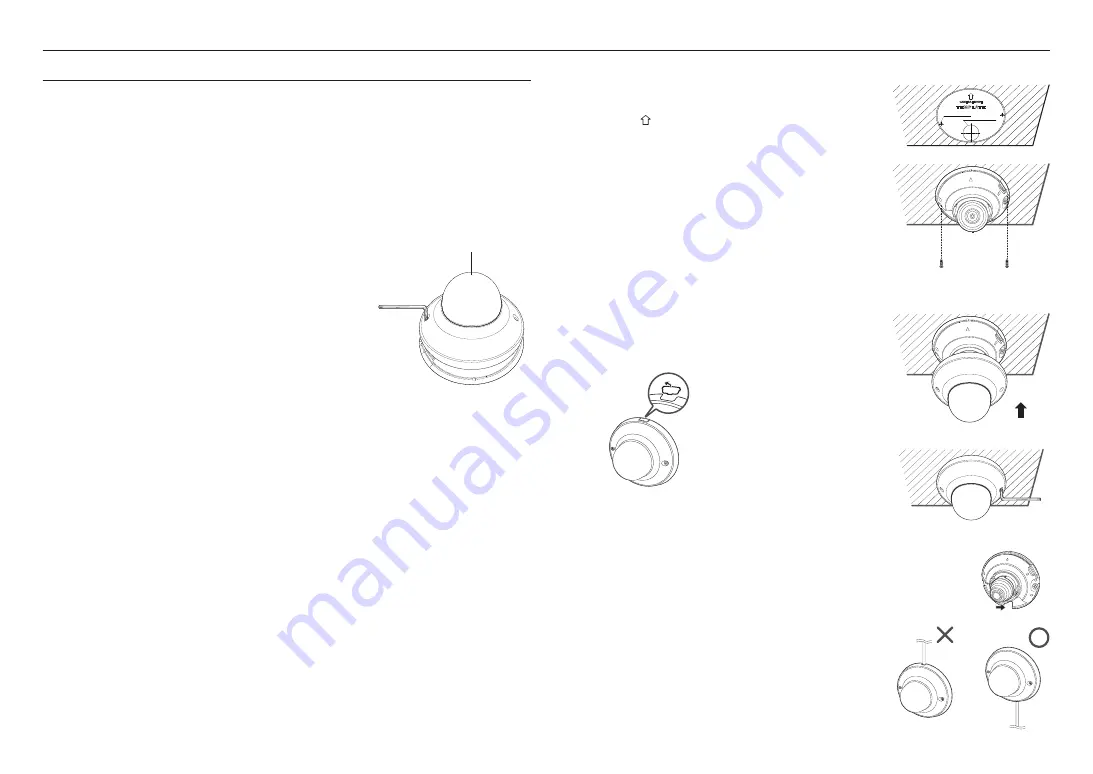
Disassembling
Remove the dome cover after loosening the screws by turning them
counterclockwise using the supplied L wrench.
~
Note that it is not necessary to loosen the screw completely.
J
`
Do not touch the transparent part of the dome cover once the protective film
is removed.
Installation
1.
Consider the direction to be monitored, attach the template, and
drill holes by following the template.
`
Set the < > mark imprinted on the camera to face the direction of camera
monitoring.
2.
Using 2 tapping screws, fix the camera at 2 holes drilled with a
template.
3.
Connect the camera internal terminal with the corresponding
cable.
4.
Adjust the lens in a desired direction by referring to the “
Adjusting
the monitoring direction for the camera
” section. (page 11)
J
`
We recommend you not to touch the lens as the camera lens has been
properly focused in the final process of manufacturing. If so, the lens may be
out of focus or stained by alien substances.
5.
Cover the dome cover and tighten the screws by turning them
clockwise using a L wrench to secure the cover.
`
If necessary, remove the wiring hole cover on the side of dome
cover to use.
`
Wall mounting (IP42)
When mounting the camera to a wall, route the LAN cable to connect
from the bottom as illustrated to ensure proper protection against
liquid and dust.
Dome Cover
Summary of Contents for QND-8012
Page 1: ...NETWORK CAMERA User Manual QND 8012 QND 8022...
Page 22: ......


