28
CALIBRA
TION
8.2. pH CALIBRATION
To optimize the pH measurement follow the general guidelines mentioned in the introduction of the
CALIBRATION section.
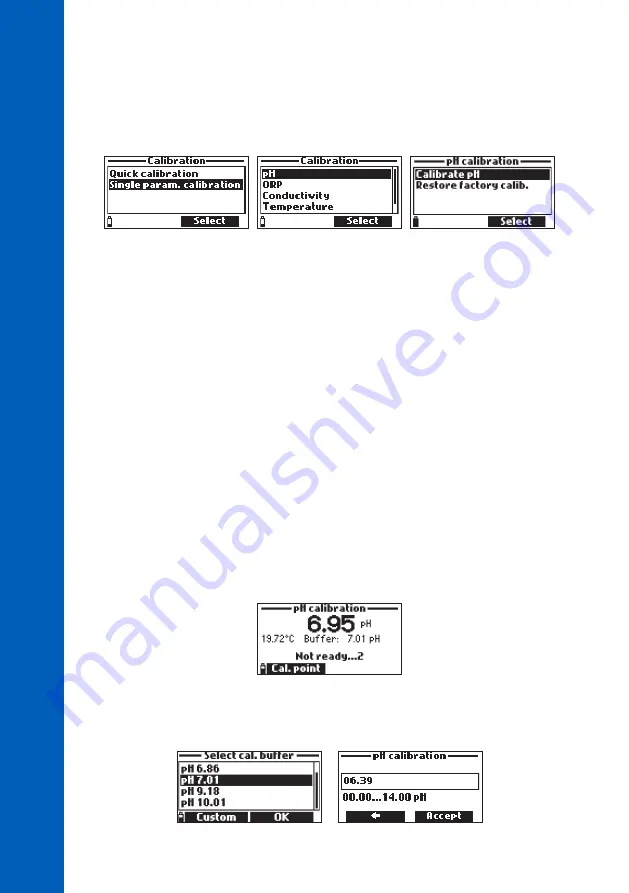
From the “Calibration” menu select “Single param. calibration” and then “pH”.
Options:
•
Calibrate pH
: Perform a new calibration using up to 3 buffers (pH 4.01, 6.86, 7.01, 9.18, 10.01
or one custom buffer). When a three-point calibration is performed, new data overwrites the old
one. With a single or two-point calibration the meter will also use information from the previous
calibration, if available.
•
Restore factory calib
.: Restore the factory calibration if a new pH sensor has been installed. Some
messages displayed during calibration are based on previous calibration data. A user calibration
should follow immediately.
pH Calibration Procedure
1. Remove the shield from the probe and rinse the probe with purified water.
2. Fill the calibration beaker 2/3 full with the first buffer solution.
3. Immerse the sensors in the buffer solution. Raise and lower the probe several times. Discard
the solution.
4. Fill the calibration beaker 2/3 full with the first buffer solution.
5. Slowly place the sensors in the selected buffer. Dislodge bubbles that may adhere to the sensors.
6. Wait a few minutes for the measurement to stabilize. Use the arrow keys to select “Calibrate pH”
and press
Select
to start the calibration. The temperature, pH buffer value and the “Not ready”
message are displayed.
7. If necessary, press
Cal. point
to select the correct buffer. To use a custom buffer, press
Custom
.
A text box window will appear. Use the keypad to enter the value of the buffer (0.00 to 14.00 pH)
at the current temperature. Press
Accept
to confirm the buffer value.


