background image

6

Hangar 9 Toledo Special Assembly Manual




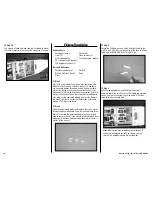
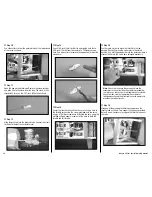
Step 4

Use the narrow edge of a flat file to make two flat spots on 

the wheel axle that faces the bottom of the fuselage. These 

will be the areas that the screws for the wheel collars will 

tighten into. The flat areas will keep the wheel collars more 

secure than if the axle were round.




Step 5

Attach a 5/32-inch wheel collar to the axle using a 3mm x 

5mm machine screw. Make sure to apply threadlock to the 

screw so it will not vibrate loose. Position the collar so it is 

7/16-inch (11mm) from the landing gear as shown and use 

a #2 Phillips screwdriver to tighten the screw on the flat area 

of the axle. The position of the wheel may need to be be fine-

tuned in the last step of this section.




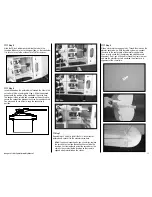
Step 6

Slide the wheel on the axle. Use a 5/32-inch wheel collar and 

a 3mm x 5mm machine screw to secure the collar. Make 

sure to position the collar so the wheel can rotate freely on 

the axle. Use a #2 Phillips screwdriver to tighten the screw 

on the flat area of the axle.




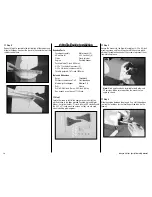
Step 7

Slip the wheel pant over the wheel. The wheel pant is 

secured to the landing gear using a 4-40 x 3/8-inch socket 

head screw and #4 washer. Apply a drop of threadlock on the 

screw before using a 3/32-inch hex wrench or ball driver to 

tighten the screw.


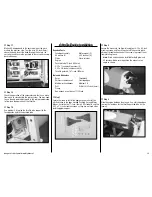
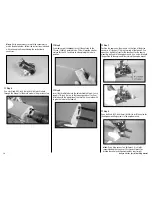
Step 8

Repeat Steps 3 through 7 to install the remaining wheel and 

wheel pant.


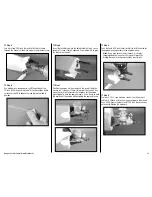
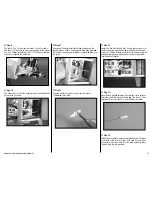
Step 9

Position the wheels so they are centered side to side 

inside the wheel pant. You will need to loosen the wheel 

collars to do so. Also make sure the wheel can rotate 

freely without binding.

hint

: Apply a small drop of lightweight oil to help the 

wheels to roll smoothly.

Summary of Contents for toledo special 40

Page 1: ...span 69 5 in 1765 3mm Length 50 8 in 1290 75mm Wing Area 702 8 sq in 45 3 sq dm Weight 5 5 6 25 lb 2 49 2 83 kg Radio 4 channel w 4 5 servos Engine 40 52 2 stroke 56 82 4 stroke Power 46 Toledo Special 40 Assembly Manual ...

Page 2: ... Flight Preparations 31 Maintaining Your Model 31 Safety Do s and Don ts for Pilots 32 Daily Flight Checks 32 Age requirements 33 Safety Precautions and Warnings 33 Warranty Information 33 CE Compliance Information for the European Union 34 2009 Official Academy of Model Aeronautics Safety Code 35 Replacement Parts 1 HAN4861 Fuselage 2 HAN4862 Right Wing Panel with Aileron 3 HAN4863 Left Wing Pane...

Page 3: ...heel collar 4 4 40 x 3 8 inch socket head cap screw 2 8 32 x 3 4 inch machine screw 3 4 flat washer 2 8 flat washer 3 23 4 inch rubber wheels 2 Cowl 21 4 inch nylon spinner blue 1 4 sheet metal screw spinner screw 2 4 40 x 1 2 inch socket head cap screw 4 4 washer 4 1 4 inch 6mm fuel tubing 4 Elevator 4 40 nylon lock nut 2 4 flat fender washer 2 Nylon clevis 1 Clevis retainer 1 Pushrod keeper 1 Mi...

Page 4: ...00 Cleaner and towels Additional Required Tools Drill File Pin drill Pliers Ruler Scissors Side cutters Flat blade screwdriver Hobby knife with 11 blade Small clamps Medium grit sandpaper Z bend Pliers HAN119 Phillips screwdriver 1 2 Hook and loop tape Low Tack Tape MMM209034 Box wrench to fit propeller nut Box end or open end wrench 1 4 inch 7 16 inch 1 2 inch Hex wrench or ball driver 3 32 inch ...

Page 5: ...cate the main landing gear wheels wheel pants and the bag marked landing gear Open all the part bags and set the parts where they can be easily accessed Step 2 The main landing gear is mounted to the bottom of the fuselage using three 8 32 x 3 4 inch machine screws and three 8 washers Apply a drop of threadlock on each of the screws Use a 2 Phillips screwdriver to tighten the screws to secure the ...

Page 6: ... last step of this section Step 6 Slide the wheel on the axle Use a 5 32 inch wheel collar and a 3mm x 5mm machine screw to secure the collar Make sure to position the collar so the wheel can rotate freely on the axle Use a 2 Phillips screwdriver to tighten the screw on the flat area of the axle Step 7 Slip the wheel pant over the wheel The wheel pant is secured to the landing gear using a 4 40 x ...

Page 7: ...rd the vertical stabilizer as shown in the photo below Step 3 Slide the horizontal and vertical stabilizers tightly together as shown You will need to deflect the rudder to allow the rudder control horn to pass by the elevator Step 4 Slide the threaded rods into the holes in the aft end of the fuselage as shown Step 5 Slide the tail assembly tightly against the fuselage Make sure to guide the port...

Page 8: ...hread a servo mounting screw into the holes in the radio tray for mounting the servos Apply a drop or two of thin CA into each hole to harden the threads made by the screw This will provide a much more secure mounting of the servos than if this step were skipped Step 3 Use the hardware to mount the rudder and elevator servos in the servo tray Make sure the output of the servos face to the rear of ...

Page 9: ...be covered in the Electric Motor Installation starting on Page 20 Step 8 Plug the rudder elevator and throttle servos into the receiver The lead from the switch should also be plugged in at this time Finally plug the Y harness or 6 inch 152mm servos extensions for the aileron servos into the receiver Note When using two 6 inch 152mm extensions you will need to use a computer radio with dual ailero...

Page 10: ...ded with your radio system regarding binding if necessary Remove the horns from the servos inside the fuselage at this time using a 1 Phillips screwdriver Step 2 Open the bag marked rudder and remove the clevis clevis retainer and pushrod keeper You will also need these three items that were in the bag marked elevator You will also need to remove the 251 2 inch elevator pushrod and 26 inch rudder ...

Page 11: ... in position Step 7 Repeat Steps 5 and 6 to install the 251 2 inch elevator pushrod and secure it to the elevator servo horn Hint If you have larger hands you can always remove the servo horns to make the connections outside the fuselage Just remember to orient the servo horns the same as they are inside the fuselage so they remain aligned when reinstalled on the servos Step 8 Slide a clevis retai...

Page 12: ...ll bit 5 64 inch 2mm 5 32 inch 4mm Box wrench or nut driver 11 32 inch Step 1 Locate the items to install the engine to your aircraft You will find these in the bags marked Pushrod Set and Motor Mount Set aside the four 17 8 inch 48mm EP standoffs and the 8 32 x 21 4 inch machine screws as they are not used when installing glow engines Step 2 Secure the mounts to the firewall using four 8 32 x 3 4...

Page 13: ...ace of the drive washer is 41 2 inches 114mm forward of the firewall Use a pencil or drill bit to transfer the locations for the engine mounting bolts onto the engine mounts Use a clamp to hold the position of the engine while marking the engine mounts Step 8 Use a drill and 5 32 inch 4mm drill bit to drill the holes for the engine mounting screws in the engine mounts Hint If you have access to a ...

Page 14: ...sing the screw provided with the servo using a 1 Phillips screwdriver Attaching the horn using this method will give equal movement of the horn to both low throttle and full throttle Step 15 Use the radio system to move the throttle to the low position Physically move the carburetor to the closed position Use a felt tipped pen to mark the pushrod where it crosses the hole in the servo horn enlarge...

Page 15: ... inch machine screw 4 8 32 x 3 4 inch machine screw 4 Throttle pushrod 161 2 inch 420mm Tools and Adhesives Ruler Threadlock Phillips screwdriver 2 Felt tipped pen Medium grit sandpaper Medium CA Drill Drill bit 5 32 inch 4mm Clamp Box wrench or nut driver 11 32 inch Step 1 Locate the items to install the engine to your aircraft You will find these in the bags marked Pushrod Set and Motor Mount Se...

Page 16: ... hole drilled in Step 4 Leave roughly 1 8 inch 3mm of the tube exposed so it will not interferre with the operation of the throttle Use medium CA to glue the tube to the firewall Step 7 Position the engine on the mounts so the face of the drive washer is 41 2 inches 114mm forward of the firewall Use a pencil or drill bit to transfer the locations for the engine mounting bolts onto the engine mount...

Page 17: ...tep 12 Use side cutters to remove one of the arms from a 180 degree servo horn Step 13 Center the throttle stick and trim Secure the servo horn to the throttle servo using the screw provided with the servo using a 1 Phillips screwdriver Attaching the horn using this method will give equal movement of the horn to both low throttle and full throttle Step 14 Open the bag marked fuselage Remove the cl...

Page 18: ... the carburetor in most cases Make sure the arm is secure and aligned correctly before proceeding with adjusting the radio system Step 18 Check the operation of the carburetor and that it can move from open to closed using the radio system You may need to use the end point adjustments in the radio programming to fine tune the operation of the throttle Step 19 Use medium CA to glue the throttle tub...

Page 19: ... correct direction Also note which fuel tubes go to the vent line and to the clunk so they can be connected to the engine correctly Clunk Vent Line Top View Side View Vent Line faces top of fuselage To Muffler To Carburetor Step 5 Insert the fuel tank into the fuselage while guiding the fuel tubes through the hole in the firewall Make sure the vent line faces the top of the fuselage before using t...

Page 20: ...y 8 washer 4 Hook and loop strap Tie wrap not included 4 washer 2 4 40 x 3 8 inch socket head screw 2 115 16 inch 48mm standoff 4 Hook and loop tape not included 8 32 x 21 4 inch machine screw 4 Tools and Adhesives Hobby knife with 11 blade Drill Phillips screwdriver 2 Drill bit 5 32 inch 4mm Ball driver or hex wrench 3 32 inch Step 1 Locate the items to install the electric motor and speed contro...

Page 21: ...or ball driver Hint Use low tack tape to keep the hook and loop strap out of the way while installing the battery tray Step 5 Plug the speed control lead into the throttle channel of the receiver Mount the switch from the E Flite 60 amp ESC in the switch location on the side of the fuselage in the battery compartment Step 6 Secure the battery in the fuselage using the hook and loop strap It is sug...

Page 22: ...unt to the motor using the hardware provided with the motor Use 2 Phillips screwdriver and threadlock to secure the screws Step 12 Attach the motor to the firewall using four 8 32 x 2 1 4 inch machine screws four 1 15 16 48mm standoffs and four 8 washers Use threadlock on the screws to prevent them from vibrating loose Step 13 Connect the leads from the motor to the leads from the speed control Us...

Page 23: ...tep 6 and mount the cowl as there is no cutting necessary for an electric motor Step 2 Use cardstock to make template indicating the needle valve engine head and muffler as well as any other items that may protrude through the cowling Step 3 Remove the engine from the firewall and position the clear cowling on the front of the fuselage Use the templates and a felt tipped pen to transfer the locati...

Page 24: ...h the cowl to the fuselage Step 8 Slide the spinner backplate onto the shaft of your motor It may be necessary to use a reamer to enlarge the hole in the spinner to fit your shaft Note If you are using an electric motor you will need to install the propeller adapter first Follow the instructions included with the motor for the installation procedure for the adapter Note It may be necessary to enla...

Page 25: ...into the grooves of the backplate Make sure that the propeller does not touch the spinner cone If it does remove the cone and reposition the propeller in relation to the backplate Once the propeller is positioned use two 4 x 1 2 inch sheet metal screws and a 1 Phillips screwdriver to secure the spinner cone to the backplate Window Installation Required Parts Fuselage assembly Windshield Center win...

Page 26: ...8mm servo extension 2 Aileron servo mounting blocks 4 27 8 inch 73mm pushrod wire 2 4 x 1 2 inch sheet metal screw 8 Tools and Adhesives Phillips screwdriver 1 30 minute epoxy Mixing sticks Mixing cup Drill Pencil Ruler Thin CA Small clamps Medium grit sandpaper Drill bit 1 16 inch 1 5mm 5 64 inch 2mm Step 1 Locate the items necessary to install the aileron servos in the wing Most items are from t...

Page 27: ...r bonding the epoxy in the following step Make sure to sand the end grain of the blocks Step 7 Use 30 minute epoxy to glue the blocks to the servo cover at the marks made earlier Use clamps or tape to keep the block tight against the servo cover until the epoxy fully cures Important Make sure the blocks are at least 1 16 inch 1 5mm from the edge of the servo cover If not the cover may not fit back...

Page 28: ...ach of the holes for the servo mounting cover screws to harden the surrounding wood Step 13 Remove the tape that secures the string inside the opening for the aileron servo Tie the string around the end of the extension Use the string to pull the aileron servo extension into the opening at the center of the wing as shown Step 14 Use four 4 x 1 2 inch sheet metal screws and a 1 Phillips screwdriver...

Page 29: ...Anodized aluminum wing tube Anodized aluminum anti rotation tube Step 1 Locate the items necessary to mount the wing to the fuselage Most items are in the bag marked wing The wing tubes are unmarked but the bag contains only the anodized wing tube and the anodized anti rotation tube A small flat screwdriver can be used to remove obstructions Step 2 Slide the anodized wing tube and the anodized ant...

Page 30: ...en balancing your model support the plane upright at the marks made on the bottom of the wing with your fingers or a commercially available balancing stand This is the correct balance point for your model You might find you may be required to add a small amount of weight to either the front or back of the fuselage to achieve the correct balance After the first flights the CG position can be adjust...

Page 31: ...o the line going to the needle valve or to the fuel dot on the side of the cowling Disconnect the fuel line attached to the pressure fitting of the muffler your tank is full when fuel begins to run out of the pressure line Reconnect the fuel lines to the needle valve assembly or insert the plug into the fuel dot and connect the line to the muffler Note It is very important to reconnect the lines t...

Page 32: ...visibility can cause disorientation and loss of control of your aircraft Strong winds can cause similar problems Do not point the transmitter antenna directly toward the model The radiation pattern from the tip of the antenna is inherently low Do not take chances If at any time during flight you observe any erratic or abnormal operation land immediately and do not resume flight until the cause of ...

Page 33: ...RINGEMENT MERCHANTABILITY OR FITNESS FOR A PARTICULAR PURPOSE OF THE PRODUCT THE PURCHASER ACKNOWLEDGES THAT THEY ALONE HAVE DETERMINED THAT THE PRODUCT WILL SUITABLY MEET THE REQUIREMENTS OF THE PURCHASER S INTENDED USE c Purchaser Remedy Horizon s sole obligation hereunder shall be that Horizon will at its option i repair or ii replace any Product determined by Horizon to be defective In the eve...

Page 34: ...your repair Non warranty repair estimates will be billed a minimum of 1 2 hour of labor In addition you will be billed for return freight Please advise us of your preferred method of payment Horizon accepts money orders and cashiers checks as well as Visa MasterCard American Express and Discover cards If you choose to pay by credit card please include your credit card number and expiration date An...

Page 35: ...en and where required by rule helmets must be properly worn and fastened They must be OSHA DOT ANSI SNELL or NOCSAE approved or comply with comparable standards RADIO CONTROL 1 All model flying shall be conducted in a manner to avoid over flight of unprotected people 2 I will have completed a successful radio equipment ground range check before the first flight of a new or repaired model aircraft ...

Page 36: ...15182 2009 Horizon Hobby Inc 4105 Fieldstone Road Champaign Illinois 61822 877 504 0233 horizonhobby com Hangar 9 com ...

Reviews: