32
Hangar 9 Toledo Special Assembly Manual
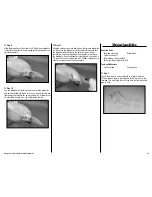
Checking the Control Horns
Inspect the control horns to make sure they have not
crushed the wood of the control surface. If so, remove the
control horn screws to remove the control horn. Place 2–3
drops of thin CA into each of the screw holes. In addition,
use a T-pin to poke small holes in the covering in the area
where the control horn mounts, then saturate the area with
thin CA. This will harden the wood and give the control
horns a solid surface to be mounted to.
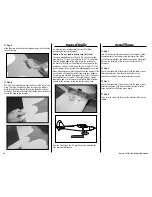
Checking the Wheel Collars
Check the setscrews on the wheel collars for the main and
tail wheel to make sure they are not loose. Use a 1.5mm
hex wrench to tighten the setscrews. It is suggested if they
loosen frequently to remove them, apply threadlock to the
setscrews, then secure the wheel collars back into position.
The threadlock and hex wrench are included in the kit for
this purpose.
Check the Muffler Bolts
Use a 2.5mm hex wrench (Evolution 2-stroke) or box wrench
(Saito 4-stroke) to make sure the hardware holding the
muffler onto the engine is tight and has not vibrated loose
during flight.
Check the Engine Mount Bolts
Remove the spinner and propeller from the engine. Remove
the exhaust stacks from the fuselage, and then remove the
cowling from the fuselage. Remove the muffler from the
engine, and then use a Phillips screwdriver to make sure the
four bolts securing the engine to the mount are tight.
Safety do’s and don’ts for Pilots
• Ensure that your batteries have been properly charged
prior to your initial flight.
• Keep track of the time the system is turned on so
you will know how long you can safely operate your
system.
• Perform a ground range check prior to the initial flight
of the day. See the “Daily Flight Checks Section” for
information.
• Check all control surfaces prior to each takeoff.
• Do not fly your model near spectators, parking areas or
any other area that could result in injury to people or
damage of property.
• Do not fly during adverse weather conditions. Poor
visibility can cause disorientation and loss of control of
your aircraft. Strong winds can cause similar problems.
• Do not point the transmitter antenna directly toward the
model. The radiation pattern from the tip of the antenna
is inherently low.
• Do not take chances. If at any time during flight
you observe any erratic or abnormal operation, land
immediately and do not resume flight until the cause of
the problem has been ascertained and corrected. Safety
can never be taken lightly.
dual Rate Recommendations
• We recommend that the rudder dual rate be set to Low
for takeoff to help minimize overcorrection during the
takeoff roll.
• We recommend the rudder dual rate be set to High
for landing to help maintain heading as the model
transitions from flying speed to taxi speeds.
• Elevator and Aileron dual rates should be adjusted
for personal feel and also if there is any unusual wind
conditions.
daily Flight Checks
Step 1
Check the battery voltage on both the transmitter and
the receiver battery packs. Do not fly below 4.3V on the
transmitter if you are using a Spektrum transmitter that uses
4-cells to power the transmitter. Do not fly below 9.5V on
the transmitter if you are using a JR or Spektrum transmitter
that uses 8-cells to power the transmitter. Do not fly if the
receiver pack is at or below 4.7V. To do so can crash your
aircraft.
note
: When you check these batteries, ensure that
you have the polarities correct on your expanded scale
voltmeter.
Step 2
Check all hardware (linkages, screws, nuts, and bolts) prior
to each day’s flight. Be sure that binding does not occur and
that all parts are properly secured.
Step 3
Ensure that all surfaces are moving in the proper manner.
Step 4
Perform a ground range check before each day’s flying
session.
Step 5
Prior to starting your aircraft, turn off your transmitter, then
turn it back on. Do this each time you start your aircraft.
If any critical switches are on without your knowledge, the
transmitter alarm will warn you at this time.
Step 6
Check that all trim levers are in the proper location.
Step 7
All servo pigtails and switch harness plugs should be
secured in the receiver. Make sure that the switch harness
moves freely in both directions.


