


Overhaul
Installation and Service Manual
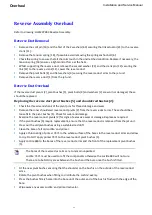
Reverse Assembly Overhaul
Refer to drawing: HJ21207003 Reverse Assembly.
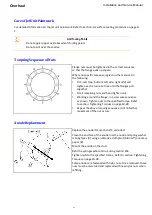
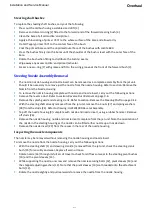
Reverse Duct Removal
Remove the split pin [14] and the first of the 2 washers [60] securing the link actuator [21] to the reverse
crank [11].
Remove the tension spring [18], if possible avoid removing the spring anchor bolt [6].
Check the spring to ensure that all the coils touch in the unstretched condition. Replace if necessary, the
tension spring [18] ensures a light control force at the helm.
Whilst supporting the reverse duct, remove the second washer [24] and the crank pin [12] securing the
link [21] to the reverse crank [11]. Lower the reverse duct.
Remove the pivot bolts [4] and flat washers [3] securing the reverse duct arms to the jet unit.
Remove the reverse duct [1] from the jet unit.
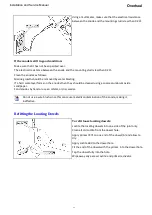
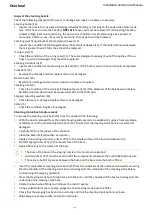
Reverse Duct Overhaul
If the reverse duct pivots [2], pivot bushes [5], pivot bolts [4] and washers [3] are worn or damaged, these
should be replaced.
Replacing the reverse duct pivot bushes [5] and shouldered bushes [2]:
Check the threads and shank of the pivot pins for thread damage and wear.
Remove the inner shouldered reverse duct pivots [2] from the reverse duct arms. These should be a
loose fit in the pivot bushes [5]. Check for wear and damage.
Examine the reverse duct pivots [2] for signs of excessive wear or damage. Replace as required.
If the pivot bushes [5] require replacement, ensure that the reverse duct is removed from the jet unit.
Press out the old pivot bushes using a suitable sized drift.
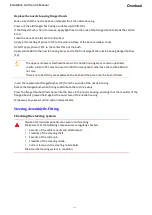
Clean the bore of all old Loctite
®
and primer.
Apply a thin coating of primer 7471 to the whole surface of the bores in the reverse duct arms and allow
to dry. Do NOT apply primer 7471 to the reverse duct pivot bushes [5].
Apply Loctite 680 to the bores of the reverse duct arms and the front of the replacement pivot bushes
[5].
The bores of the reverse duct arms are to remain unpainted.
Loctite
®
7471 must be used to refit the components otherwise the Loctite 680 will not cure.
There are to be NO dry areas between the bush and the bore once the bush is fitted.
Fit the new pivot bushes ensuring that the shoulder on the bush is on the outside of the reverse duct
arms.
Rotate the pivot bushes when fitting to distribute the Loctite
®
evenly.
Press the bushes firmly home into the bore until the outer end of the bush is flush with the edge of the
bore.
Wipe away any excess Loctite
®
and primer/activator.
9-6
Summary of Contents for HJ212
Page 1: ...HJ212 Installation and Service Manual R3A3 Jet unit Manual ...
Page 20: ...Product Description Installation and Service Manual 2 6 ...
Page 56: ...Commissioning Installation and Service Manual 6 4 ...
Page 62: ...Fault Finding Installation and Service Manual 7 6 ...
Page 82: ...Maintenance Installation and Service Manual 8 20 ...
Page 137: ...Installation and Service Manual Appendix Notes 10 21 ...
Page 141: ...Installation and Service Manual Appendix Notes 10 25 ...
Page 164: ...Appendix Installation and Service Manual 10 48 ...
Page 166: ......
Page 169: ......
Page 171: ......
Page 172: ......
Page 175: ......
Page 176: ......
Page 177: ......
Page 178: ......
Page 181: ......
Page 185: ......
Page 186: ......
Page 188: ......
Page 195: ......
Page 196: ......
Page 197: ...Notes ...