


Installation and Service Manual
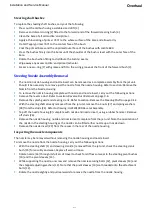
Overhaul
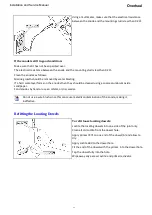
Water seal removal
The water seal should not be removed unless it is being replaced. The water seal
will not work correctly if it is removed and then reinstalled.
The water seal need only be replaced if it is leaking, or there is insufficient material
left to last to the next inspection.
Remove the seal face holder [12] from the mainshaft along with the seal sleeve [5], seal [6] and the
water seal stationary face items 1 & 2.
Care must be taken during removal as the water seal stationary face is ceramic and is quite brittle.
Remove the water seal carbon face forward. Care must be taken as this item is brittle.
If the water seal rubber bellows [4] is to be replaced, remove the water seal retaining pin and slide the
water seal spring cap [7] and spring [6] aft. Refer to drawing: 61500 Water Seal.
Break the connection between the water seal rubber bellows and the mainshaft and slide the water seal
components forward off the mainshaft.
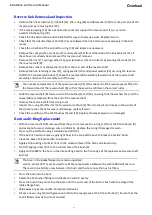
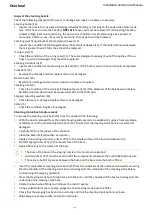
Inspect the Bearing Assembly and Water Seal
Inspect the following parts for wear or damage. Fit replacement parts where necessary.
Oils seals [6]
Check oil seals for wear, cuts or deformity. Replace if damaged.
Bearing [7]
Inspect the bearing for any signs of wear, replace if wear is evident.
Do not swap the bearing inner halves. Keep the bearing clean.
Bearing housing [8]
Ensure that there are no signs of wear, fretting, or relative movement in the bearing housing [8].
Bearing sleeve [3]
Ensure that there are no signs of wear, fretting or damage.
Seal sleeves [5]
The seal sleeves may be turned end for end instead of replacing them. Ensure that there are no signs of
wear, fretting or damage.
Seal face holder [12]
Ensure that there are no signs of wear or damage.
Water seal assembly. Refer to drawing: 61500 Water Seal.
Check the mating faces, items [2] and [3], for scores, cracking or chipped surface. The water seal
stationary face can be checked without removing it from the seal face holder [12].
It is recommended that both the water seal rotary components and the stationary face components,
items 1 & 2 on the same drawing, are replaced even if only one of the items appears worn.
O-ring [35]
Inspect for cuts, deformation or permanent set, replace if defects are found. Replace this o-ring on re-
assembly.
Mainshaft [1]
Inspect for signs of scuffing, pitting or corrosion. Check threaded area and keyways for damage, repair.
Remove any burrs from the water seal area with emery paper. Ensure all emery residue is cleaned off.
Clean and inspect all parts thoroughly.
9-19
Summary of Contents for HJ212
Page 1: ...HJ212 Installation and Service Manual R3A3 Jet unit Manual ...
Page 20: ...Product Description Installation and Service Manual 2 6 ...
Page 56: ...Commissioning Installation and Service Manual 6 4 ...
Page 62: ...Fault Finding Installation and Service Manual 7 6 ...
Page 82: ...Maintenance Installation and Service Manual 8 20 ...
Page 137: ...Installation and Service Manual Appendix Notes 10 21 ...
Page 141: ...Installation and Service Manual Appendix Notes 10 25 ...
Page 164: ...Appendix Installation and Service Manual 10 48 ...
Page 166: ......
Page 169: ......
Page 171: ......
Page 172: ......
Page 175: ......
Page 176: ......
Page 177: ......
Page 178: ......
Page 181: ......
Page 185: ......
Page 186: ......
Page 188: ......
Page 195: ......
Page 196: ......
Page 197: ...Notes ...