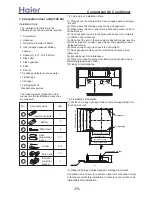

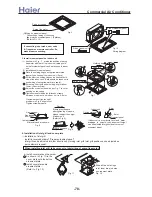


1. Before installation [Before finishing installation, do not throw the attached parts installation
needs]
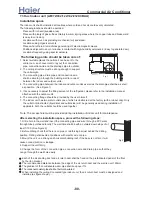
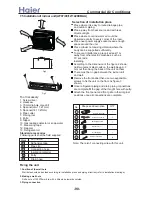
2. Choose installation place
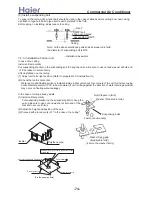
(1) The chosen installation place should meet the following requirements and get the users consent.
Place ensures ideal airflow distribution.
The passage of airflow has no obstacles.
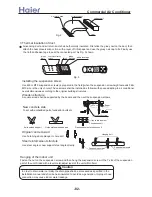
When importing outside air, it should be imported directly from outdoors. (if the pipe can not be extended, it also can
not be imported from top)
Place ensures enough space for maintenance.
The pipe length between indoor and outdoor unit is in the permitted limit (referring to outdoor unit installation part).
The indoor unit, outdoor unit, electric wire and connection wire is at least 1m away from television and radio. This is
to avoid the image disturbance and noise caused by the above-mentioned home appliance. (Even if 1m away, if the
electromagnetic wave is too strong, it can also cause noise.)
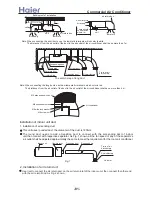
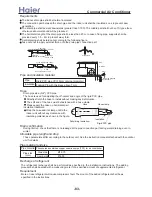
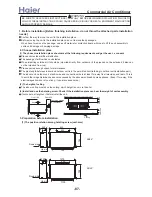
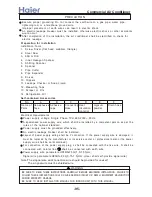
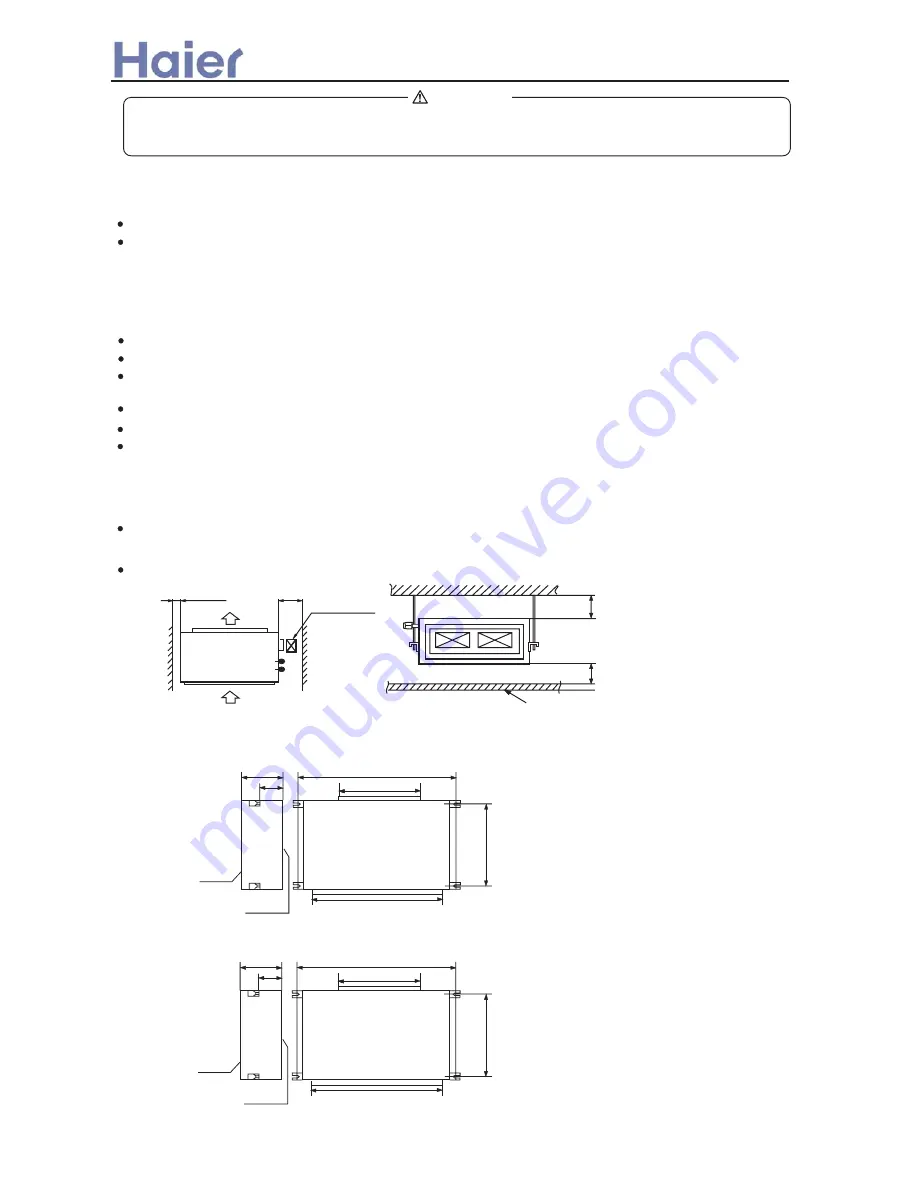
(2) The height of ceiling
The indoor unit can install on the ceiling, which height is no more than 3m.
(3) Install and use the hoisting screw. Check if the installation place can bear the weight of unit assembly.
If not certain, strengthen it before install the unit.
(600x600)
Over 100
Over 900
Air out
Air in
Checking meatus
Ceiling
Over 300
Over 200
WARNING
BE SURE TO READ THESE INSTRUCTIONS CAREFULLY BEFORE BEGINNING INSTALLATION. FAILURE TO
FOLLOW THESE INSTRUCTIONS COULD CAUSE SERIOUS INJURY OR DEATH, EQUIPMENT MALFUNCTION
AND/OR PROPERTY DAMAGE.
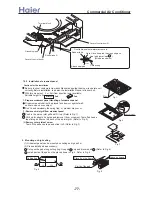
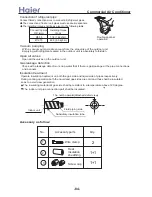
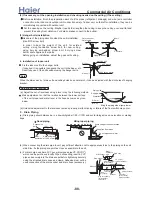
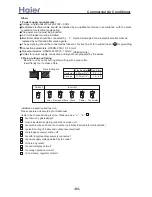
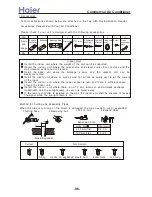
Confirm the way to move the unit to the installation place.
Before moving the unit to the installation place, do not remove their packages.
When have to remove the package, use a soft material or protection board with rope to lift the unit assembly to
avoid unit damage or bumping a scrape.
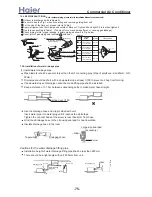
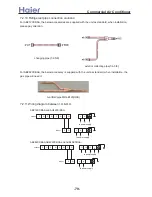
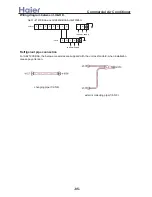
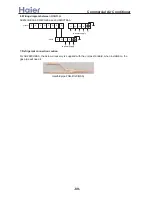
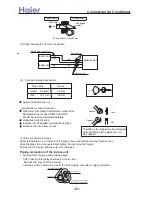
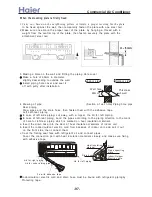
(1) The position relation among hoisting screw (unit: mm)
360
890
250
794
600
750
Down side
Up side
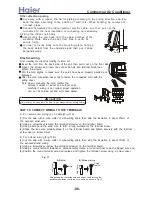
360
1270
250
794
853
1103
Down side
Up side
3. Preparation before installation
AD28*
AD42*
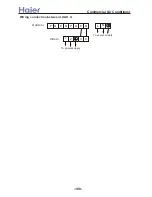
>a__WcU[S^ <[c >a`V[e[a`Wc
-87-
Summary of Contents for AB072XCBAA
Page 21: ... a__WcU S c a V e a Wc AU84NXTBAA 66 33 1 23 4 43 33 61 2 3 160 2 15 3 52 21 ...
Page 138: ... a__WcU S c a V e a Wc AU282XHBAA AU422XIBAA PCB printed diagram 138 ...
Page 141: ... a__WcU S c a V e a Wc AU84NXTBAA PCB printed diagram 141 ...
Page 144: ... a__WcU S c a V e a Wc AB AE AD units PCB printed diagram 144 ...
Page 149: ... a__WcU S c a V e a Wc AF07 142XCBAA PCB printed diagram 149 ...
Page 180: ...MEMO Commercial Air Conditioner ...